Do you have a question about the HOMCOM HOME GYM and is the answer not in the manual?
Follow guidelines for proper use, maintenance, clothing, and equipment checks to ensure safe operation.
Consult a doctor before exercise, be aware of body signals, and stop if experiencing adverse symptoms.
Use on a flat surface with clear space; keep children and pets away; ensure equipment is properly assembled.
Read all warnings and instructions before use. Keep this manual for future reference.
Perform various stretches for 15-30 seconds each to prepare muscles before exercise.
Perform stretches for 20-30 seconds or multiple repetitions as part of a cool-down routine.
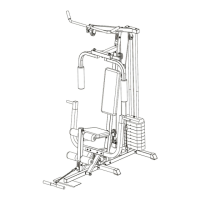
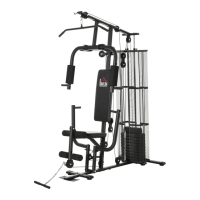
Assemble the base frame, connecting tubes, and weight stack components using specified bolts and nuts.
Assemble the main frame components, including down and up sections, ridge tube, and rubber cushion.
Attach the connecting part, butterfly arms, foam pads, and pulley brackets to the main frame.
Connect the U push frame components, including the connect tube and handle bars, using pins.
Attach the seat beam, leg beam, roller tubes with foam, seat, and backrest to the main frame.
Assemble pulleys, brackets, and bushes, and attach them to the frame using bolts and nuts.
Route and secure wire cables through pulleys and frame components, ensuring proper tension.
Adjust and tighten cable bolts; use chain extension if cables are too short.
Prepare muscles and improve blood flow with gentle stretching exercises held for about 30 seconds.
Work out at a steady pace, aiming to raise heart rate into the target zone shown on the graph.
Wind down cardio-vascular system and muscles with gentle stretching for about 5 minutes.
Increase resistance for muscle toning, requiring reduced speed to maintain target heart rate.