Do you have a question about the Home Decorators Collection ST. CHARLES and is the answer not in the manual?
Frame is warranted free of manufacturing defects to the original purchaser for five years.
Excludes freight, packaging, commercial use, acts of nature, fire, freezing, abusive use, and purchased parts.
Read all instructions before assembly. Assemble on a soft, non-abrasive surface to avoid damage.
Lists and illustrates all hardware components required for assembly.
Lists and illustrates all parts included in the package for assembly.
Connect the support bar, backrest, and seat to the left arm component.
Secure the seat to the left arm using M6x35 combination bolts.
Insert the right arm to the support bar, backrest, and seat.
Attach the right arm to the seat using M6x35 combination bolts.
Connect the support bar to both the left and right arms using M6x20 bolts.
Attach the support tube to the seat using M8x28 combination bolts.
Attach the left and right legs to the support tube using M8x28 combination bolts.
Connect the connector bar to the left and right legs using M6x20 combination bolts.
Fully tighten all bolts, turn chair upright, and place seat and back cushions.
Clean with a damp cloth and dry thoroughly to prevent mildew. Avoid abrasives, bleach, or solvents.
Store in a dry, sheltered place and keep away from fire, extreme heat, freezing, and inclement weather.
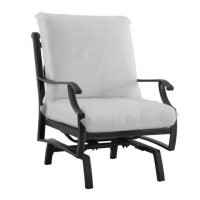
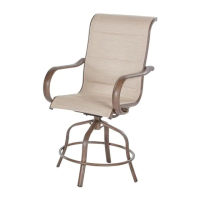
This document is a comprehensive Use and Care Guide for the ST. CHARLES STEEL/ALUM 2PK ROCKER CHAIR-BARE, a product from the Home Decorators Collection. It provides detailed instructions for assembly, important safety information, warranty details, and care and cleaning recommendations to ensure the longevity and safe use of the chair.
The ST. CHARLES STEEL/ALUM 2PK ROCKER CHAIR-BARE is designed as an outdoor rocking chair, intended for normal outdoor use. It is a two-pack (2PK) item, suggesting that it comes as a set of two chairs. The chair's construction involves a combination of steel and aluminum, providing durability suitable for outdoor environments. The "rocker" designation indicates its primary function as a chair that allows for a gentle back-and-forth rocking motion, providing comfort and relaxation. The "bare" in the product name suggests that the chair frame is provided without cushions, which are then added during the final assembly steps. The design incorporates a decorative backrest with an intricate, interwoven pattern, adding an aesthetic element to its functionality. The chair is designed to be assembled by the user, with clear, step-by-step instructions provided in the manual. Once assembled, it serves as a comfortable seating option for outdoor spaces such as patios, decks, or gardens. The inclusion of cushions (back and seat) in the package contents further emphasizes its focus on comfort.
The usage features of the ST. CHARLES STEEL/ALUM 2PK ROCKER CHAIR-BARE are primarily centered around safety, comfort, and appropriate outdoor application.
Safety First: The manual emphasizes several critical safety instructions to ensure safe operation and prevent injury. It explicitly states that the chair is "NOT intended for commercial use and will void the warranty," highlighting its residential purpose. Users are warned against placing heavy objects on the chair, and it should not be used as a support or for shaking, leaning, or climbing. Children under the age of 10 near the product must be supervised by a competent adult at all times. The product should not be located near open flames or any heat source. When not in use, it is recommended to secure the product in a cool and covered location. The chair unit is noted as heavy, potentially requiring two adults for safe assembly, which is an important consideration for initial setup. A specific weight limit of 250 lbs (113.39 kg) is provided, which users must adhere to for safety.
Assembly and Setup: The assembly process is designed to be user-friendly, although it is recommended that "more than one person may be required to assemble this product" due to its size and weight. All necessary hardware, including various combination bolts, a hex wrench, and a wrench, are provided. The instructions advise assembling the product on a soft, non-abrasive surface like carpet or cardboard to prevent damage. The assembly involves connecting the support bar, backrest, seat, left and right arms, support tube, legs, and connector bar using the provided bolts and tools. A key instruction throughout the assembly is to "Loosely tighten the bolts" initially, with a final tightening step once all components are in place. This allows for easier alignment of parts. The final step involves placing the seat and back cushions on the chair, ensuring all connections are secure before use.
Comfort and Design: The chair is designed to provide comfort through its rocking motion and the inclusion of dedicated back and seat cushions. The steel and aluminum construction offers a sturdy frame, while the rocking mechanism allows for gentle movement. The aesthetic design, particularly the intricate pattern on the backrest, contributes to its appeal as a piece of outdoor furniture.
Environmental Considerations: While designed for normal outdoor use, the manufacturer recommends "storing and / or covering this product when any formidable / severe weather is approaching." This suggests that while it can withstand typical outdoor conditions, protection during extreme weather will help preserve its condition and extend its lifespan.
The maintenance features for the ST. CHARLES STEEL/ALUM 2PK ROCKER CHAIR-BARE are straightforward and focus on regular cleaning and proper storage to ensure durability and appearance.
Cleaning: For best results, the chair should be cleaned with a damp cloth and then thoroughly dried. This simple cleaning routine helps prevent the accumulation of dirt particles, which can lead to mildew or other forms of deterioration over time. It is crucial to avoid cleaning the chair with abrasive materials, bleach, or solvents, as these can damage the finish or material of the chair. Adhering to these cleaning guidelines will help maintain the chair's aesthetic appeal and structural integrity.
Storage: Proper storage is a key aspect of maintaining the chair, especially given its outdoor nature. The manual advises storing the chair in a dry, sheltered place when it is not in use. This protects it from direct exposure to harsh weather elements. Furthermore, users are instructed to "Keep the chair away from fire, extreme heat, freezing conditions, and inclement weather such as rain, hail, sleet, snow, or wind." This comprehensive guidance on storage aims to prevent damage from environmental factors that could otherwise compromise the chair's materials and functionality. By following these storage recommendations, users can significantly extend the life of their rocking chair and keep it in good condition for many seasons.
Warranty: The product comes with a "5 YEAR FRAME WARRANTY," covering manufacturing defects to the original purchaser for five years. This warranty reflects the manufacturer's confidence in the frame's quality. However, it's important to note what is not covered: freight and packaging charges to and from the service center, commercial use, hardware, acts of nature, fire, freezing, and abusive use. Additionally, purchased parts are not covered under this warranty. The manufacturer reserves the right to substitute similar merchandise if the model is no longer in production. This warranty information provides users with a clear understanding of the support available for their product, encouraging proper use and maintenance to avoid voiding the warranty.
| Type | Vanity |
|---|---|
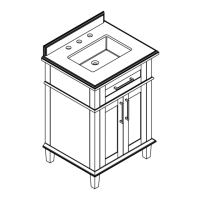
| Style | Transitional |
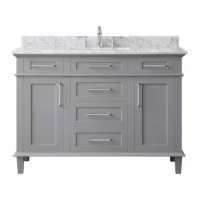
| Mounting Location | Freestanding |
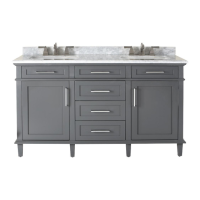
| Sink Type | Undermount |
| Vanity Top Material | Quartz |
| Hardware Finish Family | Brushed Nickel |
| Number of Doors | 2 |
| Number of Sinks | Double Sink |