Do you have a question about the Home Gym SA-006SM and is the answer not in the manual?
Read all instructions, use for intended purpose, domestic settings, ensure safe space and flat surface.
Assembly by adults, regular checks, professional repair, careful disassembly.
Appropriate attire, hair tied, stop if unwell, avoid moving parts, medical consultation, maintain posture.
Keep children/pets away, adhere to maximum user weight limit.
Wipe seat cover after use, lightly grease moving parts to prevent wear and ensure smooth function.
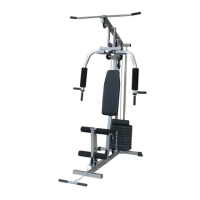
Detailed list of all components, hardware, and quantities required for product assembly.
Connect base frames and main frame using specified bolts, washers, and nuts.
Install rubber cushions, weight stacks, selector shaft, and top weight plate onto guide tubes.
Attach upper cross beam, rubber bumper, press pin, and volitant U to main frame and base.
Install tube caps and oil bushes into press bar and other relevant components.
Connect press bar, press arms, hand bars, and foam grips using bolts and nuts.
Attach back cushion, front support frame, seat frame, leg extension frame, and seat cushion.
Thread the 2370mm cable through pulleys 1-4 and attach to weight stack.
Thread the 3750mm cable through pulleys 5-9 and attach to the hook/chain.
Connect the 2720mm press arm cable over pulleys 10-12 to the press arm.
Install the high pull and low pull components.
Illustrates correct and incorrect shackle positions for proper weight stack function.
