9 - English
OPERATION
PREPARING THE SEED BED
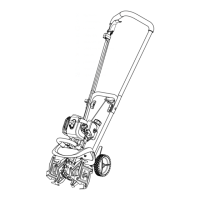
See Figure 11.
WARNING:
To prevent accidental starting that could cause serious
personal injury, stop the engine and disconnect the spark
plug before installing or removing the wheel assembly.
The cultivator can be used to break up garden soil and pre-
pare a seed bed for planting. Plan ahead to leave enough
room between the seed rows to allow for machine cultivating
after the plants have grown.
With the wheel assembly accessory installed in position
A as described on page 10, roll the machine to the work
area.
For general cultivating, remove or adjust the wheel assem-
bly accessory using the guidelines in Adjusting Wheel
Position on page 10.
Based on the type of soil being cultivated and soil condi-
tions at the time, the appropriate height of the drag bar
will vary. Adjust the drag bar position using the guidelines
in Adjusting Drag Bar Position on page 10.
Start the engine.
Stand behind the unit with the tines on the ground and
the work area clean and free of obstructions.
Completely engage the throttle lever to begin tine rotation.
NOTE: If the machine moves forward too quickly and
wheels are in position A or B with drag bar installed, push
down on the handlebar to allow the drag bar to penetrate
the soil and slow the forward motion of the unit. The rotat-
ing tines help to pull the machine forward, so use slower
speeds and a shallow depth setting when learning to use
the unit and when cultivating on hard, rough, or uneven
ground.
Always operate the unit at full throttle when cultivating.
NOTE: Several passes over the same path may be required
to reach the desired depth. Do not try to dig too deeply in
the first pass. If the machine jumps or bucks, allow the unit
to move forward at a slightly faster rate or install wheel as-
sembly accessory.
To dig more deeply, lift up on the handlebar. Apply downward
pressure on the handlebar for more shallow cultivating.
If the machine stays and digs in one spot, try rocking the unit
from side to side to start it moving forward again.
If the soil is very hard, water a few days before cultivating.
Avoid working the soil when soggy or wet. Wait a day or two
after heavy rain for the ground to dry.
WARNING:
Always shut off engine before fueling. Never add fuel to a
machine with a running or hot engine. Move at least 30 ft.
from refueling site before starting engine. Do not smoke
and stay away from open flames and sparks. Failure to
safely handle fuel could result in serious personal injury.
STARTING/STOPPING THE CULTIVATOR
See Figures 7 - 10.
To start an engine that is cold or has run dry:
Fill the fuel tank, if necessary. Always use the proper
lubricant/gasoline mixture. See Fuel Mixture on page 8.
Place the engine switch in the ON ( | ) position.
NOTE: Do not engage the throttle lever during the start-
ing process.
Slowly push the primer bulb seven times.
NOTE: If restarting a warm engine, do not push the
primer bulb.
Set the start lever to the START position.
NOTE: If restarting a warm engine, leave the choke in
the RUN position.
Standing behind the tool with one hand on the handlebar
to securely hold the tool, pull the recoil starter until the
engine runs.
Return the recoil starter gently to the eyelet on lower
handle. Do not allow the cord to snap back.
NOTE: Squeezing and releasing the throttle trigger releases
the start lever to the RUN position.
Engage the throttle lever to operate.
To stop the cultivator:
Release the throttle lever.
Move the engine switch to the OFF ( O ) position.
 Loading...