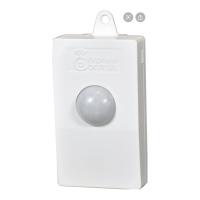
HomeSeer HSM200 Guide
This guide contains instructions for setting up your HomeSeer HSM200
multisensor! The HSM200 is designed to sense motion, temperature and
light levels and will work with most Z-Wave certified controllers or smart
hubs. HomeSeer HS3 system users can also program the unit to display
up to 7 different colors when things happen in the home. Since the
HSM200 is line powered, it can function as a Z-Wave network repeater
and there are no batteries to replace!
Adding the HSM200 to your Z-Wave Network (for HomeSeer HS3 System Users)
The HSM200 can be added directly through HS3 or can be added via your Z-Wave controller and then imported. (see
below if you are not using HS3)
a) Navigate to Plug-ins->Z-Wave->Controller Management. Expand your Z-Wave controller.
b) Open the Actions menu and select Add / Include Z-wave Device.
c) Click Start to initiate the Add process and press the button once on the side of the HSM200 to put it into
Inclusion mode. The process will take some time to complete.
Adding the HSM200 to your Z-Wave Network (for non-HomeSeer systems)
The HSM200 is Z-Wave certified multi-sensor that should work with any Z-Wave certified system controller. Please
follow the procedure required by your controller manufacturer for adding (“pairing”) the HSM200 with your Z-Wave
network. Note: The Color Control will only work if your control system support the Z-Wave Color Command Class. Please
check with the manufacturer of your system to verify compatibility.
Removing the HSM200 from your Z-Wave Network (for HomeSeer HS3 System Users)
Should you need to remove or reset your HSM200 to its factory configuration, please follow this procedure:
a) Navigate to Plug-ins->Z-Wave->Controller Management. Expand your Z-Wave controller.
b) Open the Actions menu and select Remove / Exclude Z-wave Device.
c) Click Start to initiate the Remove process and press the button once on the side of the HSM200 to put it into
Exclusion mode. The process should take very little time to complete.