EasyManua.ls Logo

Homewerks Worldwide 3070-250-CH-B-WS User Manual

Homewerks Worldwide 3070-250-CH-B-WS
8 pages
To Next Page IconTo Next Page
Page #1 background imageLoading...
Page #1 background image
UTILITY SHOWER KIT
W/SOAP HOLDER
09-14-2017
PACKAGE AND HARDWARE CONTENTS
MODEL
3070-250-CH-B-WS - Chrome
Homewerks Worldwide, LLC • Lake Bluff, IL 60044 • www.homewerksww.com
PREPARATION
SAFETY INFORMATION
Before beginning assembly of product, make sure all parts are present.
Compare parts with package contents list and hardware contents. If any
part is missing or damaged, do not attempt to assemble the product.
Contact customer service for replacement parts.
Estimated Assembly Time: 30 minutes
Tools Required for Assembly (not included): Adjustable Wrench, Groove
Joint Pliers, Pipe Wrench, Phillips Head Screwdriver, Pipe Tape or Pipe
Thread Compound, and Supply Lines
Installations may vary depending on how the previous shower was
installed. Supplies necessary for the installation of the shower are not
all included; however, they are available wherever plumbing supplies
are sold.
Prior to beginning installation, turn off the hot or cold water lines, then
turn on the old shower to release built-up pressure. When installing the
new faucet, hand tighten the connector nuts. DO NOT OVERTIGHTEN.
Connections that are too tight will reduce the integrity of the system.
Please read and understand this entire manual before attempting to
assemble, operate or install the product.
WARNING
Protect your eyes with safety glasses when cutting or soldering water
supply lines.
CAUTION
If you solder the joints during installation of the shower, the seats,
cartridges, and washers must be removed before using a ame
or the warranty will be voided on these parts.
Cover the sink drain to avoid losing parts.
PART DESCRIPTION QUANTITY
A Shower head 1
B Shower arm 1
C Soap dish 1
D Body 1
A
B
C
D
Question and Answer IconNeed help?

Do you have a question about the Homewerks Worldwide 3070-250-CH-B-WS and is the answer not in the manual?

Homewerks Worldwide 3070-250-CH-B-WS Specifications

General IconGeneral
BrandHomewerks Worldwide
Model3070-250-CH-B-WS
CategoryBathroom Fixtures
LanguageEnglish

Summary

Package and Hardware Contents

Check Parts Before Assembly

Ensure all parts are present and undamaged before starting assembly. Contact customer service if any part is missing or damaged.

Safety Information

Eye Protection During Installation

Wear safety glasses when cutting or soldering water supply lines to protect your eyes from injury.

Soldering Precautions and Warranty

Remove seats, cartridges, and washers before soldering to avoid voiding the warranty.

Prevent Losing Small Parts

Cover the sink drain to prevent accidental loss of small parts during installation.

Preparation for Installation

Water Shut-off and Tightening

Turn off water supply, relieve pressure, hand-tighten nuts, and avoid overtightening to maintain system integrity.

Product Specifications

Assembly Instructions

Disconnect Old Faucet and Prep Surface

Turn off water, disconnect supply lines, remove old faucet, and clean the mounting surface.

Apply Thread Sealant

Apply thread sealant tape clockwise or pipe joint compound to all exposed male threaded areas.

Water Supply Connection Configuration

Adapt water supply based on direction (above/below) and use plug if needed. Warning against hot water only hookup.

Install Soap Holder

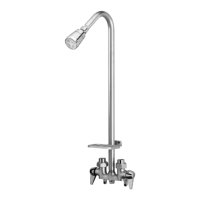
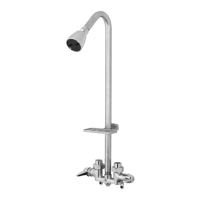
Slide soap holder onto shower arm with mounting tabs up, then attach to wall with screws at desired height.

Attach Shower Arm and Head

Thread shower arm onto handle assembly, ensure correct orientation, and attach shower head clockwise.

Connect Water Supply Lines

Connect hot (left) and cold (right) supply lines using 1/2" adapters. Turn on water and flush lines.

Mount Shower Handle Assembly

Secure the shower handle assembly to a solid surface using appropriate anchors, bolts, or screws.

Operation Instructions

Care and Maintenance

Troubleshooting

Handle Leaks

Address leaks under the handle by tightening the bonnet or inspecting/replacing O-rings and cartridge.

Water Not Shutting Off

Resolve shut-off issues by cleaning or replacing the rubber valve seat and cartridge.

Replacement Parts List

Limited Lifetime Warranty

Related product manuals