EN
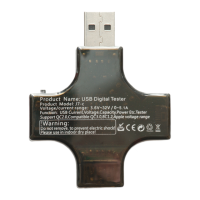
Hommie USB DIGITAL TESTER USER MANUAL
Thank you for purchasing the Hommie product. Please read this [User Manual] carefully before using the product, and retain it in for future use. If you have any
questions or suggestions about our products, please contact: hommiehk@hotmail.com.
Multi-interface LCD display:
Connect power supply equipment (Such as charger, power bank, USB cable,etc.) to the corresponding input interface of this USB tester. Then, connect your device,
such as Laptop, Tablet, Smartphone and more, to the corresponding output interface of this USB tester.
Note:
1. If you use the USB cable to connect (Such as charging your laptop), please pay attention to the quality and input of the cable, especially the maximum current.
2. While charging your smart phone or computer, please do not use Micro USB input interface.
Operation
1. Screen display settings.
Click the MFB to switch the display interface when the USB tester is power on: Chinese interface - English interface -Personalized interface 1-Personalized interface 2
- Personalized interface 3 - Over voltage protection - Low voltage protection - Over current protection - Off
Chinese interface
English interface
Personalized interface1
Personalized interface 2
Personalized interface 3
APO settings: Set AO../OFF/1-24 hours
AO.. - Smart monitoring the APO.
OFF - Turn off the APO.
1-24 hours - Auto power off when reaching the
setting time.
Click MFB five times to access the APO settings.
Click MFB to decrease the time(Click MFB and hold it to decrease quickly).
Double-click MFB to increase the time (Double-click MFB and hold it to increase
quickly).
Wait for 10s until the current value is confirmed.
Click MFB seven times (Only allow to adjust current when there is no device to
be charged. After adjusting, the current is 0.00A. If you adjust the current during
charging device, please disconnect device and then adjust the current again.).
Flips the screen to 180°.
Input voltage > the set value (1.00V-35.0V), the
tester will cut off its output and alarm to remind.
Click MFB to switch next interface.
Double-click MFB to increase the value, and hold it to increase quickly.
Triple-click MFB to decrease the value, and hold it to decrease quickly.
Input voltage < the set value (0.00V-34.0V), the
tester will cut off its output and alarm to remind.
Current > the set value (0.20A-15.0A), the tester
will cut off its output and alarm to remind.
Note: AO.. function. Detecting that the power is always less than 2W within 1 hour, the product will automatically cut off the output.
2. Background settings.
Turn on the USB tester while holding the MFB. It will enter into the interface of Background Settings. Click MFB to switch interfaces: Voltage adjustment - Current
adjustment - High voltage protection - Low voltage protection - Over current protection - Capacity compensation factor .
Note:
1. “Over voltage, Low voltage and Over current protection” is the same as the above mentioned function, whose only difference is the operation.
2. Do not adjust voltage and current if there is no accurate 5.00V power supply and 2.00A constant current load. If there is wrong adjustment due to your
misoperation, you can press and hold the MFB for 2s to reset the factory settings.
The externally connected 5.00V voltage as
calibration reference voltage.
Double-click MFB (If the externally connected 5.00V voltage itself is not
accurate, the calibration will affect the voltage accuracy of the tester.)
The externally connected 2.00A load with the
constant current as calibration reference current.
Double-click MFB (If the externally connected 2.00A constant current load itself
is not accurate, the calibration will affect the accuracy of current of the tester.)
Input voltage > the set value (1.00V-35.0V), the
tester will cut off its output and alarm to remind.
Double-click MFB to access the setting state:
Click MFB to decrease the value, and then hold it to decrease quickly.
Double-click MFB to increase the value, and then hold it to increase quickly.
Wait for 10s until the current value is confirmed.
The instruction of capacity compensation factor: For a example, when
monitoring the actual capacity of power bank, if the total internal loss is 35%,
the actual capacity is x(1+0.35) - that is x1.35.
Input voltage < the set value (0.00V-34.0V), the
tester will cut off its output and alarm to remind.
Current > the set value (0.20A-15.0A), the tester
will cut off its output and alarm to remind.
Capacity compensation
factor
The capacity of the current voltage multiply by
capacity compensation factor to get the final
displaying value (x0.50-x1.50).
Screen displays RESET and restore to factory state.
Resistance; Temperature
Capacity
Electric quantity
Current; Power
APO
Current
Resistance
Capacity
APO
Voltage
Power/Temperature
Electric quantity
Time
Voltage of power lines and
data lines
Time
MFB (Multi-Function Button)
Voitage
Power
Electric quantity
Capacity
Time
Current
Resistance
Temperature
capacity factor
APO (Automatic Power Off)
Power
Electric quantity
Capacity
APO