1998 American Honda Motor Co., Inc. – All Rights Reserved
2
of 2
AII 20161 (9810)
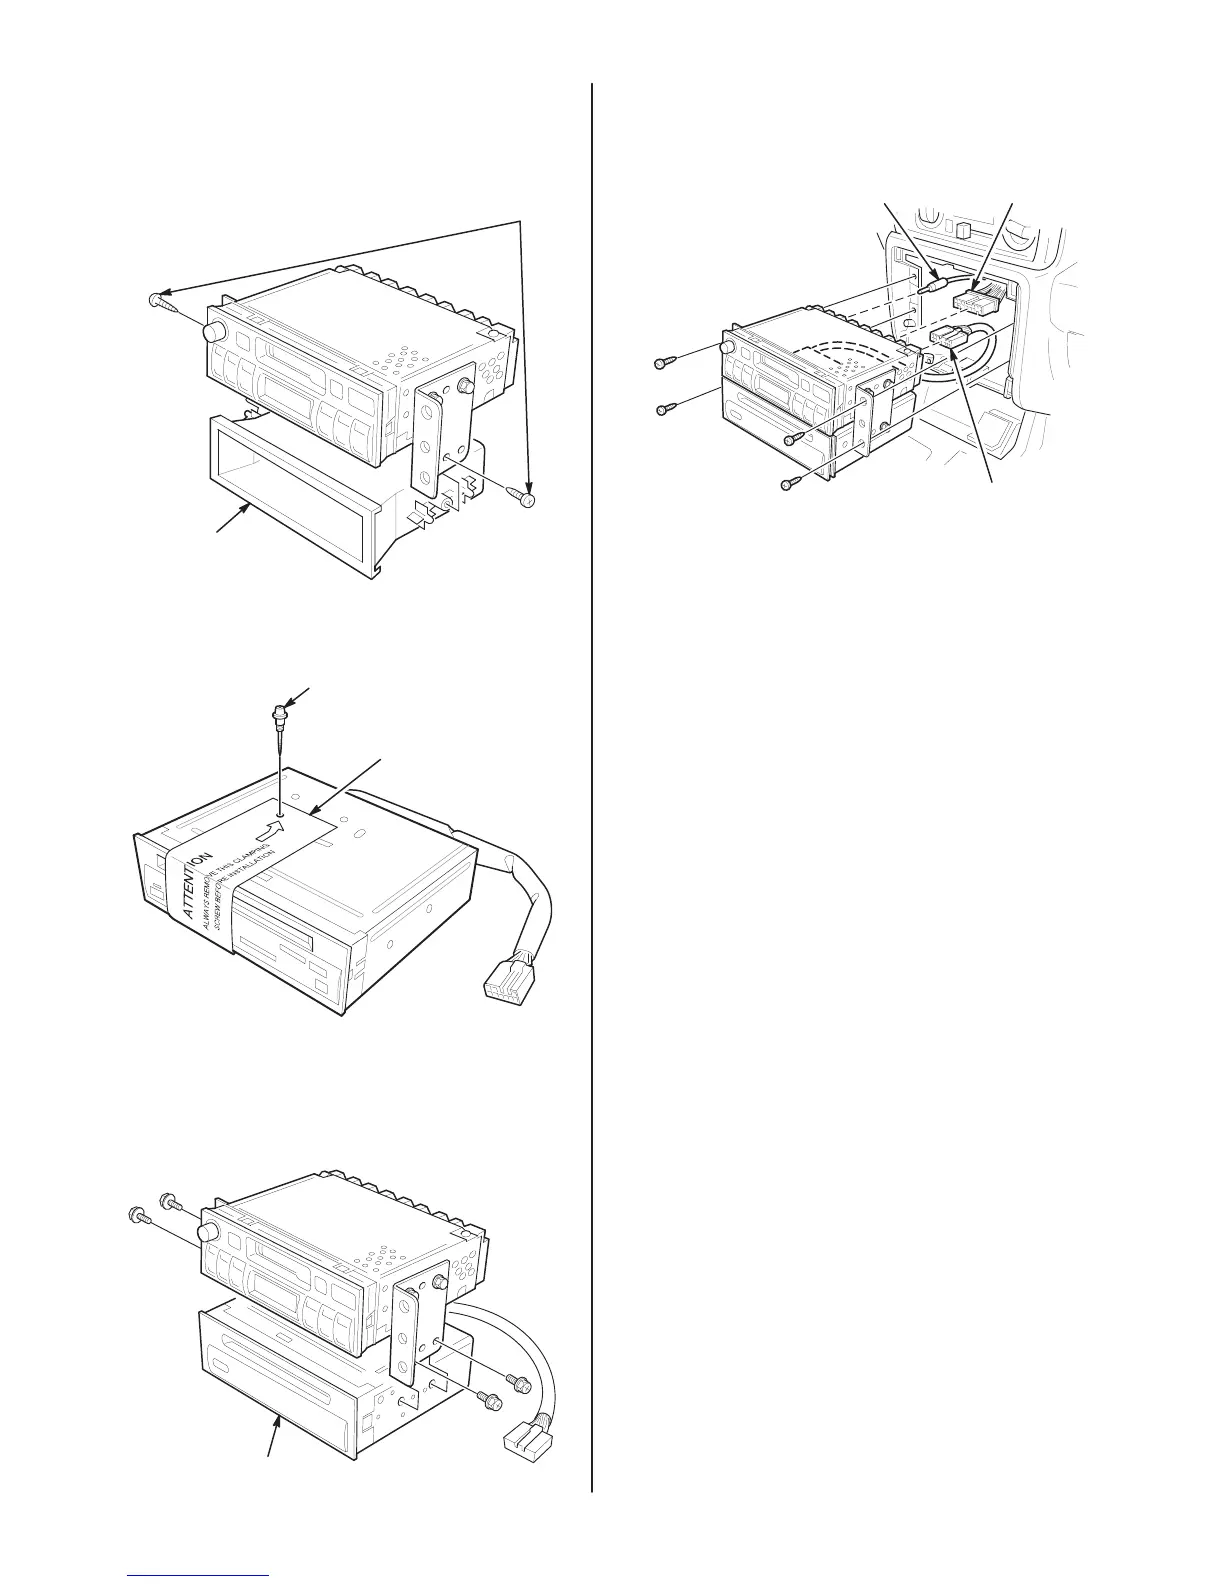
6. Remove the screws and the pocket from the
audio unit. Discard the pocket and pocket
screws.
SCREWS
(Discard.)
POCKET
(Discard.)
7. Remove and discard the shipping screw and
wrapper from the
CD player.
SHIPPING
SCREW
(Discard.)
WRAPPER
(Discard.)
8. Place the audio unit on top of the CD player.
Slide the right and left brackets over the
CD
player,
a
n
d i
nstal
l t
h
e f
our
s
crew
s s
upplie
d w
ith
the CD player.
CD
PLA
YER
9. Plug the 12-pin connector from the CD player
into the back of the audio unit.
ANTENNA
LEAD
16-PIN
CONNECTOR
12-PIN CONNECT
OR
FROM CD PLA
YER
10. Plug the 16-pin connector and the antenna
lead
into the audio
unit, then reinstall the audio
unit.
11. Reinstall the lower cluster assembly.
12. Reconnect the negative cable to the battery.
13. Check that the
CD player operates according
to the owner’s manual supplied with the
CD
player.
14. Reset the clock and the radio station presets.
15. Put
the
CD
player owner
’
s manual in the glove
box for your customer.