1998 American Honda Motor Co., Inc. – All Rights Reserved Y0505-E 1
of 2
INSTALLATION
INSTRUCTIONS
Accessory Application Publications No.
Issue Date
CD PLAYER
PASSPORT
OCT
1998
AII 2
0161
PARTS LIST
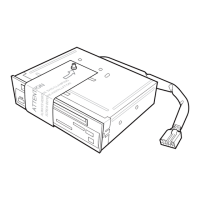
CD Player
P/N 08A51-ED1100
CD Player
Owner’s Manual
4 Screws
T
OOLS REQUIRED
#2 Phillips screwdriver
Ratchet
8 mm Socket
INSTALLATION
1. Write down the customer’s radio station
presets;
the radio
memory will be erased when
you disconnect the battery.
2. Disconnect the negative cable from the
battery.
3. Remove
the ashtray
. On
A/T
models, move the
shift lever to the “L” position.
CLIPS
(4
places)
ASHTRAY
(Remove.)
CIGARETTE LIGHTER
CONNECTORS
LOWER CLUSTER
ASSEMBLY
4. Remove the lower cluster assembly (one
screw, and gently pull to release the four
retaining
clips; then unplug the cigarette
lighter
connectors).
5. Remov
e a
nd
r
etain
t
h
e f
ou
r s
crew
s s
ecurin
g t
he
audio
u
nit
. U
nplu
g t
h
e 1
6-pi
n c
onnecto
r a
n
d t
he
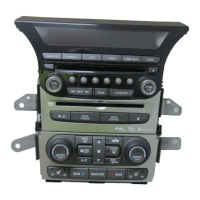
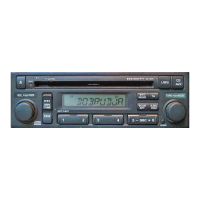
antenna lead, and remove the audio unit.
ANTENNA
LEAD
16-PIN
CONNECTOR
AUDIO UNIT
Retain these screws.