FRONT
WHEELlSUSPENSlONlSTEERlNG
TIRE
REPAIR
NOTE:
Use the manufacturer’s instructions for the tire repair
kit you are using. If your kit does not have instruc
-
tions, use the procedures provided here.
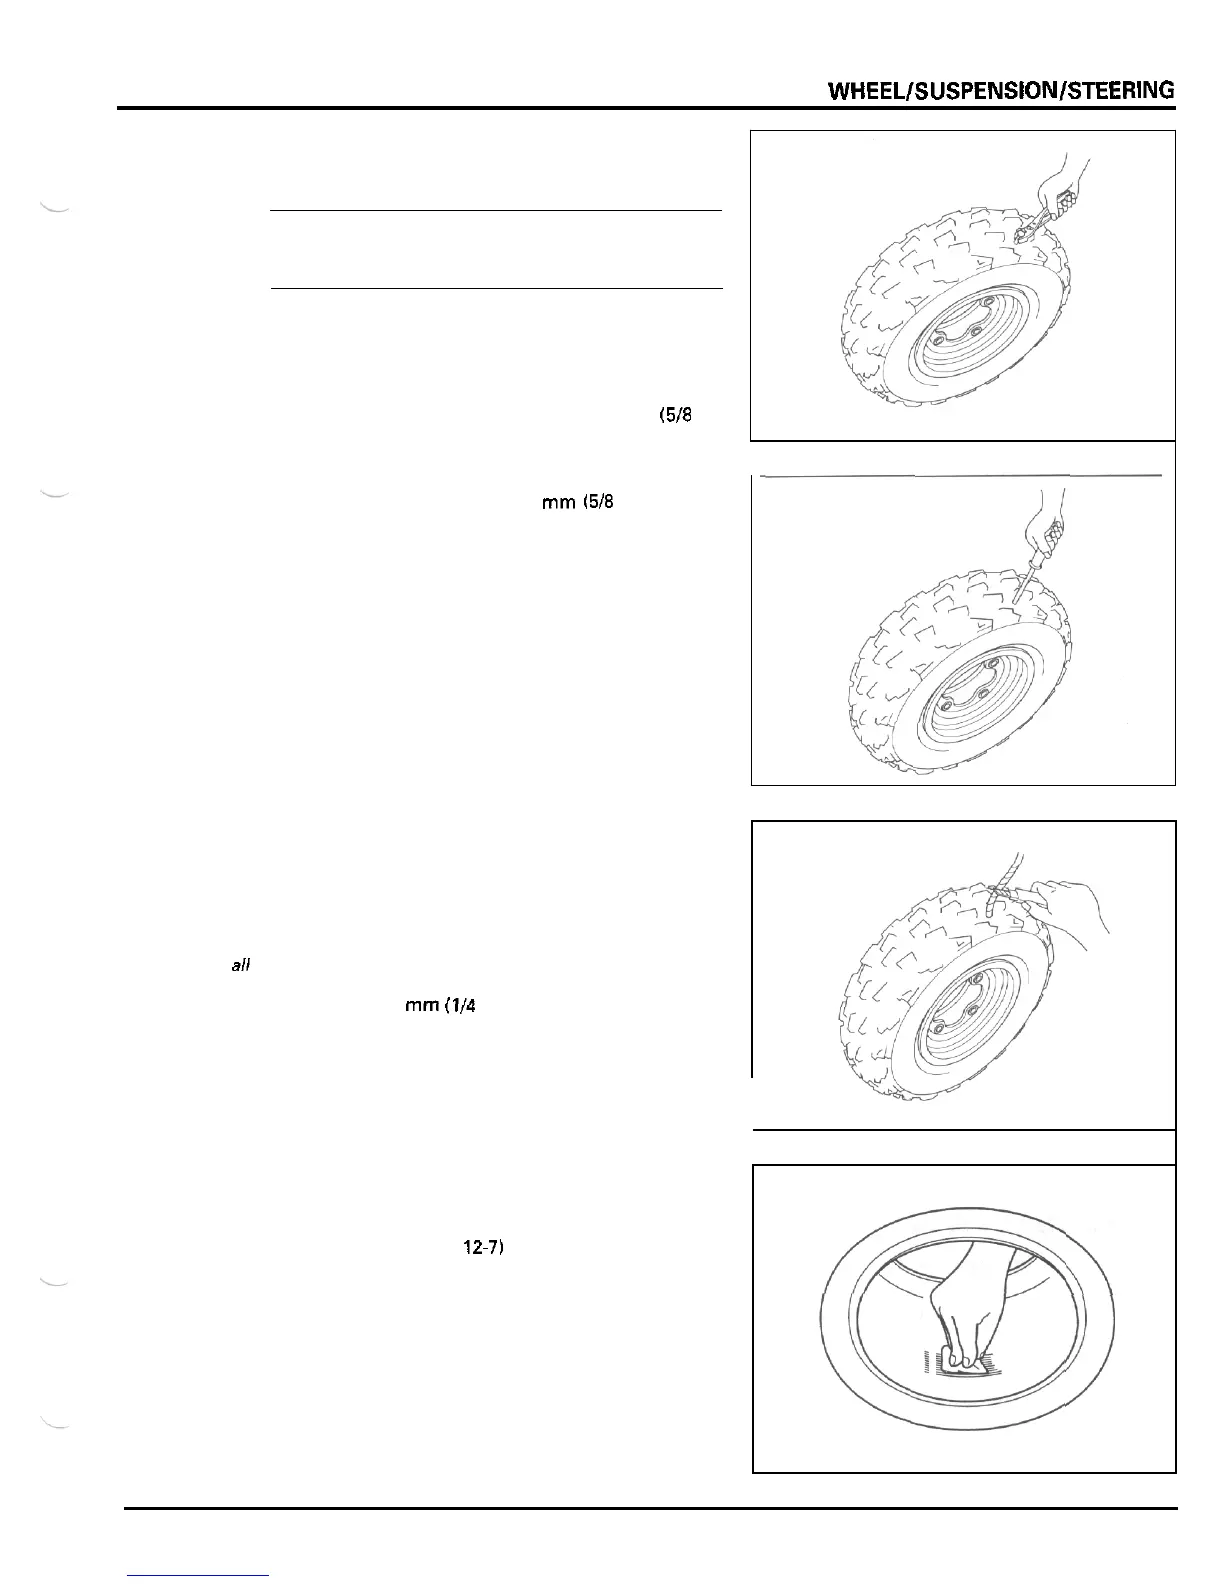
Check the tire for puncturing objects.
Chalk mark the punctured area and remove the punc
-
turing object.
Inspect and measure the injury.
Tire repairs for injuries lager than
15
mm
(518
in)
should be a section repair.
Section repairs should be done by
a
professional tire
repair shop.
If
the injury
is
smaller than
15
mm
(5/8
in). proceed
with the repair as described here.
Install
a
rubber plug into the injury as follows:
Apply
a
cement to
a
plug inserting needle and work
the needle into the injury to clean and lubricate it.
Do
this three times.
Do
not
let
the cement dry.
Insert and center
a
rubber plug through the eye
of
the inserting needle.
Apply cement to the rubber plug.
Push the inserting needle with plug into the injury
until the plug
is
slightly above the tire.
Twist the needle and remove
it
from the tire; the plug
will stay in the tire.
Trim the plug
6
mm
(114
in) above the tire surface.
Repeat the above procedure if the puncture
is
large.
Do
not use more than two plugs per injury.
Becarefulnotto
push
the plug
all
the way into the
tire
to
prevent
it
from
falling
inside.
Allow the repair to dry. Drying time will vary with air
temperature. Refer to the tire repair kit manufactur
-
er’s recommendations.
Inflate the tire and test the seal by dabbing a small
amount of cement around the plug. Escaping air will
cause
a
bubble in the cement. If there is leakage,
remove the tire (page
12-7)
and apply
a
cold patch
to
the inside
of
the tire as described.
If a plug has been inserted, trim it even with the inner
tire surface.
Temporarily place a rubber patch that
is
at least twice
the size of the puncture over the injury. Make
a
mark
around the patch, slightly larger than the patch itself.
Rough the area marked inside the tire with a tire
buffer or a wire brush. Clean the rubber dust from
the buffed area.
12
-
1
1
 Loading...