Do you have a question about the Honeywell Home VisionPRO TH8320R1003 and is the answer not in the manual?
| Programmability | 7-Day Programmable |
|---|---|
| Operating Modes | Heat, Cool, Auto, Off |
| Fan Modes | Auto, On, Circulate |
| Wi-Fi Connectivity | No |
| Humidity Control | No |
| Compatibility | Heat Pump |
| Power Method | Battery |
| Display | Backlit |
| Changeover | Auto or Manual |
| Weight | 0.5 lbs |
Monitor/control heating/cooling, receive email alerts via Gateway.
Thermostat learns system response time to optimize comfort.
Program setback temps for energy savings during absence.
View on/off status of controlled equipment.
Customize thermostat display and behavior.
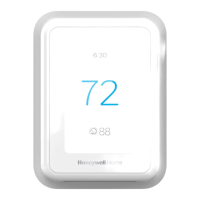
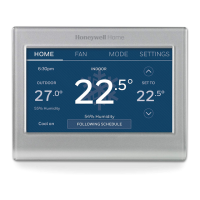
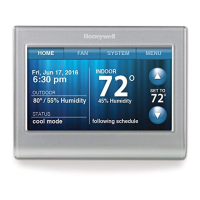
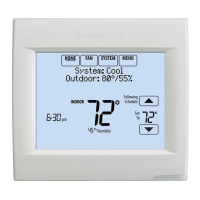
HOME, FAN, SYSTEM, MENU buttons for core functions.
Shows system mode, outdoor temp/humidity.
Displays current schedule and hold status.
Shows indoor temperature and humidity.
Indicates alert messages or EmHeat mode.
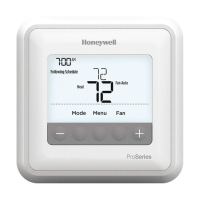
HOME, FAN, SYSTEM, MENU buttons for core functions.
Shows system mode, outdoor temp/humidity.
Touch to override program schedule.
Displays current schedule and hold status.
Load holiday schedules and custom events.
Touch the current time to access options.
Choose to adjust time or date.
Use ▲ or ▼ to adjust the selected value.
Confirm or discard adjustments.
Date setting aids daylight saving and features.
Touch the FAN button to access settings.
Choose desired fan mode (On, Auto, Circ, Follow Schedule).
Fan runs continuously.
Fan runs with heating/cooling system.
Fan controlled by program settings.
Touch the SYSTEM button to access settings.
Choose Heat, Cool, Off, Auto, or Em Heat.
Controls only the heating system.
Controls only the cooling system.
Selects heating or cooling based on temp.
Controls auxiliary/emergency heat.
Default energy saver schedules for residential use.
Default energy saver schedules for commercial use.
Select 'Edit Schedule' from the menu.
Choose between guided setup or manual entry.
Choose specific days to apply schedule settings.
Adjust wake time and set heat/cool temps.
Use ▲ or ▼ to modify settings.
Maintain temperature until manual change.
Return to programmed schedule.
Modify temperature; maintained until hold time.
Adjust hold duration up to installer limit.
Apply preset occupied temperature.
Return to programmed schedule.
Select 'Equipment Status' from the menu.
View the operational status of HVAC systems.
Check the current status of the fan.
View the status of the humidification system.
View the status of the dehumidification system.
Enter vacation mode settings to save energy.
Set leave/return dates and temperature preferences.
Verify all vacation hold configurations.
Select 'Holiday Schedule' from the menu.
Create specific schedules for non-standard days.
Choose from predefined lists of national holidays.
Navigate to custom event configuration.
Initiate the process for creating a new event.
Select event timing: specific date or month/weekday.
Choose between US Holidays or Canadian Holidays.
Access and manage the list of national holidays.
Set Occupied/Unoccupied temperatures for holidays.
Navigate to the Holiday Mode menu.
Define specific temperatures for the override period.
Activate occupancy mode for energy saving.
Adjust temperature or set a Hold Until time.
Sensor triggers setback when room is empty.
Select 'Auto' for automatic control.
Adjust the target humidity level.
Use for condensation prevention.
Select 'Auto' for automatic control.
Adjust the target humidity level.
Select 'Auto' for automatic control.
Adjust the target humidity level.
How the AC reduces humidity.
Choose Mode, Temporary Boost, or Lockout.
Set ventilation to Auto, Off, or On.
Select duration for temporary ventilation.
Prevent ventilation during specific periods.
Select 'Preferences' from the main menu.
Configure display, reminders, and behavior.
Set reminders for replacing air filters.
Choose between Fahrenheit and Celsius.
Modify the screen brightness.
Select 'Clean Screen' to lock the display.
Use a damp cloth; avoid spraying liquid directly.
Navigate to the 'Security Settings' menu.
Choose Unlocked, Partially locked, or Fully locked.
Allows only temperature changes.
Restricts all access.
Select 'Dealer Information' from menu.
Learns system response time for optimal comfort.
Manages climate during vacant periods.
Prevents compressor damage by delaying restarts.
Warms up the space before occupancy.
Access requires password; for technicians.
Warning against unauthorized modifications.
Replace batteries when warning appears.
Instructions for detaching the thermostat unit.
Location of the CR2032 backup battery.
Replace batteries when warning appears.
Use 2 fresh AA lithium batteries for replacement.
Replace batteries when warning appears.
Use 2 fresh AAA alkaline batteries for replacement.
Temperature displayed may vary by sensor location.
Humidity displayed may vary by sensor location.
Certain models lack indoor humidity display.
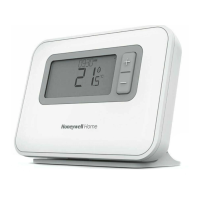
Move remote control room-to-room for comfort.
Display outdoor temp/humidity on thermostat.
Respond to sensor location for comfort.
Remote access via web, smartphone, or tablet.
One-touch control for leaving/returning home.
Check power, batteries, circuit breaker.
Adjust screen brightness via Preferences.
Indicates Emergency Heat or an alert.
Check settings, power, breaker, door closure.
Check RedLINK Gateway, account, or battery delay.
5-year warranty against defects in workmanship/materials.
Labor costs for installation/removal not covered.
Device complies with FCC Part 15 rules.
Unauthorized modifications may void user authority.
Compliance with RF exposure guidelines for users.
Thermostat contains lithium battery, may need special handling.
Proper disposal of electronic waste is required.
Visit honeywellhome.com/support for assistance.
Call 1-800-468-1502 for customer assistance.