EasyManuals Logo

Honeywell 2116 User Manual

Honeywell 2116
11 pages
To Next Page IconTo Next Page
To Previous Page IconTo Previous Page
Page #4 background imageLoading...
Page #4 background image
3
SETUP & OPERATION
STEP 2: SET CALENDAR AND CLOCK
Once batteries are installed and the control pad is powered, the next step is to
begin by programming the clock and calendar. READ ENTIRE DIRECTIONS AND
WRITE DOWN DATE/DAY/TIME BEFORE PROGRAMMING. NOTE: You must enter
all information without delays. If the light goes off, you must begin programming
again.
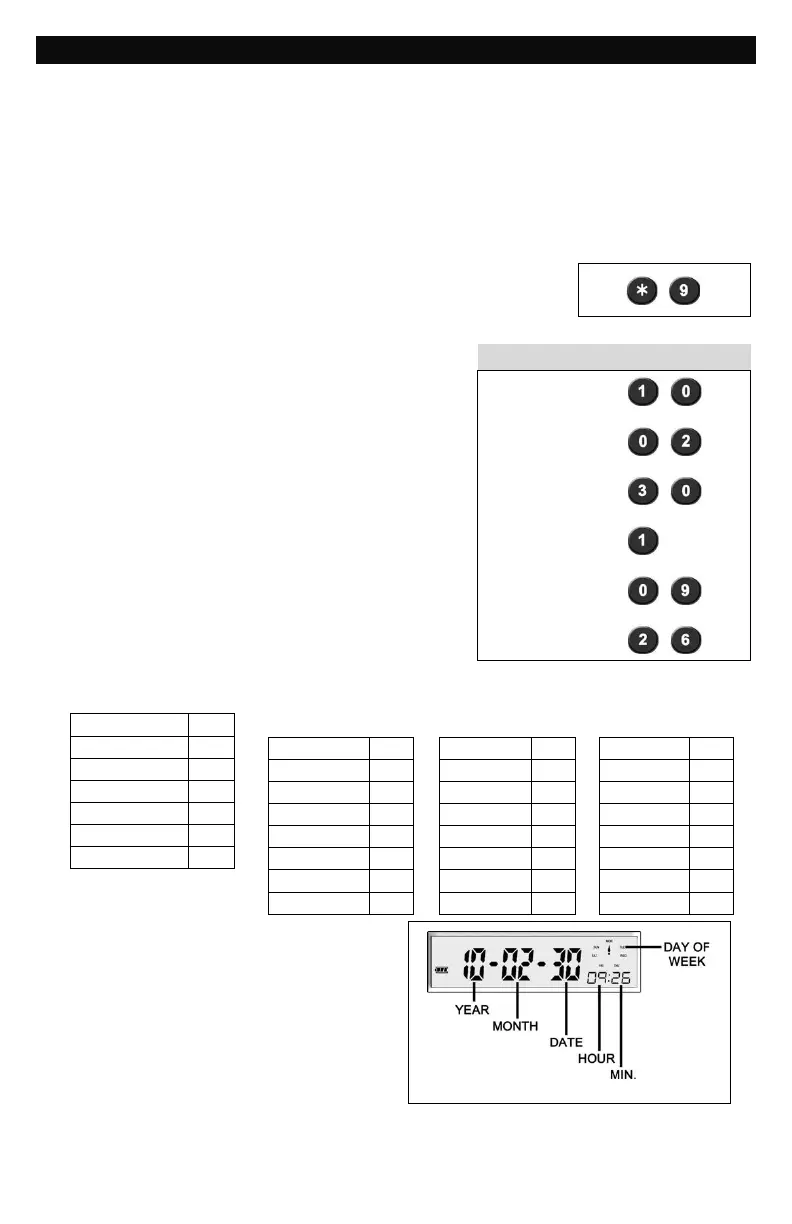
1. With the safe door closed and locked, press
the key followed by the 9 key.
1.
The LCD readout will glow amber.
EXAMPLE
2. Enter the Year 2 Digits
2.
2010 =
3. Enter the Month 2 Digits
3.
February =
4. Enter the Date 2 Digits
4.
30
th
=
5. Enter the Day 1 Digit (see chart below)
5.
Monday =
6. Enter the Hour 2 Digits (see chart below)
6.
9:26 am =
7. Enter the Minutes 2 Digits
7.
9:26 am =
DAY
#
Monday
1
Tuesday
2
Wednesday
3
Thursday
4
Friday
5
Saturday
6
Sunday
7
HOUR
#
#
HOUR
#
#
HOUR
#
#
1:00 am
01
9:00 am
09
5:00 pm
17
2:00 am
02
10:00 am
10
6:00 pm
18
3:00 am
03
11:00 am
11
7:00 pm
19
4:00 am
04
12:00 pm
12
8:00 pm
20
5:00 am
05
1:00 pm
13
9:00 pm
21
6:00 am
06
2:00 pm
14
10:00 pm
22
7:00 am
07
3:00 pm
15
11:00 pm
23
8:00 am
08
4:00 pm
16
12:00 am
00
When correctly entered, the LCD
readout will stop glowing and should
display the information you just
programmed.

Questions and Answers:

Question and Answer IconNeed help?

Do you have a question about the Honeywell 2116 and is the answer not in the manual?

Honeywell 2116 Specifications

General IconGeneral
BrandHoneywell
Model2116
CategorySafes
LanguageEnglish

Related product manuals