EasyManua.ls Logo

HOOKE ROAD MMR.30016 - User Manual

HOOKE ROAD MMR.30016
7 pages
Print Icon
To Next Page IconTo Next Page
Loading...
Security Deck Enclosure
(1) Contents:
Qty
Part Name
Size(mm)
Qty
Part Name
Size(mm)
1
Security Deck Enclosure Assembly
L×6
Plastic Washer
M6.2×11×4
H
×14
Button Head Socket Cap Screw
M6×12
M
×4
Flat Washer
M8×20
I
×2
Button Head Socket Cap Screw
M6×16
N
×20
Flat Washer
M6×20
J×12
Flange Hex Lock Nuts
M6
AA×10
Tie-Down Rings
K×6
Nylon Insert Locknut
M6
Q×2
Black Rubber cushion
18×50
MMR.30016
Question and Answer IconNeed help?

Do you have a question about the HOOKE ROAD MMR.30016 and is the answer not in the manual?

Summary

Product Contents

Tools Required for Installation

Installation Time Estimate

Installation Instructions

Step 1: Prepare Rear Seat

Lower the rear seat to prepare for the installation process.

Step 2: Install Base Components

Attach Part F with original bolts and assemble Parts D1, D2, E1, E2 with specified hardware.

Step 3: Assemble Main Panels

Connect Part C with Parts D1 and D2 using the designated fasteners.

Step 4: Attach Additional Parts

Install Part G into Part A, then assemble Part A and Part C with specified hardware.

Step 5: Complete Installation

Finalize the installation and enjoy the product.

Important Attention Notes

Review product part variations and contact distributor for any questions.

Overview

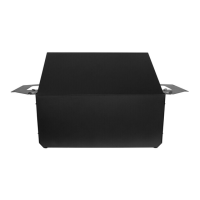
This document outlines the installation instructions for the Hooke Road Security Deck Enclosure, model MMR.30016. This product is designed to provide a secure storage area in the rear of a vehicle, likely a Jeep Wrangler given the visual cues in the installation images. The enclosure helps to protect valuables from theft and the elements, enhancing the utility and security of the vehicle's cargo space.

Function Description:

The Hooke Road Security Deck Enclosure creates a lockable storage compartment in the rear of a vehicle. It consists of several metal panels that assemble to form a sturdy box-like structure. The design appears to integrate with the vehicle's existing structure, utilizing original bolt locations where possible. The enclosure includes a top lid that can be opened for access to the storage area, and it is supported by gas struts or similar mechanisms (indicated by "Part G" and its assembly with "Part A" and "L"). The inclusion of tie-down rings ("AA") suggests additional functionality for securing items within or on top of the enclosure. Black rubber cushions ("Q") are also provided, likely for vibration dampening or protection.

Important Technical Specifications:

The manual provides a detailed list of parts and their dimensions, which are crucial for assembly and understanding the product's construction.

  • Main Assembly: Security Deck Enclosure Assembly (1 unit).
  • Fasteners:
    • Button Head Socket Cap Screw (H): M6 x 12 (14 units)
    • Button Head Socket Cap Screw (I): M6 x 16 (2 units)
    • Flange Hex Lock Nuts (J): M6 (12 units)
    • Nylon Insert Locknut (K): M6 (6 units)
  • Washers:
    • Plastic Washer (L): M6.2 x 11 x 4 (6 units)
    • Flat Washer (M): M8 x 20 (4 units)
    • Flat Washer (N): M6 x 20 (20 units)
  • Accessories:
    • Tie-Down Rings (AA): 10 units
    • Black Rubber Cushion (Q): 18 x 50 (2 units)
  • Main Components (Lettered for assembly):
    • A: Main enclosure body/panel
    • B: Likely a front or rear panel of the enclosure
    • C: Likely a side panel or partition
    • D1, D2: Side support brackets or panels
    • E1, E2: Lower mounting brackets or supports
    • F: Base mounting brackets
    • G: Likely a support arm or gas strut for the lid

Tools Required for Installation:

  • Drive Socket Ratchet Wrench
  • T50 Torx Bit Socket
  • 4mm Hex Bit Socket
  • 10mm Shallow Socket

These tools indicate the types of fasteners used and the mechanical nature of the installation.

Usage Features:

The primary usage feature is secure storage. Once installed, the enclosure provides a protected space for gear, groceries, or other items, preventing them from shifting during transit and offering a deterrent against theft. The top-opening lid allows for easy access to the contents. The tie-down rings (AA) offer versatility for securing additional cargo, either within the enclosure or on its exterior surface if the design allows. The black rubber cushions (Q) suggest an effort to minimize noise and vibration, contributing to a more refined user experience.

Maintenance Features:

The manual does not explicitly detail maintenance features. However, based on the product type and materials, general maintenance would likely include:

  • Regular Inspection: Periodically check all fasteners (screws, nuts) for tightness to ensure the enclosure remains securely assembled and mounted. Vibrations from driving can loosen fasteners over time.
  • Cleaning: The metal panels can be cleaned with appropriate automotive cleaning products to maintain their appearance and prevent corrosion.
  • Lubrication: If the lid mechanism (Part G) involves hinges or gas struts, occasional lubrication of moving parts might be beneficial to ensure smooth operation and prevent squeaks.
  • Rubber Components: Inspect the black rubber cushions (Q) and any other rubber seals for wear, cracking, or damage. Replace them if necessary to maintain their intended function of dampening or sealing.
  • Corrosion Prevention: For metal components, especially in environments exposed to moisture, salt, or harsh chemicals, applying a protective wax or coating could extend the product's lifespan.

Installation Process Overview:

The installation is broken down into five steps:

  • Step 1: Preparation: Put down the rear seat of the vehicle to create space for installation.
  • Step 2: Base Bracket Installation: Install "Part F" using original bolts and then assemble "Part D1," "D2," "E1," "E2" with "Part H," "J," "N," "K," "AA." This step likely involves securing the foundational mounting points and side supports.
  • Step 3: Panel Assembly: Assemble "Part C," "D1," "D2" with "Part H," "J," "N," "K." This step appears to involve attaching the main side panels or partitions to the previously installed base and supports.
  • Step 4: Lid Mechanism and Final Panel Assembly: Install "Part G" into "Part A" using "Part L," "K." Then, assemble "Part A" and "Part C" with "Part I," "L," "M," "K." This step focuses on attaching the main lid ("Part A") and its support mechanism ("Part G"), as well as connecting it to other panels.
  • Step 5: Final Touches: Install "Part B" and apply the black rubber strip with glue. This step completes the enclosure and adds finishing elements like seals or trim.

The estimated installation time is 1-2 hours, requiring 2-3 people, and may vary based on mechanical skill. The manual emphasizes verifying all parts are present and reading instructions carefully before starting. An electronic version of the manual is available via a QR code.

Overall, the Hooke Road Security Deck Enclosure (MMR.30016) is a robust accessory designed to enhance the security and functionality of a vehicle's cargo area, providing a practical solution for protecting belongings.

HOOKE ROAD MMR.30016 Specifications

General IconGeneral
BrandHOOKE ROAD
ModelMMR.30016
CategoryAutomobile Accessories
LanguageEnglish

Related product manuals