Do you have a question about the Hoover H-DRY 500 NDE H9A3TCBEXS-S and is the answer not in the manual?
Appliance marked according to European directive 2012/19/EU on Waste Electrical and Electronic Equipment (WEEE).
Appliance for household use only; commercial use is excluded. Misuse may void warranty.
Children should be supervised. Not for unsupervised use by children under 3 years.
Use dry hands, do not lean on door, do not use if faulty. Avoid misuse creating fire hazard.
Avoid low temperatures, freezing risk, and ensure ambient temperature between 5-35°C for optimal performance.
Details on using standard, slim, and universal stacking kits for washing machine compatibility.
Ensure machine is level by adjusting feet and avoid installation behind restricted doors.
Check electrical system is earthed and socket compatible. Refer to rating plate for technical details.
Ensure adequate room ventilation and clear air inlet/outlet. Keep 12mm gap from walls/obstructions.
Avoid timers, extensions, and ensure accessible plug. Handle damaged cords with qualified personnel.
Ensure suitability via care labels, close fastenings, empty pockets, turn items inside out for best results.
Avoid drying silk, nylon, PVC, leather, and items treated with dry cleaning fluids or rubber.
Foam rubber items can ignite. Do not dry foam rubber, shower caps, waterproof textiles, or rubber-padded items.
Do not dry glass fibre curtains; they can cause skin irritation due to fibre contamination.
Wash soiled items with cooking oil, petrol, etc., in hot water with extra detergent before drying.
Remove lighters, matches, and flammable liquids from pockets before drying to prevent hazards.
Appliance contains flammable refrigerant (R290). Keep away from open flames and ignition sources.
Do not use damaged appliance. Repairs must be by authorised service. Incorrect disposal can cause fires/poisoning.
Allows direct discharge of water to a waste pipe, avoiding manual container emptying.
The kit consists of 1 hose and 1 bung.
Step-by-step instructions for connecting the drain hose to the machine's water drainage system.
Water from laundry is collected in a container, advised by indicator light or display when full.
Instructions for pulling out, emptying, and refitting the water container tank.
Steps to remove the kickplate, slide out, empty, and refit the water container.
How to open the door and restart the appliance after closing it.
Warning that the drum and door can be very hot during operation and after cool-down.
Indicator light signals need for lint or sponge filter cleaning. Check filters if laundry is not drying.
Clogged filters increase drying time and cause damage. Cleanliness before each cycle is essential.
Warning against using the tumble dryer without the filters installed.
Read the manual, remove internal items, and wipe the drum and door before first use.
Ensure suitability via care labels, close fastenings, empty pockets, turn items inside out, and load loosely.
Specific items like silk, nylon, PVC, leather, and dry-cleaned garments should not be tumble dried.
Use spin-dried laundry and avoid overloading for shorter drying times and reduced energy consumption.
Sort laundry by care symbols, amount/thickness, and fabric type (cotton, synthetics).
Clean lint filters after each cycle. Empty water tray. Wipe drum interior and exterior.
Do not use abrasive pads. Switch off and unplug before cleaning. Avoid touching hot parts.
Download the hOn App, create a profile, and pair the appliance following on-screen instructions.
Requires a 2.4 GHz Wi-Fi network. 5 GHz is not supported for machine configuration.
Check router, load laundry, close door, and set programme selector to REMOTE CONTROL (Wi-Fi).
Exit mode by changing selector position or restarting the cycle. Remote control is disabled with the door open.
Load laundry, close door, select programme, press start. Restart if door opened mid-cycle.
Explains the cool down phase and intermittent tumbling for crease reduction after the cycle.
Information on power, supply voltage, maximum load, and energy class can be found on the rating plate/energy label.
Identifies key controls: Programme Selector (A), Start/Pause (B), Delay Start (C), etc., and Display (H).
How to select programmes by rotating the selector and how to cancel/switch off the appliance.
Guide to setting the initial language via buttons D/E and confirming with START/PAUSE.
How to start, pause, and resume cycles. Close the porthole before pressing.
Display shows cycle duration, estimated time to end, and adjusts based on load humidity.
Appliance shows 'END' when complete; turn selector to OFF. Selector must be in OFF before selecting a new programme.
How to pause a cycle by pressing START/PAUSE for 2 seconds and how to restart it.
Cancel a programme by turning the programme selector to the OFF position.
Allows delaying the start from 30 mins to 24 hours in intervals. Display shows selected delay time.
Transforms automatic cycles to programmed ones, up to 3 minutes after start. Rapid programmes offer duration choices.
Cycle to remove odors and smooth creases, refreshing garments. It overwrites the selected program.
Sets desired dryness (Ready to Iron, Dry Hanger, Dry Wardrobe, Extra-dry) up to 3 mins after start.
Automatic cycles indicate intermediate drying levels via flashing lights corresponding to dryness degree.
Sets alternate drum movements to reduce folds, activating 'Ready to Iron' and anti-crease movements.
Locks keys by pressing F+G for 2 secs. Cycle stops if door opened with lock active; restart requires unlocking.
Shows remaining time, postponed time, and notifications. Includes indicator light descriptions.
Details of Drying Selection, Anti Crease, Filter Cleaning, and Wi-Fi indicator lights and their meanings.
Standard cycle for normal wet cotton laundry, most energy efficient.
Specifies maximum drying weights for Cotton (Max. capacity declared) and Synthetics/Delicates (Max. 4 kg).
Details EN 61121 standard programme to use for testing: Standard Dry Cotton, Iron Dry Cotton, Easy-Care Textile.
Warning for 10/11 kg Tumble Dryers with drain hose kit: connect for recovering condenser water.
Details selectable options, capacity (kg), and drying time for various programmes like Whites, Eco Cotton, Woolmark, etc.
Position to select for remote control via App. Cycle starts via App commands.
Suitable for drying cottons, sponges, and towels.
Energy-efficient cotton programme for cottons and linens.
Approved by Woolmark for machine washable wool, up to 1kg. Caution about felting.
Uses a special rack to dry up to 2 pairs of canvas shoes. Remove laces.
Accessory for drying up to 4 sneakers. Instructions for placement and use.
For synthetic fabrics needing accurate and specific treatment.
Minimizes tangles and folds with specific drum movements. Remove linens immediately.
For uniformly drying jeans or denim. Recommended to flip garments before drying.
Takes care of technical garments, drying gently to avoid shrinking elastic fibers.
For small loads and delicate garments, providing gentle care.
Dries mixed fabrics (cotton/synthetic) in 59'. Shortens cycle if residual humidity is low.
Reduces main allergens like dust mites, pet hair, and pollens while drying.
Quick drying cycles allowing choice of 30, 45, or 59 minutes for items ready in short time.
Dries different fabrics simultaneously. Alerts when lightweight fabrics are dry.
Adapts drying technology automatically to fabric capacity and typology.
Check common issues like switched on status, program selection, door closure, and water container before calling service.
Troubleshooting for long drying times or damp clothes: check program, spin, filters, and load size.
Checks for power supply, plug connection, fuse, and door closure when the dryer does not operate.
Instructions to switch off and contact service if the dryer is noisy.
Addresses issues with filter cleaning indicator and water container indicator lights.
Contact service for unresolved problems. Charges may apply for incorrect installation or misuse.
Always use genuine spares available directly from Service.
Recommend servicing and repairs only by an Authorised Service engineer for safety and efficiency.
Product guaranteed under terms on certificate. Check warranty conditions online. Fill form or contact for assistance.
Confirms compliance with relevant European safety, health, and environmental requirements.
Disconnect plug, cut cable, break hinges/lock to prevent children shut-in. Prevents fires or poisoning.
Declines responsibility for printing errors and reserves the right to make changes without notice.
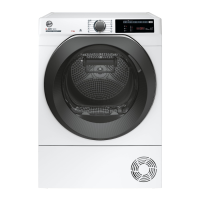
| Door color | Black |
|---|---|
| Door hinge | Left |
| Drum volume | 125 L |
| Control type | Rotary, Touch |
| Display type | LED |
| Loading type | Front-load |
| Certification | Woolmark |
| Drum material | Stainless steel |
| Drying system | Heat pump |
| Product color | White |
| Reversible doors | - |
| Appliance placement | Freestanding |
| Inverter technology | Yes |
| Built-in condensate drainage | No |
| Cycle time | 235 min |
| Noise level | 69 dB |
| Drying class | A |
| Drum capacity | 9 kg |
| Number of drying programs | 16 |
| Apps supported | hOn |
| Delay start (max) | 24 h |
| Water reservoir location | Door |
| Power plug type | Type F (CEE 7/4) |
| AC input voltage | 220 - 240 V |
| Energy consumption | 1.59 kWh |
| Energy efficiency scale | A+++ to D |
| Annual energy consumption | 194 kWh |
| Package depth | 620 mm |
| Package width | 596 mm |
| Package height | 650 mm |
| Package weight | 44800 g |
| Depth | 611 mm |
|---|---|
| Height | 850 mm |
| Weight | 43300 g |