Attaching the Propeller and Spinner
Remove the prop nut and prop washer from the engine.
Install the spinner back plate. Install the propeller, the
prop washer and then the prop nut in that order (see
photo). Securely tighten the prop nut using an
adjustable wrench. Install the spinner cone.
Starting the Evolution Engine
Fuel
The Evolution Engine comes pre-run and adjusted from
the factory. We recommend using high quality Cool
Power Omega, Hangar 9
®
AeroBlend
™
or Power Master
fuels containing 10 to 15% Nitro. The Evolution Engine
has been test run using these fuels. If another brand of
fuel is used, it may be necessary to slightly adjust the
needle valves to compensate for the differences in fuel.
Glow Plug
The Evolution Engine comes with a specially designed
“Super Plug” that prevents idle and transition
flameouts. The plug’s unique shape directs incoming
fuel/air mixture away from the plug element. When
replacing the plug, be sure to replace it with another
Hangar 9 Super Plug (HAN3011).
Starting the Engine
Step 1. Fill the tank with the above-mentioned 10 or
15% fuel.
Step 2. Reattach the fuel lines, making sure the vent
and clunk line are attached to the fuel nipple
and the muffler pressure nipple.
Caution: Do not attach the glow driver yet.
Step 3. With the throttle fully open, place your thumb
over the carburetor and rotate the prop clock-
wise through 6 complete revolutions, thus
priming the engine.
Step 4. Close the throttle to the idle position and have
a helper hold your airplane.
5
Select a servo arm that has a hole located 11mm or
7/16" out from center and attach the other end of the
throttle linkage. (see photos below)
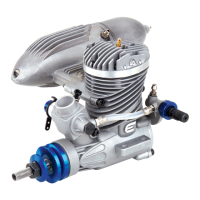
With low-throttle and mid-trim (idle position), the
throttle barrel should be open 1mm, giving a low rpm
idle (see photo above). Adjust the length of the pushrod
until the throttle barrel is exactly 1mm open. Check to
be sure the servo is moving in the correct direction. Full
throttle should open the throttle barrel fully, while low-
throttle, low-trim should completely close the throttle
barrel. Reverse the servo throw if necessary.
Note: It may be necessary to slightly adjust the
length of the throttle pushrod to achieve the
correct mid-trim, low-stick idle position.
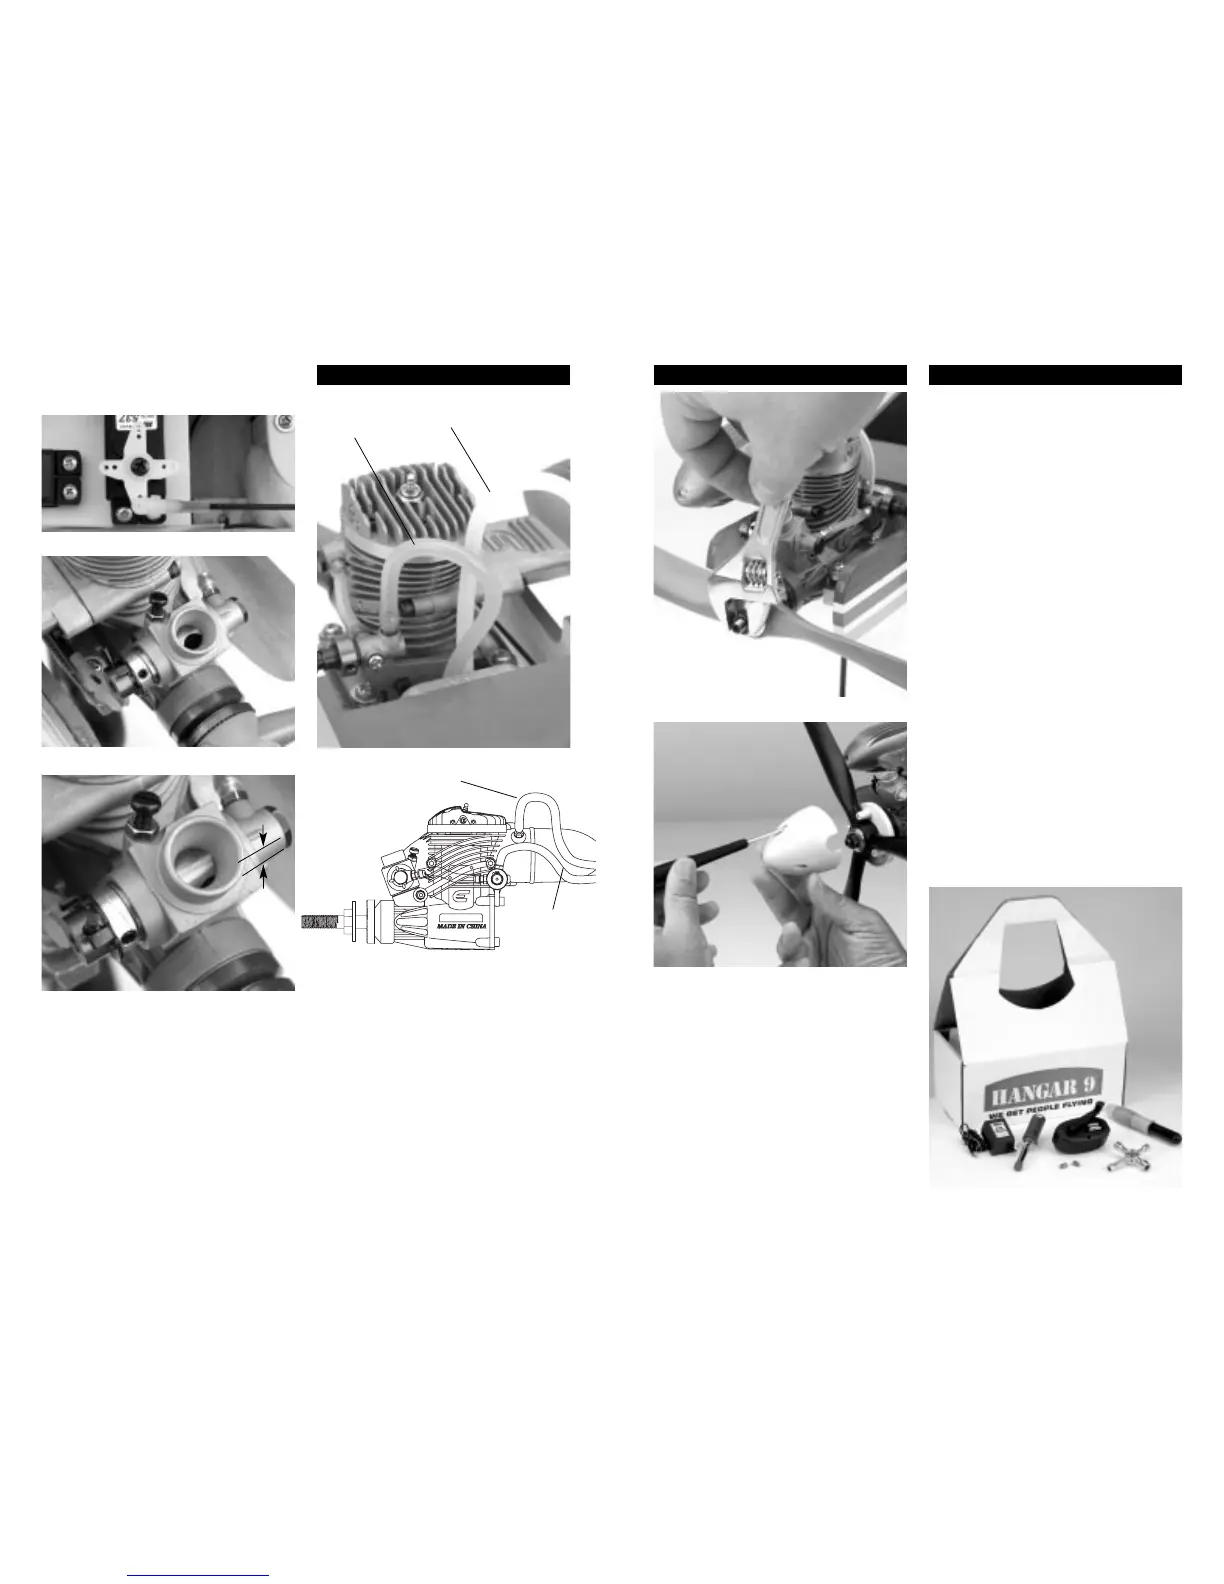
Attaching the Fuel Lines
Using medium silicon fuel tubing, attach the fuel
tank’s clunk line to the fuel nipple. This line will supply
fuel to the engine. Attach the vent line to the muffler
pressure nipple. This line pressurizes the fuel tank with
the muffler pressure, creating consistent fuel flow,
regardless of the airplane’s altitude.
4
Securely tighten the prop nut using an adjustable wrench.
Fuel Line
Vent Line
Vent Line
Fuel Line
At low throttle, mid-trim, the throttle barrel should be 1 mm open.
1 mm
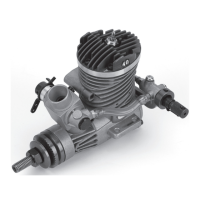
The Hangar 9 START KIT includes everything needed, except fuel and
starter, to get the Evolution Engine running.
1/2 throttle
Linkage 11mm out