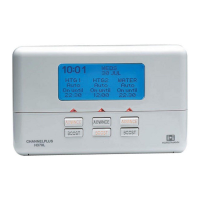
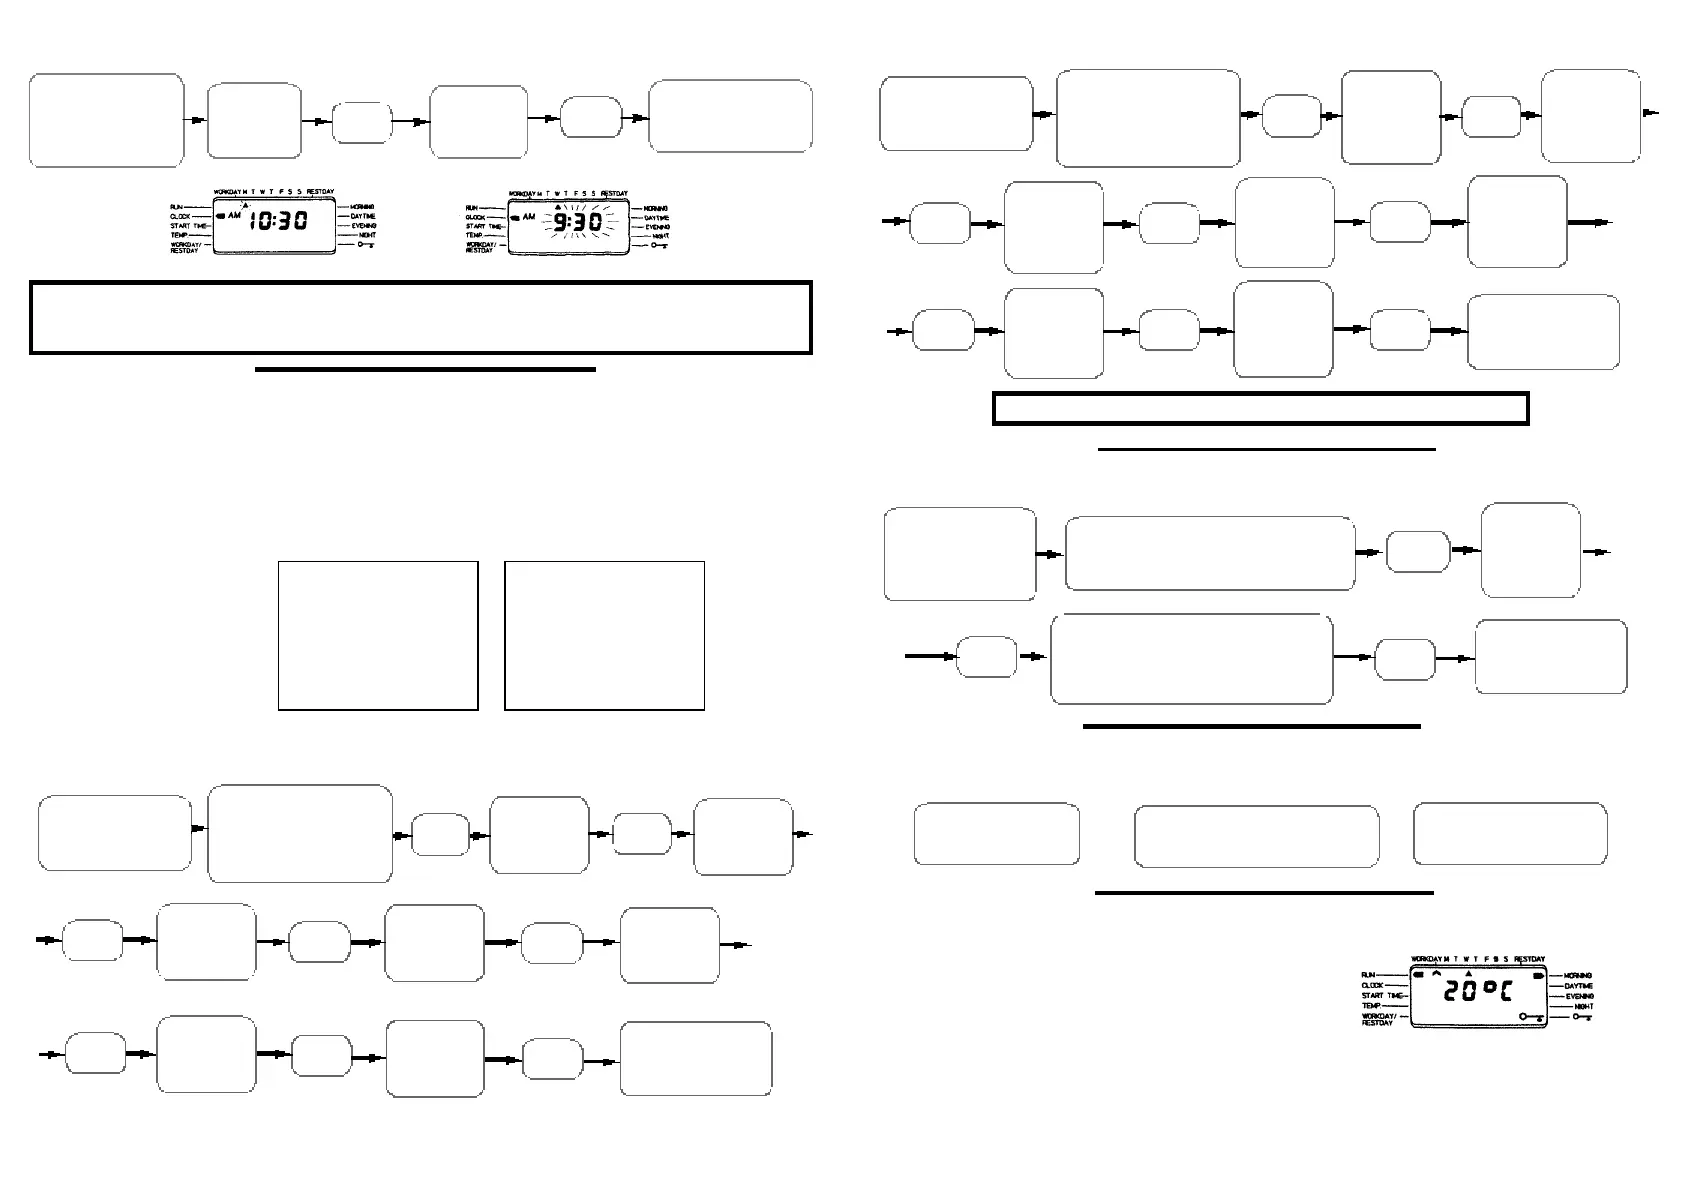
SETTING DAY AND TIME OF DAY
Press the SET button
until SET indicator is next
to the clock position on
the display.
(see diagram)
Use PLUS
and MINUS
buttons to
adjust time
Return SET button unit
the SET indicator is next to
the RUN position.
Use PLUS
and MINUS
buttons to
adjust day
Press
ENTER
Press the SET button
until the SET indicator is
next to the STARTTIME
position.
Press
ENTER
Press
ENTER
Press
ENTER
CHANGINGTHESTARTTIMES
The timed setting for the
MORNING Workdaywill now
flash
Use the PLUS and MINUS
buttons to alter the start time
DEFAULT TIME SETTINGS
The default factory settings
are shown, however if you
wish to change these
proceed as instructed by the
following sections on page
2 and page 3.
NOTE: When setting the time or altering the temperature settings, if a period exceeding 60 seconds is
allowed to elapse between button presses then the CentaurStat will automatically return to the run
position. Any alterations made since the last press of the ENTER button will not recognised.
Press
ENTER
TIME AND TEMPERATURE SETTINGS
The CentaurStat 7 has four temperature settings per 24 hours WORKDAY and four temperature settings
per 24 hours RESTDAY (MORNING, DAYTIME, EVENING and NIGHT). These all have different start times
and temperature settings (See default time settings below). If a period is not required the setting can
be switched OFF.
WORKDAY TIMES TEMPS.
Mon - Fri
MORNING 6:00
am 20
o
C
DAYTIME 8:30
am 18
o
C
EVENING 5:00
pm 21
o
C
NIGHT 10:00
pm15
o
C
RESTDAY TIMES TEMPS.
Sat - Sun
MORNING 7:00
am 20
o
C
DAYTIME 10:00
am 19
o
C
EVENING 5:00
pm 21
o
C
NIGHT 11:00
pm15
o
C
Repeat for
DAYTIME
Workdaytime
setting
Press
ENTER
Repeat for
NIGHT
Restdaytime
setting
Repeat for
MORNING
Restdaytime
setting
Repeat for
EVENING
Restdaytime
setting
Repeat for
DAYTIME
Restdaytime
setting
Repeat for
NIGHT
Workdaytime
setting
Repeat for
EVENING
Workdaytime
setting
Press
ENTER
Press
ENTER
Press
ENTER
Press
ENTER
Press the SET button
until the SET indicator is
next to the RUN
position.
Press the SET button
until the SET indicator is
next to the TEMP.
position.
Press
ENTER
Press
ENTER
Press
ENTER
The day of week indicator will now flash
against the current day.
Use the PLUS(Restday) or MINUS(Workday)
buttons to nominate your selection
Repeat for
DAYTIME
Workday
temperature
setting
Press
ENTER
Repeat for
NIGHT
Restday
temperature
setting
Repeat for
MORNING
Restday
temperature
setting
Repeat for
EVENING
Restday
temperature
setting
Repeat for
DAYTIME
Restday
temperature
setting
Repeat for
NIGHT
Workday
temperature
setting
Repeat for
EVENING
Workday
temperature
setting
Press
ENTER
Press
ENTER
Press
ENTER
Press
ENTER
Press the SET button
until the SET indicator is
next to the RUN
position.
CHANGING THE TARGET TEMPERATURES
SETTING WORKDAYS AND RESTDAYS
Press the SET button
until the SET indicator is
next to the
WORKDAY/RESTDAY
position.
Press
ENTER
The temperature setting
for the MORNING Workday
will now flash
Use the PLUS and MINUS
buttons to alter the start time
Repeat for
the nextday
selection
temperature
setting
Press
ENTER
Press
ENTER
Repeat until all days have been completed
NOTE: This process will only allow 2 days for
restday and 5 days for workday
Press the SET button
until the SET indicator is
next to the RUN
position.
TEMPERATURE OVERRIDE
TEMPERATURE LOCK
PAGE 2
Ensure the SET
indicator is in the normal
RUN position.
Use the PLUS and MINUS buttons to
increase or decrease the temperature
settings or switch the system OFF
The CentaurStat will operate
on this new setting unit the
next time period
The OFF setting can be achieved by setting above 35
o
C or below 6
o
C
The temperature lock facility allows you to ‘lock in’ the target
temperature of the current heating period.
With the SET indicator in the RUN position press the ENTER
button. A KEY symbol will appear in the KEY position on the
right hand side of the display
The locked temperature will now override all other temperature settings until the lock is cancelled.
All controls buttons other then the ENTER button will be inoperative.
To cancel the lock simply press the ENTER button again and the CentaurStat will revert to the normal
programmed settings.
PAGE 3

 Loading...