The Series 7500 Easy Access Overhead Concealed & Direct Drive Swing Door Operator, equipped with a C4190 Control, is designed for automated swing door operation, prioritizing ease of access and safety. This device is intended for installation by trained and experienced installers familiar with local codes and ANSI A156.19 standards for power-operated doors. Proper installation and adjustment are critical to ensure safe and correct operation, adhering to Horton Automatics recommendations and all applicable code requirements.
Function Description:
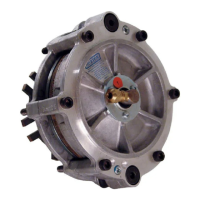
The Series 7500 operator automates the opening and closing of swing doors, offering both overhead concealed and direct drive arm configurations. It integrates with activation switches to initiate door cycles and features a C4190 control system for managing various operational parameters. The operator is designed to provide easy access, making it suitable for a range of applications, including those requiring compliance with handicap codes. The system includes mechanisms for adjusting door speed, deceleration, acceleration, and hold-open times, ensuring smooth and controlled door movement. It also incorporates safety features such as current limiting to prevent excessive force and a breakout stop function for emergency situations.
Important Technical Specifications:
- Power Requirements: 120 VAC, 60Hz, 15 Amp service (in conduit) to the header. Non-North American voltages can be 240 VAC, requiring an operator with a 240VAC power supply. Power can be routed through the top of the jamb for single swing units or at the center of the header for pairs.
- Opening Size: The rough opening should be 1/4" (6mm) taller and 1/2" (13mm) wider than the unit/frame. The opening must be plumb and square, with a level threshold and swing area.
- Handicap Code Requirements (ANSI 117):
- Minimum 24" (610mm) opening clearance from the door jamb at the opening side to any structure.
- Activation switches should be located 36" (914mm) to 42" (1067mm) from the floor.
- A minimum of 5'x5' (1524mm x 1524mm) clear and level floor area is required on both sides of the doorway. Maneuvering room can be eliminated if the actuating switch is placed in an accessible location outside the swing of the door.
- Beveled thresholds should have a maximum height of 1/2" (6mm).
- Bottom horizontal rails on aluminum/glass doors must be at least 7 1/2" (190mm) (local codes may require more).
- Door Panel Prep (7600 & 7800 Series): Specific drilling and mounting requirements for wood or metal doors are detailed, including locations for pivot points, drive blocks, and various fasteners.
- Fasteners: A fastener chart specifies drill/countersink sizes and tap sizes for different fasteners (#6, #10, #14 SMS, #1/4-20 MS) and masonry anchors (C1423 green anchor for 1/4" drill, C1424 blue anchor for 5/16" drill).
- Door Weight and Opening/Closing Times (ANSI Chart):
- Door Leaf Width (Inches/mm):
- 30" (762mm): 3.0 sec (100-175 lbs), 3.5 sec (200 lbs)
- 36" (914mm): 3.0 sec (100 lbs), 3.5 sec (125-150 lbs), 4.0 sec (175-200 lbs)
- 42" (1067mm): 3.5 sec (100 lbs), 4.0 sec (125-150 lbs), 4.5 sec (175-200 lbs)
- 48" (1219mm): 4.0 sec (100 lbs), 4.5 sec (125-150 lbs), 5.0 sec (175 lbs), 5.5 sec (200 lbs)
- Force Requirements: The force required to prevent a door from opening or closing shall not exceed 15 lbf (67N) applied one inch (25mm) from the latch edge.
- Kinetic Energy: The kinetic energy of a door in motion shall not exceed 1.25 lbf (5.56N).
- Opening Time: Doors shall be field adjusted to open to check or 80 degrees in three seconds or more. Total opening time to full-open shall be four seconds or more.
- Closing Time: Doors shall be field adjusted to close from 90 degrees to 10 degrees in three seconds or longer, and from 10 degrees to fully closed in 1.5 seconds or more.
- Hold-Open Time: The door shall remain fully open for at least 5 seconds unless a sensing device is used.
- Power Failure: Manual pressure not to exceed 15 lbf (67N) at a point one inch (25mm) from the latch edge (may vary by local code).
Usage Features:
- Operator Handing: The operator's handing (LH, LHR, RH, RHR) must be confirmed before installation. Instructions are provided for changing the operator's hand if needed.
- Overhead Concealed Arm (7500/7800 Series): This configuration involves an arm concealed within the header, connecting to the door panel via a pivot base plate. Installation includes aligning the door in the closed position, inserting the pivot pin, and securing the power arm to the output shaft.
- Direct Drive Arm (7600 Series): This configuration uses a direct drive arm connected to the output shaft and then secured to the door panel. Installation involves positioning the power arm onto the output shaft at 90 degrees to the opening and then securing it to the panel.
- Bottom Pivot Installation: Pivots are secured to the floor using FHSMS and plastic anchors. Options include non-threshold and threshold pivots, with specific instructions for marking hole locations.
- Activation Switches (C1316-2 & C1260):
- C1316-2 Switch Assembly: Surface-applied or flush-mounted 4"x4"x1 1/2" junction box. Requires drilling a 1/4" hole for wiring.
- C1260 Switch Assembly: 6 1/4" diameter plate, typically push-to-open. Requires pulling 24 VAC, 2 conductor wire into the box and connecting to microswitch terminals (not high voltage).
- Remote Switch Locations: Low voltage class II wiring (in conduit) is required for remote switch locations, which should be predetermined and wired before installation.
- Operator Adjustments: The C4190 control allows for fine-tuning various parameters:
- Open/Close Check Switch Cams: Adjust for switch activation at 10 degrees from full-closed/full-open.
- L.OUT (Lock Out Time Delay): Sets the duration to ignore the safety sensor during door closing.
- LIMIT (Current Limiting): Sets the amount of opening force.
- DELAY (Time Delay Adjustment): Suggested minimum 5 seconds after full open.
- OBST (Obstruction): Replaces time delay cancel on old C7160-3 controls.
- HOLD (Hold Voltage Function Control): Sets hold-open voltage after a nominal 10-12 second delay from the beginning of the actuation signal. Also sets speed for Stop & Seek mode.
- SPEED (Open Speed Adjustment): Sets the open speed of the operator.
- CHECK (Open Check Speed Adjustment): Sets the speed after the open check switch activates.
- DACCL (Open Deceleration Adjustment): Determines how quickly the door slows after the open check switch is tripped.
- ACCEL (Open Acceleration Adjustment): Sets motor acceleration to open speed setting.
- Closing Speed Adjustment: Suggested minimum 4 seconds.
- Jumpers (JB1, JB2, JB3):
- JB1 (Push-n-Go): With jumper in place, a slight push on the door actuates the operator.
- JB2 (Disable Touch Stop): Remove to disable touch stop.
- JB3 (Lock Enable): Inserts a 0.25 second delay to allow the lock to release before the door starts to move.
- Safety Decals: Minimum 6" (152mm) diameter decals must be visible from both sides of the door. Required decals include "AUTOMATIC CAUTION DOOR ACTIVATE SWITCH TO OPERATE" (C7280) and "Daily safety check" (C1690-2) on the interior door jamb. Optional decals include "ACTIVATE SWITCH OR PUSH TO OPERATE" (C7282), "ACTIVATE SWITCH OR PULL TO OPERATE" (C7281), "Handicap symbol" (C1688), and "DO NOT ENTER ONE-WAY AUTOMATIC DOOR" (C1631-3).
Maintenance Features:
- Door Panel Adjustments: Manual adjustments can be made if the door binds or does not swing smoothly. This includes adjusting the drive block, power arm, and bottom pivot. Glazing is advised before final adjustments.
- Changing Operator Hand and/or Closing Spring: Detailed instructions are provided for removing and replacing a broken spring, changing spring direction, or changing operator hand. This process involves disassembling parts of the gear train, output shaft, and bearing plates.
- Reversing Motor Leads: If changing spring direction or operator hand, motor leads at the potentiometer must be reversed.
- Breakout Stop: If the door is equipped with a fixed or emergency breakout stop, it should be tested several times to ensure it flips over and turns off the operator when the door is in the breakout position. Door height adjustment may be needed if it does not work properly.
- Pre-loading Spring: After spring changes, the spring must be pre-loaded by rotating the arm on the output shaft until the outer spring hooks clip into the spring retainer bracket, then rotating an additional 1/2 turn (180 degrees) and holding that position before reinstalling the chassis stop.
- Check Cam Adjustment: After the spring is pre-loaded and the operator is installed, the open check cam and close check cam must be adjusted.
- Troubleshooting: In case of problems or suspected hazardous situations, the door should be taken out of automatic service until a professional inspection is made. Horton Automatics Technical Assistance is available for questions.