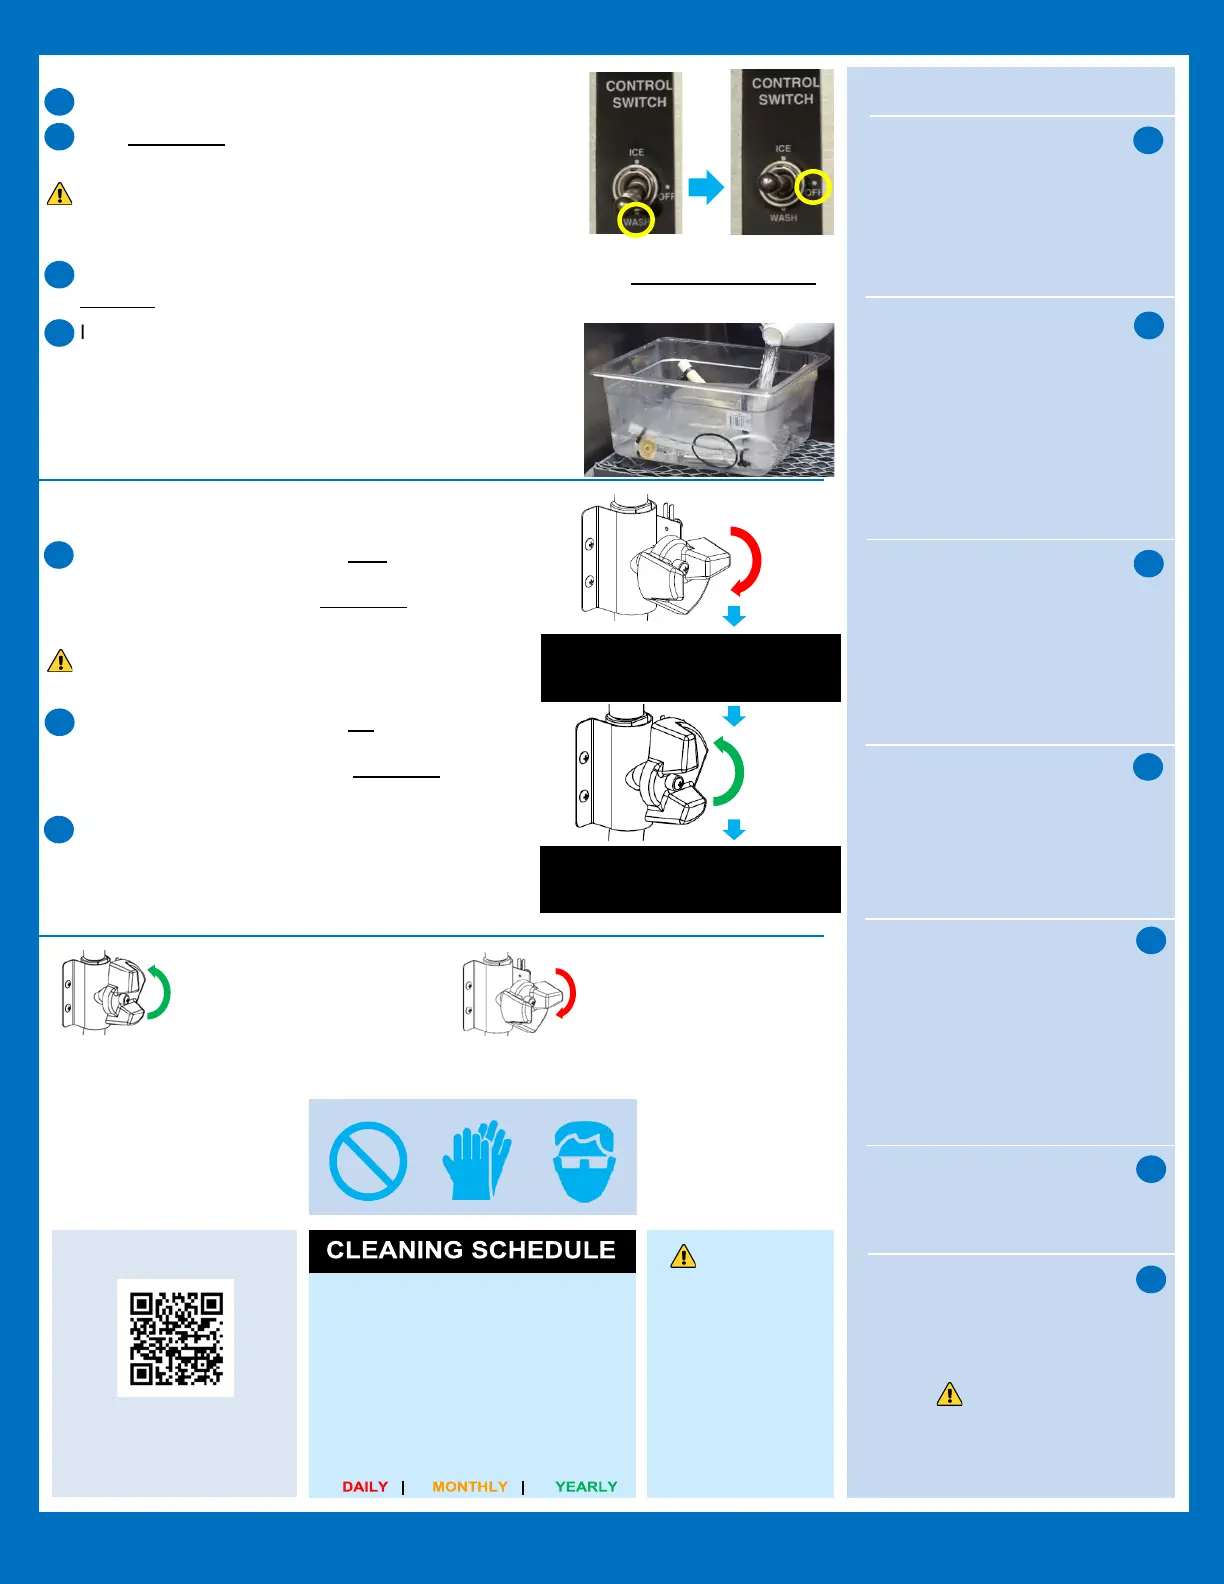
Move the control switch to WASH, replace Front Panel.
After 30 minutes, remove Front Panel, then move the
control switch to OFF.
NOTICE! DO NOT leave the control switch on WASH
for extended periods when water tank is empty. It will
damage water pump seals.
Remove the Front Insulation Panel, remove the Drain Plug. Clean all items (See
Step 10). Once water tank has drained, replace all items.
In bad water conditions, a more thorough cleaning may
be required. Turn off power supply, clean all items in a
solution of 5 oz. of Scale Away per gallon of warm
water. Rinse and replace the cube guides, float switch,
water supply tubes, spray tubes and spray guides. Turn
on power supply. Otherwise, continue to Step ⓫.
Cleaning Rinse:
Turn the cleaning valve to the right until completely
horizontal (closed). Move the control switch to ICE,
replace Front Panel. After 3 minutes, remove the
Front Panel, move switch to OFF.
NOTICE! ICE MACHINE WILL NOT WORK,
unless valve is completely closed.
Turn the cleaning valve to the left until completely
vertical (open). Move the control switch to WASH,
replace the Front Panel. After 5 minutes, remove
the Front Panel, switch to OFF.
Remove the Front Insulation Panel, then remove
the Drain Plug. After the water tank has drained,
replace all items. Continue to Sanitation – Step ⓮
on front...
Tech Support: 1.800.233.1940
CONTROL PANEL
ICE > 3 minutes > OFF
OPEN
30
min.
sanitizing continued…
• Remove the front
insulation panel and drain
plug
• After the water tank has
drained, replace drain plug and
front insulation panel
RINSE 1: (Steps 19-21)
• CLOSE cleaning valve
• Move control switch to ICE,
replace the front panel
• After 3 minutes, remove the
front panel
• Move control switch to OFF
• OPEN cleaning valve
• Move control switch to WASH,
replace the front panel
• After 5 minutes, remove the
front panel
• Move control switch to OFF
• Remove the front
insulation panel and drain
plug
• After the water tank has
drained, replace drain plug and
front insulation panel
RINSE 2 & 3: (Steps 22-28)
• Repeat 2x (Steps 19–21) for
complete ice/food safety
• Clean the dispenser /
storage bin liner with a
neutral cleaner (dish soap)
• Rinse thoroughly
• CLOSE cleaning valve
• Move control switch to ICE,
replace the front panel
• Replace all panels in their
correct positions
CONTROL PANEL
WASH > 5 minutes > OFF
INSTRUCTION MANUAL:
hoshizakiamerica.com/support
Type in the model number of your
ice machine (including dashes) to
To allow cleaning solution flow to
the inside the evaporator
Turn left to open (vertical)
Must be closed for normal ice
making operation
Turn right to close (horizontal)
NOTICE!
IF ICE MAKER IS ON DISPENSER,
remember to turn on the dispenser
after cleaning
WARNING!
DO NOT use
ammonia type
cleaners. Can cause
damage to icemaker
WEAR liquid-proof
gloves and goggles
protect skin & eyes
from cleaning &
sanitizing chemicals
● Scoop
● Water Filters
● Exterior
● Bin Door/Top Kit
● Ice Maker/Bin
● Water Supply Inlet
● Condenser
● Water Hoses
Dish soap, rinse well
Check psi, change if req’d
Dish soap & damp cloth
Warm water & clean cloth
Follow these instructions
Clean inlet screen
Inspect. Clean with brush
Inspect. Replace if req’d
● ● ●
18
7
8
9
10
11
12
13
AMMONIA
Cleaners
19
20
21
22
30
29
Need Service or Repair? Locate your closest Hoshizaki Certified Service Tech: hoshizakiamerica.com/locate-service-rep
 Loading...