4
Installing Handles and Tapered Dowel Rod
Materials Required:
2 – Solid Wood Handles
4 – 1/4” x 1 3/4” Carriage Head Bolts with 1/4” Flat Washer, 1/4” Lock Washer & 1/4” Nut
1 – Tapered Dowel Rod
2 – 1” Wood Screws
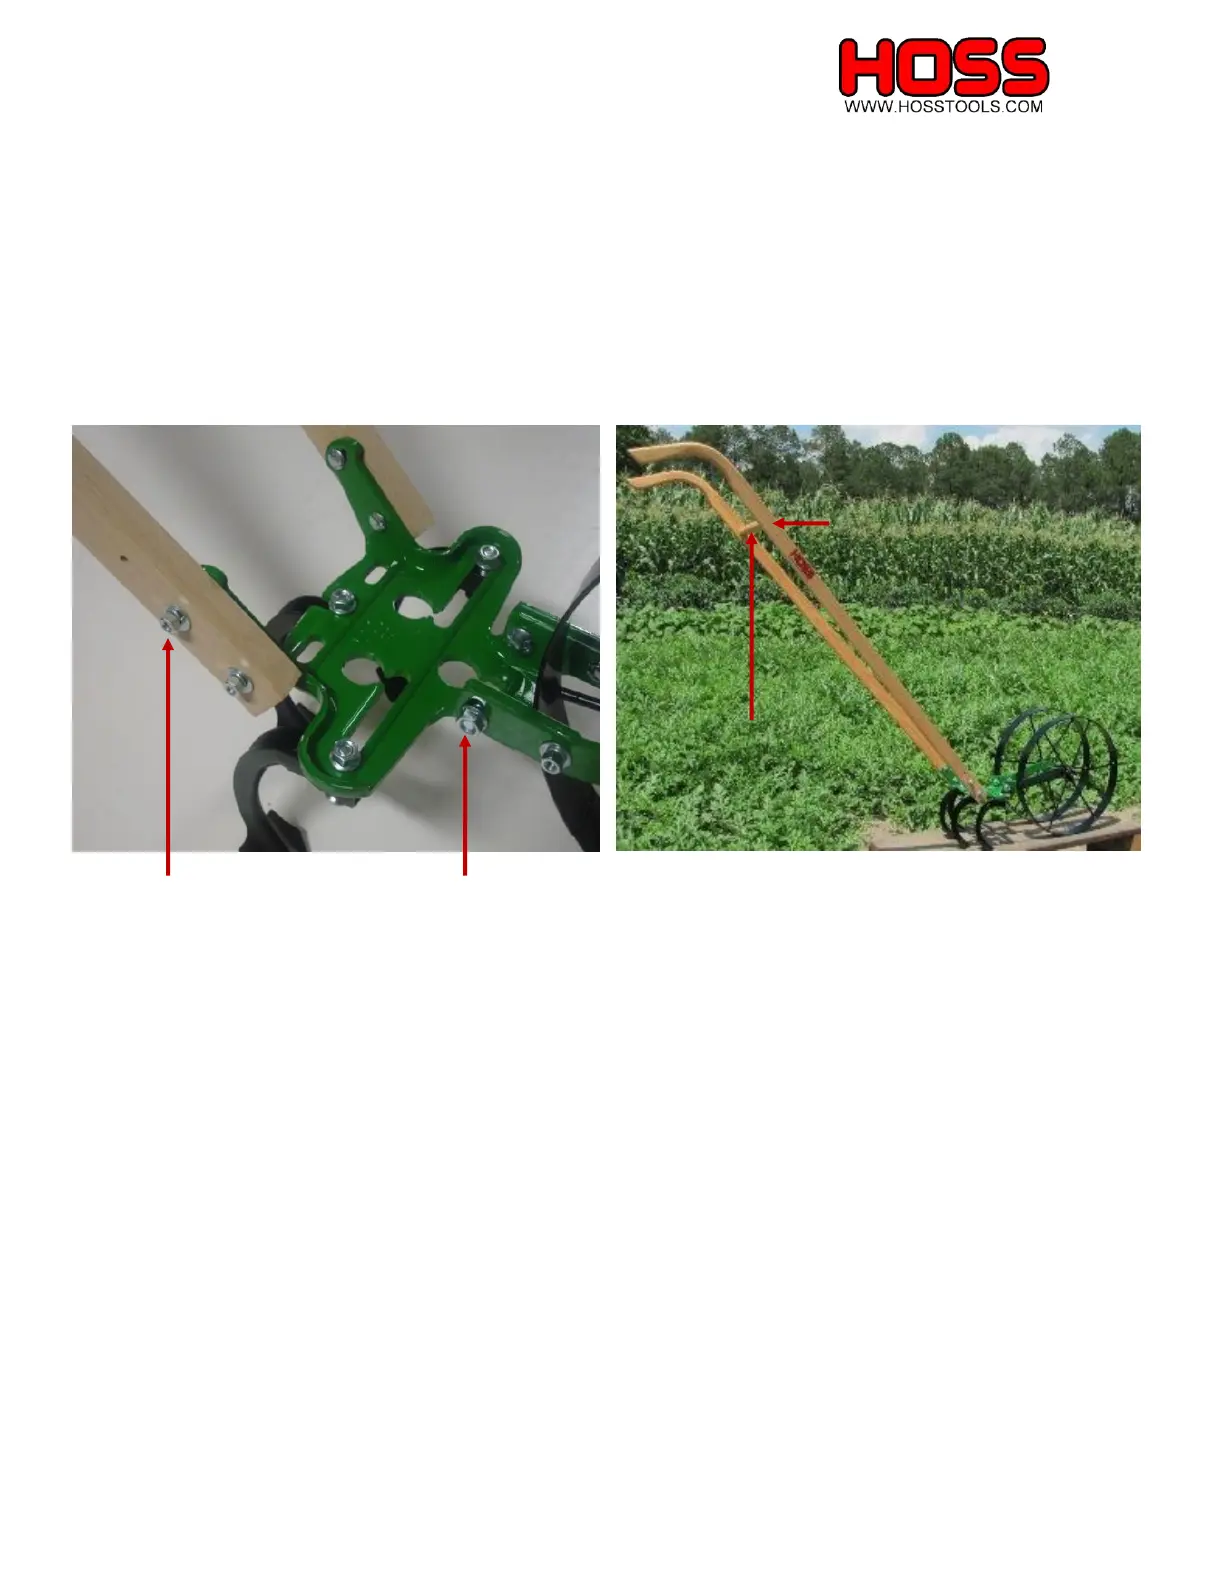
1) Position handles to the outside of each toolbar handle mount.
2) Place four 1/4” x 1 3/4” carriage head bolts through toolbar handle mount, and out through the
handle (logo should be facing outward on each handle).
3) Fasten using 1/4” flat washer, then 1/4” lock washer and 1/4” nut.
4) Adjust handle to correct height per user (see left photo above).
5) Secure handle position using a 7/16” wrench.
6) Place tapered dowel rod between handles at the mortised location (slight tension is common when
installing tapered dowel rod). A twisting motion will help seat the rod into the hole. Both sides should
bottom out against tapered dowel shoulder.
7) Insert the 1” wood screws into the pilot holes in the handles at the tapered dowel location (2 pilot
holes, one per side). Tighten both sides down snug, securing the tapered dowel.
*Tip: Apply linseed oil to handles with a soft cloth to ensure longer life.
Pilot Hole for 1” Wood Screw
 Loading...