®
8 1
76
2 3
4 5
5.
4.
3.
1.
2.
7.
8.
1.
2.
3.
6.
FAN FOLD
PLEASE KEEP THESE INSTRUCTIONS FOR FUTURE
REFERENCE AS THEY CONTAIN IMPORTANT INFORMATION.
ASSEMBLY (CONTD.) ASSEMBLY (CONTD.)
ASSEMBLY (CONTD.)
5+
6 x 45º
b
a
3
4
4
4
2
1
5
3
2
1
15.2 cm / 6 in
20.3 cm / 8 in
20.3 cm / 8 in
45º
45º
a
a
b
b
6 in / 15.2 cm
8 in / 20.3 cm
6 in
15.2 cm
6 in
15.2 cm
8 in
20.3 cm
8 in
20.3 cm
8 in
20.3 cm
45º
a
b
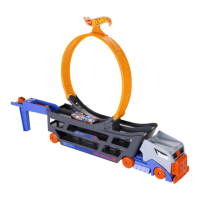
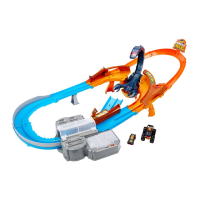
Turn power switch on. Place car at starting point as shown.
NOT FOR USE WITH SOME HOT WHEELS
®
VEHICLES.
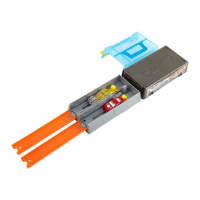
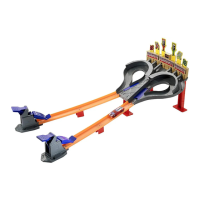
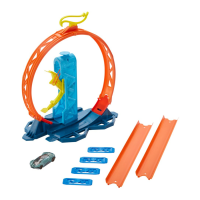
BRIDGE
x1
x2
FTC97 HW DOM I/S SIZE:23.4” x 8.3” COLOR: 1C+1C
FTC97-0970
1101748874-DOM
service.mattel.com
ON / OFF SWITCH
Push fingers through holes on
bottom to remove batteries.
Open battery cover and insert 2 “D” size alkaline batteries (not included) as shown. For best
performance, use alkaline batteries. Replace the batteries when the booster no longer propels
the car through the set.
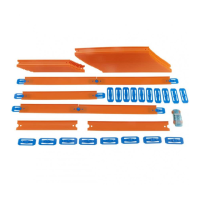
CONTENTS
45º
a
a
b
b
6 in / 15.2 cm
8 in / 20.3 cm
8 in / 20.3 cm
REQUIRES 2 “D" SIZE (LR20) ALKALINE BATTERIES (NOT INCLUDED).
APPLY LABELS
LABEL SHEET
BATTERY SAFETY INFORMATION
BATTERY INSTALLATION
• Non-rechargeable batteries are not to be recharged.
• Rechargeable batteries are to be removed from the product before being charged.
• Rechargeable batteries are only to be charged under adult supervision.
• Do not mix alkaline, standard (carbon-zinc), or rechargeable batteries.
• Do not mix old and new batteries.
• Only batteries of the same or equivalent type as recommended are to be used.
• Batteries are to be inserted with the correct polarity.
• Exhausted batteries are to be removed from the product.
• The supply terminals are not to be short-circuited.
• Dispose of battery(ies) safely.
• Do not dispose of this product in a fire. The batteries inside may explode or leak.
In exceptional circumstances batteries may leak fluids that can cause a chemical burn injury or ruin your
product. To avoid battery leakage:
Battery Performance Note: For best performance use alkaline batteries. Battery life may vary
depending on battery brand.
Protect the environment by not disposing of this product or any batteries with household
waste. This symbol indicates that this product shall not be treated as household waste. Check
your local authority for recycling advice and facilities.
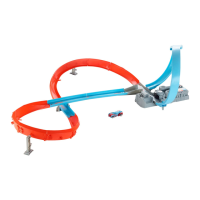
STARTING POINT
STARTING POINT
STARTING POINT
ASSEMBLY
©2017 Mattel. All Rights Reserved. Mattel, Inc., 636 Girard Avenue, East Aurora, NY 14052, U.S.A. Consumer Services 1-800-524-8697. Mattel
U.K. Ltd., Vanwall Business Park, Maidenhead SL6 4UB. Helpline 01628 500303. Mattel Australia Pty., Ltd., Richmond, Victoria.
3121.Consumer Advisory Service - 1300 135 312. Mattel East Asia Ltd., Room 503-09, North Tower, World Finance Centre, Harbour City,
Tsimshatsui, HK, China. Tel.: (852) 3185-6500. Diimport & Diedarkan Oleh: Mattel Southeast Asia Pte. Ltd. , No 19-1, Tower 3 Avenue 7,
Bangsar South City, No 8, Jalan Kerinchi, 59200 Kuala Lumpur, Malaysia. Tel: 03-78803817, Fax: 03-78803867.
45
º
a
b
TO PLAY
TO PLAY (CONTD.)
5
4
4
4
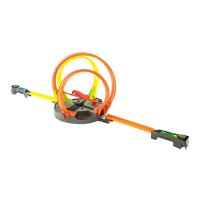
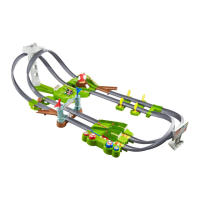
FIGURE 8 RACEWAY
INSTRUCTIONS
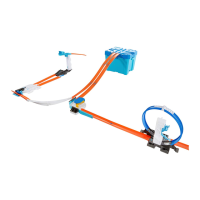
ADJUSTABLE BRIDGE
ON / OFF SWITCH
NOTE: TRACK SHOULD GO OUTSIDE THE TABS.
NOTE: O mark must be inside.
NOTE: TRACK SHOULD GO OUTSIDE THE TABS.
NOTE: TRACK SHOULD GO OUTSIDE THE TABS.