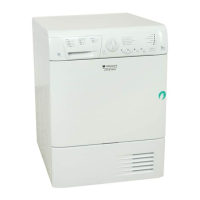
This document serves as a comprehensive instruction booklet for the Ariston AS60VX Tumble Dryer, providing detailed guidance on installation, operation, maintenance, and troubleshooting. It is designed to ensure safe and efficient use of the appliance, catering to both first-time users and those seeking to optimize their drying experience.
Function Description
The Ariston AS60VX Tumble Dryer is designed to efficiently dry laundry by drawing in cool, clean air, heating it, and then distributing it through clothes as they are gently tumbled. The moist air is subsequently expelled through a vent tube at the back of the dryer. This process ensures that clothes are dried thoroughly and are ready for wear or ironing. The dryer offers various programmes and heat settings to accommodate different fabric types and load sizes, aiming to provide optimal drying results while minimizing energy consumption.
Usage Features
The dryer's operation is straightforward, beginning with plugging the dryer into an electrical socket. Users are advised to sort laundry by fabric type and ensure the filter is clean and in place before loading. The machine should not be overloaded, and items should not obstruct the door seal.
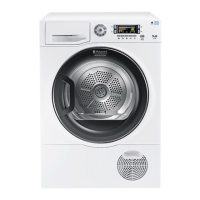
The control panel features several key components:
- PROGRAMMES Knob: This knob is used to select the desired drying programme. It should be rotated clockwise, never counter-clockwise, until the indicator points to the chosen programme. The "Drying Guide" on the control panel provides a user-friendly table of fabric types and load capacities to assist in programme selection.
- HEAT Button: This button selects the drying temperature. "OUT" indicates HIGH heat, suitable for most fabrics, while "IN" indicates LOW heat, ideal for more delicate items.
- TIMER Knob: This knob allows users to set a delay for the dryer's start time. It is rotated clockwise to select the desired delay in hours. If too far, it can be turned counter-clockwise to adjust.
- START Button: Once a programme and any delay are set, pressing this button begins the drying cycle. The "ACTIVE" indicator light will glow, signaling that the dryer is in use, and will remain on until the door is opened or power is turned off.
- ALARM Button: This button allows users to eliminate the buzzer sound that signals the end of a drying cycle. "OUT" means the buzzer is ON, and "IN" means the buzzer is OFF.
The dryer offers several programmes:
- Automatic Drying (average loads): Dries clothes completely for loads from 1 to 3kg of cotton, polycotton, or synthetics. It requires HIGH heat for optimal results, though LOW heat can be selected for a slightly drier outcome with larger loads.
- Automatic Drying (large loads): Similar to average loads but for larger capacities (3 to 6kg of cotton). Also requires HIGH heat.
- Easy Iron: A brief 10-minute programme (8 minutes heat, 2 minutes cool tumble) designed to fluff fibres of clothing ready for ironing, making them easier to manage. It is crucial to note that this is not a drying programme and should not be used for wet articles. For best results, loads should not exceed maximum capacities (2.5kg cotton, 2kg synthetics, 2kg denim), and items should be unloaded immediately after the programme ends.
- Timed Drying: Allows users to set a specific drying time (up to 120 minutes) for wet clothes, acrylic fibres, or small loads (less than 1kg). Users select the desired heat setting (HIGH or LOW) and then rotate the PROGRAMMES knob to the desired time.
- Cool Tumble Phase: This is the final phase of all programmes, lasting approximately 10 minutes, where heating elements turn off and clothing is cooled down. This phase should always be allowed to complete to ensure fabrics are properly cooled and prevent wrinkling.
During a drying programme, users can check on their laundry and remove dry items. The cycle can be resumed by closing the door and pressing the START button again. Approximately 10 minutes before completion, the dryer enters the Cool Tumble Phase. The buzzer will sound (if activated) when drying is complete, prompting users to open the door, remove laundry, and clean the filter.
Laundry Guidelines:
- Always check clothing labels for tumble drying suitability.
- Sort laundry by fabric type.
- Empty pockets, check buttons, close zippers and hooks, and tie loose belts/strings.
- Wring out items to remove excess water.
- Do not load dripping wet clothes.
- Adhere to maximum load capacities (6kg natural fibres, 3kg synthetics) to avoid reduced drying performance.
- Items unsuitable for tumble drying include those with rubber, plastic film, flammable substances, glass fibres, dry-cleaned items with ITCL Code ☑, and large bulky items that obstruct airflow.
Drying Times:
Drying times are approximate and depend on factors such as:
- Amount of water retained after spin cycle.
- Fabric type, texture, and thickness.
- Quantity of laundry (single items or small loads may take longer).
- Desired dryness level (for ironing or complete dryness).
- Heat setting used.
- Room temperature (colder rooms increase drying time).
- Bulk of items (bulky items may need to be removed, shaken, and returned to the dryer multiple times).
- Avoid over-drying to maintain fabric softness and fluffiness.
Maintenance Features
Regular maintenance is crucial for the dryer's longevity and efficient performance.
- Switching off the electricity: Always unplug the dryer when not in use, during cleaning, or any maintenance operations.
- Cleaning the filter: The filter accumulates lint and fluff during drying. It must be cleaned after each cycle by rinsing under running water or using a vacuum cleaner. A clogged filter compromises airflow, lengthens drying times, increases energy consumption, and can damage the dryer. The filter is located in front of the dryer trim; pull its plastic grip upwards to remove, clean, and then replace it securely, ensuring it is flush with the trim. Never use the dryer without the filter in place.
- Checking the drum: After each cycle, manually turn the drum to remove any small items (e.g., handkerchiefs) that might have been left behind.
- Cleaning the dryer:
- Do not use abrasives, steel wool, or stainless steel cleaning agents on the drum. A coloured film may appear on the stainless steel drum due to water and cleaning agents, but this does not affect performance.
- External metal, plastic, and rubber parts can be cleaned with a damp cloth.
- Periodically check and clean the vent tube and any permanent venting fixture to remove accumulated fluff or lint.
- Remove lint that collects around the filter and outlet vents.
- Do not use solvents or abrasives.
- The dryer uses special bearing components that do not require lubrication.
- Regular checks by authorised technicians are recommended to ensure electrical and mechanical safety.
Installation Guidelines:
- Place the dryer away from heat sources like gas ranges or stoves.
- If installed under a work counter, ensure 10mm space above and 15mm space on the sides for proper air circulation.
- Ensure the back vents are not obstructed.
- Install the dryer in a dry environment with proper air circulation.
- Ventilation: The dryer expels moist air through a vent tube. Adequate ventilation is essential to prevent backflow of gases from other fuel-burning appliances.
- Mobile venting: A vent tube must always be fitted securely to the back of the dryer. Ideally, connect it to a permanent outlet. If not possible, the tube can pass through a partly-opened window. The tube end should not be directed towards the air intake vent. The tube should not exceed 2.4 metres, be kept free of fluff/lint, and not be squashed.
- Permanent venting: A Wall/Window Vent Kit is recommended. For wall mounting, leave an opening in the wall to the left of the dryer's position, keep the tube short and straight, and ensure the duct slopes downwards. For window mounting, the hole should ideally be below the vent, and the tube kept short. Regularly check areas A and B for lint/debris. The vent tube adaptor must be fitted securely to prevent humid air from re-entering the room. Avoid pushing the dryer back too far, which could dislodge or squash the tube. Kinks or 'U' bends must be avoided.
- Open window venting: Direct the tube end downwards to prevent condensation. Ensure adequate ventilation, and that the vent tube and air intake vents are clear. Do not recycle exhaust air or discharge it into flues used by other appliances.
- Electrical connections:
- Ensure the socket is grounded and can sustain the dryer's maximum power (indicated on the rating label).
- Power voltage must match the rating label.
- The socket must be compatible with the dryer's plug; replace if necessary.
- Do not use extension cords.
- The power cord must not be bent or squashed.
- The power supply cord should be checked periodically and replaced by authorised technicians if needed.
- Portable outlets or extension leads must be protected from splashing.
- Do not install the dryer outdoors.
- The electrical wire and plug must be easily accessible after installation.
- Levelling: The dryer must be installed level for correct operation. Check side-to-side and front-to-back levelness. Adjust the two front legs using a wooden block if needed.
- Before first use: Clean the inside of the drum to remove any accumulated dust from transport.
Warnings and Suggestions:
- The appliance conforms to international safety standards and EEC Directives.
- It is designed for home use only, not professional.
- Adults should operate the dryer, following instructions carefully.
- Do not touch the appliance with wet hands/feet or while barefoot.
- Unplug the machine by pulling the plug, not the cord.
- Children and infirm individuals must not operate the dryer unsupervised or be near it during use. After use, turn off and unplug the dryer, keeping the door closed to prevent children from playing with it.
- Ensure proper ventilation; air intake/outlet vents and the vent tube must not be obstructed.
- Never direct the vent tube outlet towards the air intake at the back.
- Do not recycle exhaust air.
- Do not use on carpeting where pile height obstructs airflow from the base.
- Check if the dryer is empty before loading.
- The back of the dryer can become very hot; do not touch it during use.
- Do not use liquid fabric softeners in the dryer; add them to the final rinse of the wash.
- Do not load items that are dripping wet.
- Only tumble dry items that have been washed with detergent and water, rinsed, and spun. Drying unwashed items is a fire hazard.
- Do not dry garments treated with chemical products or contaminated with flammable substances (petrol, oil, paint, hair spray, creams, cooking fat, oils).
- Do not tumble dry rubber, foam rubber, plastic, plastic foam, nappy pants/liners, polythene, or paper.
- Do not tumble dry large, bulky items or acrylic fibres at high temperatures.
- Always complete the Cool Tumble Phase.
- Do not turn off the dryer while warm items are inside.
- Do not allow lint to collect around the dryer.
- Never climb on top of the dryer.
- Always follow electrical standards and requirements.
- Only buy original spare parts and accessories.
Disposal:
- Dispose of packaging material according to local regulations for recycling.
- For old dryers, cut the power cord and remove the door before disposal.
Saving Energy and Respecting the Environment:
- Wring out items thoroughly before tumble drying (use a high spin cycle in a washing machine) to save time and energy.
- Always dry full loads to save energy, as single or small loads take longer.
- Clean the filter after each use to maintain energy efficiency.
Troubleshooting:
The manual provides a troubleshooting guide for common issues:
- Dryer won't start: Check plug connection, power supply, fuse, extension cord usage, door closure, PROGRAMMES knob setting, and START button press.
- Drying cycle won't begin: Check if a delayed time has been set.
- Taking a long time to dry: Check if the filter is clean, temperature setting is appropriate for fabric type (HIGH for auto programmes), correct programme selected, flexible vent tube obstructed, air intake vent obstructed, permanent ventilation flap obstructed, items were too wet, or the dryer was overloaded.
Service:
If troubleshooting fails, turn off the dryer and contact the Service Centre. Provide name, address, post code, telephone number, problem type, purchase date, appliance model (Mod.), and serial number (S/N) (found on the data label inside the door). Repairing the dryer yourself or by an unauthorised person can cause harm, damage the machine, and invalidate the warranty. Spare parts are designed exclusively for this appliance.