EasyManua.ls Logo

Hotpoint H8D94SBUK - User Manual

Hotpoint H8D94SBUK
4 pages
Print Icon
To Next Page IconTo Next Page
Loading...
THANK YOU FOR BUYING A HOTPOINT PRODUCT.
In order to receive a more complete assistance, please
register your product on www.hotpoint.eu/register
Policies, standard documentation, ordering of spare parts and additional product information can be
found by:
Visiting our website docs.hotpoint.eu and parts-selfservice.whirlpool.com
Using QR Code
Alternatively, contact our After-sales Service (See phone number in the warranty booklet). When
contacting our After-sales Service, please state the codes provided on your products identifi cation plate.
EN
Quick guide
Before using the appliance carefully read the Safety
Instruction.
xxxxxxxxxxxx
xxxx
Eco Monitor
This indicator shows the energy consumption level according to
the programme and the options set. The consumption is
proportional to the lines on the display, by the ecomonitor icon.
OPENING THE DOOR DURING THE CYCLE
Laundry can be checked while the drying cycle runs and any
garments already dry can be removed, while drying continues for
the remaining items. After closing the door, press the "Start/Pause"
button to resume machine operation.
Keep the door closed until the cycle end to save time and energy.
NAVIGATION
The "UP" and "DOWN" buttons are used to navigate the available
menus.
Press the OK button to confirm the selection.
Press the Option button at the symbol, where present on the
display, to return to the previous screen.
If no selection is conrmed, after about 10 seconds., the display
return to the main screen.
SETTINGS
To access the Settings menu, press and hold the relevant button for a
few seconds.
Set language shows the available languages on the display.
Sounds allows to enable or disable the sounds (some sounds, as
warnings, will remain active anyway).
Brightness allows to modify the display brightness.
Factory Default allows to reset the default settings. After having
selected the setting, press and hold the OK button for a few
seconds.
FIRST TIME USE
When starting the appliance the first time, the control panel will
automatically show the set language menu. The UP and DOWN
buttons are used to show the languages available in the
machine. Press the OK button to confirm. The machine cannot
be used without having selected the language.
Make sure that the water tank is correctly inserted.
The dryer must be installed in a room with a temperature
ranging between 5°C and 35°C to ensure proper operation.
Before using the dryer make sure it has been in an upright
position for at least 6 hours.
Should you wish to change the opening side of the door, please
contact our After-sales Service. (See phone number in the
warranty booklet).
DAILY USE
Doing this will keep your machine working at its BEST:
- remember to empty your water tank after each drying cycle.
- remember to clean your lters after each drying cycle.
Refer to the Care & Maintenance section.
1. Plug the dryer into the power supply socket.
2. Open the door and load garments; always refer to instructions on
clothing labels and the max loads indicated in the programme
section. Empty pockets. Make sure garments do not get caught
between the door and/or the door filter. Do not load items that
are dripping wet. Do not tumble dry large, very bulky items.
3. Close the door.
4. Press the "On/Off" button.
5. Select the most suitable programme
for the type of fabric in that
load.
6. Select the options, if necessary.
7. Press the "
Start/Pause"
button to begin drying.
8. At the end of the drying cycle, a buzzer will beep. An indicator on
the control panel signals the end of the cycle. Pull the load out
immediately to prevent the formation of creases on laundry.
9. Turn the machine off by pressing the "On/Off" button, open the
door and pull the clothing out. If the machine is not switched off
manually, after about a quarter of an hour from the end of the
cycle , the appliance turns off automatically to save energy.
Note that some programme/option accords with "Crease Care"
system. This means that for some hours, after the end of the
drying cycle, the drum rotates at regular intervals to prevent the
formation of creases.
In case of power failure, it is necessary to press the "Start/Pause"
button to restart the cycle.
CARE LABEL
Always check the care labels, especially when placing garments in
the tumble dryer for the fi rst time. Below are the most commonly
used symbols:
May be tumble dried.
Do not tumble dry.
Tumble dry – high heat.
Tumble dry – low heat.
INDICATORS
Cycle phase: Drying - Cool Down
Empty water tank - Clean secondary lter - Clogged door lters - Autoclean - Eco Monitor
Refer to Troubleshooting section:
Failure call After-sales Service -
DEMO
Demo Mode
CONTROL PANEL
1 Programme selection knob
2 On/Off button
3 Start/Pause button
Options buttons
4 Gentle Power
5 Crease Care
6 Cycle End Signal
7 Cycle Options (hold for Settings)
8 Dryness Level
9 Timed Drying
10 Start Delay
Navigation buttons and Key Lock
11 UP
12 DOWN
13 CONFIRM OK (hold for Key Lock)
1
7
8 9
10
6
5
13
4
3
2
11
SYNTHETICS
1:35
-:--
-:--
12
EXTRA
Question and Answer IconNeed help?

Do you have a question about the Hotpoint H8D94SBUK and is the answer not in the manual?

Overview

This document outlines the features, usage, and maintenance of a Hotpoint tumble dryer, designed for efficient and gentle drying of various textile types.

Function Description

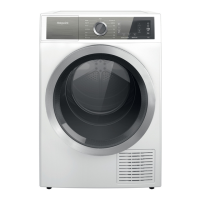
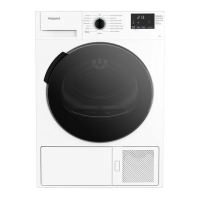
The Hotpoint tumble dryer is equipped with a comprehensive control panel that allows users to select programs, adjust settings, and monitor the drying process. The appliance utilizes a heat pump system, which contains fluorinated greenhouse gases (R134a) in a hermetically sealed unit, contributing to energy efficiency.

The core function of the dryer is to remove moisture from laundry through a variety of drying programs tailored for different fabrics and load sizes. These programs range from "Eco Cotton" for normal wet cotton laundry to specialized cycles like "Wool," "Silk," "Baby," "Duvet," "Lingerie," and "Jeans." There are also programs for "Mixed" loads, "Synthetics," "Daily" use, "Microfiber," "Cuddly Toys," "Fitness" wear, "Down Jacket," "Mats," "Shirts," and "Anti Allergy." A "Rapid 30'" program offers quick drying for small cotton loads, while "Refresh" provides a short cycle to air out garments without heat.

The dryer incorporates an "Eco Monitor" indicator that visually represents the energy consumption level based on the selected program and options, helping users make energy-conscious choices.

Several options allow for customization of the drying cycle. "Dryness Level" enables users to choose the desired residual moisture, with settings like "Iron Dry," "Hanger Dry," "Cupboard Dry," and "Extra Dry." "Timed Drying" allows for manual setting of the drying duration. The "Start Delay" option provides flexibility by delaying the start of the cycle. "Crease Care" is a valuable feature that periodically rotates the drum after the cycle ends to prevent creases, especially useful if laundry cannot be removed immediately. "Gentle Power" activates anti-stress drum movements and optimized air circulation to minimize fabric wear and ensure even drying. A "Key Lock" function prevents accidental changes to settings during operation. The "Cycle End Signal" activates a prolonged buzzer at the end of the cycle, which can be enabled or disabled.

The dryer also includes an "Autoclean" function for automatic maintenance of the bottom filter, ensuring consistent performance. An indicator on the control panel signals when this maintenance is in progress, and users are advised not to switch off the machine during this phase.

Usage Features

Operating the Hotpoint tumble dryer is designed to be straightforward. Upon first use, the appliance prompts the user to select a language from the available options using the "UP" and "DOWN" buttons, confirming with "OK." It is crucial to ensure the water tank is correctly inserted and that the dryer is installed in a room with a temperature between 5°C and 35°C for optimal operation. Before initial use, the dryer should remain in an upright position for at least 6 hours.

To begin a drying cycle, users first plug in the dryer, open the door, and load garments, adhering to clothing labels and maximum load recommendations. Pockets should be emptied, and wet or bulky items should not be loaded. After closing the door, the "On/Off" button is pressed, followed by selecting the desired program and any necessary options. The "Start/Pause" button initiates the drying process.

During a cycle, laundry can be checked, and already dry items can be removed. After closing the door, pressing "Start/Pause" resumes operation. Keeping the door closed throughout the cycle is recommended to save time and energy.

At the end of the cycle, a buzzer sounds, and an indicator on the control panel signals completion. Laundry should be removed promptly to prevent creases. The machine can be manually switched off, or it will automatically turn off after about 15 minutes to save energy. Programs with "Crease Care" will continue drum rotation for several hours after the cycle ends. In case of a power failure, the "Start/Pause" button must be pressed to restart the cycle.

The control panel features "UP" and "DOWN" buttons for navigating menus and an "OK" button for confirming selections. The "Option" button (marked with "<<") allows users to return to the previous screen. If no selection is confirmed within about 10 seconds, the display reverts to the main screen.

The "Settings" menu, accessed by pressing and holding a relevant button, allows users to customize language, enable/disable sounds (with warnings remaining active), adjust display brightness, and reset to "Factory Default" settings.

Maintenance Features

Regular maintenance is crucial for the longevity and optimal performance of the Hotpoint tumble dryer. Users are advised to unplug the dryer before performing any cleaning or maintenance procedures.

Key maintenance tasks include:

  • Emptying the water tank: After each drying cycle, the water tank (A) should be pulled out, emptied into a sink, and reinserted. The dryer should not be operated without the water tank in place.
  • Cleaning the primary door filter: After every cycle, the primary door filter (B) should be removed and cleaned of lint under running water or with a vacuum cleaner.
  • Cleaning the secondary door filter: When the relevant indicator illuminates, the secondary door filter (C) should be removed and cleaned thoroughly under running water or with a vacuum cleaner.
  • Drying filters: For optimal performance, both door filters (B and C) should be completely dry before reinserting them. The dryer must not be used without all filters properly in place. Filters are vital for collecting lint and preventing airflow issues, which can lead to longer drying times, increased energy consumption, and potential damage to the appliance.
  • Autoclean function: The dryer automatically cleans its bottom filter when sensors detect a need. An indicator on the control panel will signal this maintenance, and the machine should not be switched off during this process.
  • Cleaning the tumble dryer exterior: The external metal, plastic, and rubber parts can be cleaned with a damp cloth. Solvents or abrasives should not be used.
  • Cleaning the air intake grille: The front air intake grille (2) should be cleaned regularly (every 6 months) with a vacuum cleaner to remove lint, fluff, or dust. Lint deposits from the filter area should also be removed periodically with a vacuum cleaner.

In case of malfunctions, a troubleshooting guide is provided to help users identify and resolve common issues before contacting After-sales Service. This includes advice for situations like the dryer not turning on, not starting, garments remaining wet, long drying times, and error messages.

Hotpoint H8D94SBUK Specifications

General IconGeneral
Dryer TypeHeat Pump
Capacity9 kg
Energy RatingA++
Energy Efficiency ClassA++
Drying Programs15
Sensor DryingYes
Noise Level65 dB
ColourWhite
Noise level (wash)Not Applicable
Delay startYes
Child lockYes
Drum materialStainless Steel

Related product manuals