EasyManua.ls Logo

Hotpoint NTM119X3EUK - User Manual

Hotpoint NTM119X3EUK
4 pages
Print Icon
To Next Page IconTo Next Page
Loading...
THANK YOU FOR BUYING A HOTPOINT PRODUCT.
In order to receive a more complete assistance, please
register your product on www.hotpoint.eu/register
Policies, standard documentation, ordering of spare parts and additional product information can be
found by:
Visiting our website docs.hotpoint.eu and parts-selfservice.whirlpool.com
Using QR Code
Alternatively, contact our After-sales Service (See phone number in the warranty booklet). When
contacting our After-sales Service, please state the codes provided on your products identifi cation plate.
EN
Quick guide
Before using the appliance carefully read the Safety
Instructions.
xxxxxxxxxxxx
xxxx
OPENING THE DOOR DURING THE CYCLE
Laundry can be checked while the drying cycle runs and any
garments already dry can be removed, while drying continues for
the remaining items. After closing the door, press the "Start/Pause"
button to resume machine operation.
Keep the door closed until the cycle end to save time and energy.
DAILY USE
Doing this will keep your machine working at its BEST:
- remember to empty your water tank after each drying cycle.
- remember to clean your lters after each drying cycle.
Refer to the Care & Maintenance section.
1. Plug the dryer into the power supply socket.
2. Open the door and load garments; always refer to instructions on
clothing labels and the max loads indicated in the programme
section. Empty pockets. Make sure garments do not get caught
between the door and/or the door filter. Do not load items that
are dripping wet. Do not tumble dry large, very bulky items.
3. Close the door.
4. Press the "On/Off" button.
5. Select the most suitable programme
for the type of fabric in that
load.
6. Select the options, if necessary.
7. Press the "
Start/Pause"
button to begin drying.
8. At the end of the drying cycle, a buzzer will beep. An indicator on
the control panel signals the end of the cycle. Pull the load out
immediately to prevent the formation of creases on laundry.
9. Turn the machine off by pressing the "On/Off" button, open the
door and pull the clothing out. If the machine is not switched off
manually, after about a quarter of an hour from the end of the
cycle , the appliance turns off automatically to save energy.
Note that some programme/option accords with "Crease Care"
system. This means that for some hours, after the end of the
drying cycle, the drum rotates at regular intervals to prevent the
formation of creases.
In case of power failure, it is necessary to press the "Start/Pause"
button to restart the cycle.
CARE LABEL
Always check the care labels, especially when placing garments in
the tumble dryer for the fi rst time. Below are the most commonly
used symbols:
May be tumble dried.
Do not tumble dry.
Tumble dry – high heat.
Tumble dry – low heat.
FIRST TIME USE
Make sure that the water tank is correctly inserted. Make sure
that the drain hose on the back of the dryer is fixed correctly,
either to the dryers water tank, or to your domestic drainage
system.
The dryer must be installed in a room with a temperature
ranging between 5°C and 35°C to ensure proper operation.
Before using the dryer make sure it has been in an upright
position for at least 6 hours.
Should you wish to change the opening side of the door, please
contact our After-sales Service. (See phone number in the
warranty booklet).
CONTROL PANEL
1 ON/OFF Button (hold for Reset)
2 Programme Selection Knob
3 Start/Pause Button
Options Buttons*
4
Active Care
5 Dryness Level
6 Start Delay
7 Timed Drying
8 Cycle End
9 Gentle (hold for Key lock)
10 Crease Care (hold for Mute)
*Note: some models may have the wording in full instead of the icons.
INDICATORS
Dryness Level: Iron Dry - Hanger Dry - Cupboard Dry - Extra Dry
Cycle Phase:
Drying - Cool Down - END End of Cycle
Empty water tank - Clean door lter - Clean bottom lter
Refer to troubleshooting section:
Failure: Call after sales service -
DEMO
Demo Mode
3
3
END
END
1
3
2
4
10
8
9
5 67
D
D
E
E
M
M
O
O
h
h
h
Lorem ipsum
Question and Answer IconNeed help?

Do you have a question about the Hotpoint NTM119X3EUK and is the answer not in the manual?

Overview

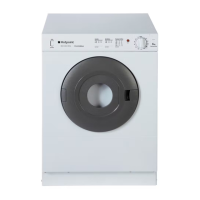
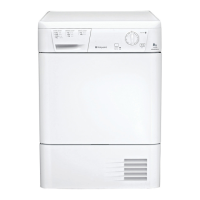
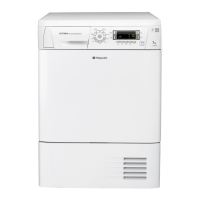
This document describes a Hotpoint tumble dryer, providing comprehensive instructions for its operation, maintenance, and troubleshooting.

Function Description

The Hotpoint tumble dryer is designed to efficiently dry laundry. It offers a variety of programs tailored to different fabric types and drying needs, ensuring optimal care for garments. The appliance features a control panel with a program selection knob and several option buttons, allowing users to customize drying cycles. Key options include "Active Care" for garment preservation, "Dryness Level" to select the desired moisture content (Iron Dry, Hanger Dry, Cupboard Dry, Extra Dry), "Start Delay" for deferred cycle initiation, "Timed Drying" for manual time setting, "Cycle End" with an audible buzzer, "Gentle" for reduced drying temperature, "Key Lock" for control panel security, "Crease Care" for periodic drum rotation to prevent wrinkles, and "Mute" to silence control panel sounds.

The dryer operates by circulating air through the drum, removing moisture from clothes. It collects lint in various filters, which are crucial for maintaining air flow and efficiency. The appliance is equipped with a heat pump system, utilizing fluorinated greenhouse gases in a hermetically sealed unit for energy-efficient drying.

Usage Features

Before first use, ensure the water tank is correctly inserted and the drain hose is properly connected, either to the water tank or a domestic drainage system. The dryer should be installed in a room with a temperature between 5°C and 35°C and must remain upright for at least 6 hours prior to use.

To operate, plug the dryer into a power socket. Open the door, load garments according to clothing labels and maximum load instructions, ensuring pockets are empty and items are not dripping wet or excessively bulky. Close the door, press the "On/Off" button, and select the appropriate program using the knob. Customize the cycle with desired options, then press the "Start/Pause" button to begin drying.

During a cycle, the door can be opened to check laundry or remove dry items. After closing the door, press "Start/Pause" to resume. At the end of the cycle, a buzzer will sound, and an indicator on the control panel will signal completion. Remove laundry promptly to prevent creases. The machine will automatically turn off after about 15 minutes of inactivity to save energy. Some programs include "Crease Care," which rotates the drum periodically after the cycle ends to minimize wrinkles. In case of a power failure, press "Start/Pause" to restart the cycle.

The dryer's display shows the duration of cycles, which is constantly checked and adjusted during drying for the best estimate. Users can adjust the dryness level if loads are consistently too wet or too dry.

Specific programs include:

  • Mixed: For cotton and synthetic fabrics together.
  • Eco: The most energy-efficient program for normal wet cotton laundry, set to "Cupboard Dry" by default.
  • Cotton: For all types of cotton, ready for the cupboard.
  • Synthetics: For synthetic fabrics.
  • Wool: For wool clothes, advisable to turn items inside out.
  • Silk: Gentle drying of silk garments.
  • Anti Allergy: Certified by "Allergy UK" for allergen reduction, usable with damp or dry loads.
  • Cuddly Toys: Preserves appearance of cuddly toys, removing accessories before drying.
  • Pre-Iron: Relaxes fibers, making ironing easier for small loads of damp or dry cotton/cotton blend fabrics.
  • Refresh: Short program for refreshing fibers with fresh air, not for wet items.
  • Duvet: For bulky items like a single duvet.
  • Bed & Bath: For cotton towels and sheets.
  • Baby: For new-born baby garments and linen (cotton and chenille), as well as delicate items.
  • Jeans: For sturdy cotton, including denim trousers and jackets.
  • Shirts: For cotton or cotton blend/synthetic shirts.

Maintenance Features

Regular maintenance is crucial for optimal performance and longevity.

  • Empty the water tank after each drying cycle by pulling it out, emptying it into a sink, and reinserting it properly.
  • Clean the door filter after each cycle. Pull the filter out, remove lint under running water or with a vacuum cleaner, and ensure it's dry before reinserting.
  • Clean the bottom filter when the indicator turns on. Open the bottom cover, pull out the filter, open its rear side, remove lint from the mesh, clean the filter chamber, and reassemble.
  • Clean the tumble dryer externally with a damp cloth.
  • Clean the front air intake grille regularly (every 6 months) with a vacuum cleaner to remove lint, fluff, or dust. Also, periodically clean lint deposits from the filter areas with a vacuum cleaner.
  • Do not use solvents or abrasives for cleaning.

Clogged filters severely affect air flow, leading to longer drying times, increased energy consumption, and potential damage to the dryer. Ensure filters are properly reinserted; the dryer may not start if they are not.

Troubleshooting tips are provided for common issues such as the dryer not turning on, garments remaining wet, long drying times, or error indicators. For example, if the water tank light is on, empty the tank. If the door filter light is on, clean the door filter and check air intake. If the bottom filter light is on, clean the bottom filter. If the dryer is in DEMO mode, follow the sequence to disable it. For persistent issues or error codes, contact After-sales Service.

Hotpoint NTM119X3EUK Specifications

General IconGeneral
TypeTumble Dryer
Appliance placementFreestanding
Loading typeFront load
Drying systemVented
Capacity9 kg
Drying classB
Width595 mm
Noise Level65 dB
Product colourWhite
ColourWhite
Delay startYes
Child lockYes
Drum materialStainless steel
ProgrammesDelicate, Synthetics, Wool, Refresh
Height85 cm

Related product manuals