Do you have a question about the House Beautiful 609867 and is the answer not in the manual?
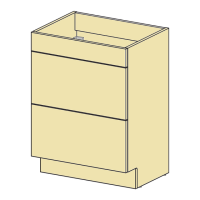
Specifies the width, depth, and height of the 600 floorstanding vanity unit.
Crucial advice to read all instructions fully before commencing assembly.
Essential steps and advice before beginning the assembly process.
Alerts to serious crushing injuries from furniture tip-over and the need for wall fixing.
Guidelines for safe use, including domestic use only and not allowing children to play.
Advice on periodically checking component security and ensuring proper ventilation.
Specific guidance on cleaning and avoiding certain aggressive cleaning agents.
Note that listed quantities are correct for assembly, with potential extras supplied.
Lists all necessary tools for the successful assembly of the vanity unit.
A visual guide using a ruler to help correctly identify screws by size.
Instructions for safely removing the drawers from the vanity unit.
Instructions on how to securely fix the bracket to the vanity unit.
Guidance on marking the wall for bracket placement using a spirit level.
Instructions for fixing the bracket to the wall using appropriate screws.
Instructions for inserting the cover component into the vanity unit.
Steps to remove protective films and insert the wash basin with silicone.
Guidance on assembling the waste outlet and compact bottle trap.
Instructions for correctly inserting the drawers back into the unit.
Instructions for removing protective films from the finished vanity.
Information and warning regarding maximum weight capacity for drawers.
Detailed instructions for adjusting drawer height, side, and inclination.
Crucial advice on checking for hidden utilities and using suitable wall fixings.
Provides practical tips for drilling holes and inserting wall plugs correctly.
Details different wall types and recommends suitable wall plug types.
Confirmation of unit completion and advice for ongoing care and checks.
Guidelines on how to clean the vanity unit safely and effectively.
| Brand | House Beautiful |
|---|---|
| Model | 609867 |
| Category | Indoor Furnishing |
| Language | English |