9
CPU Upgrade
Adding a CPU Card
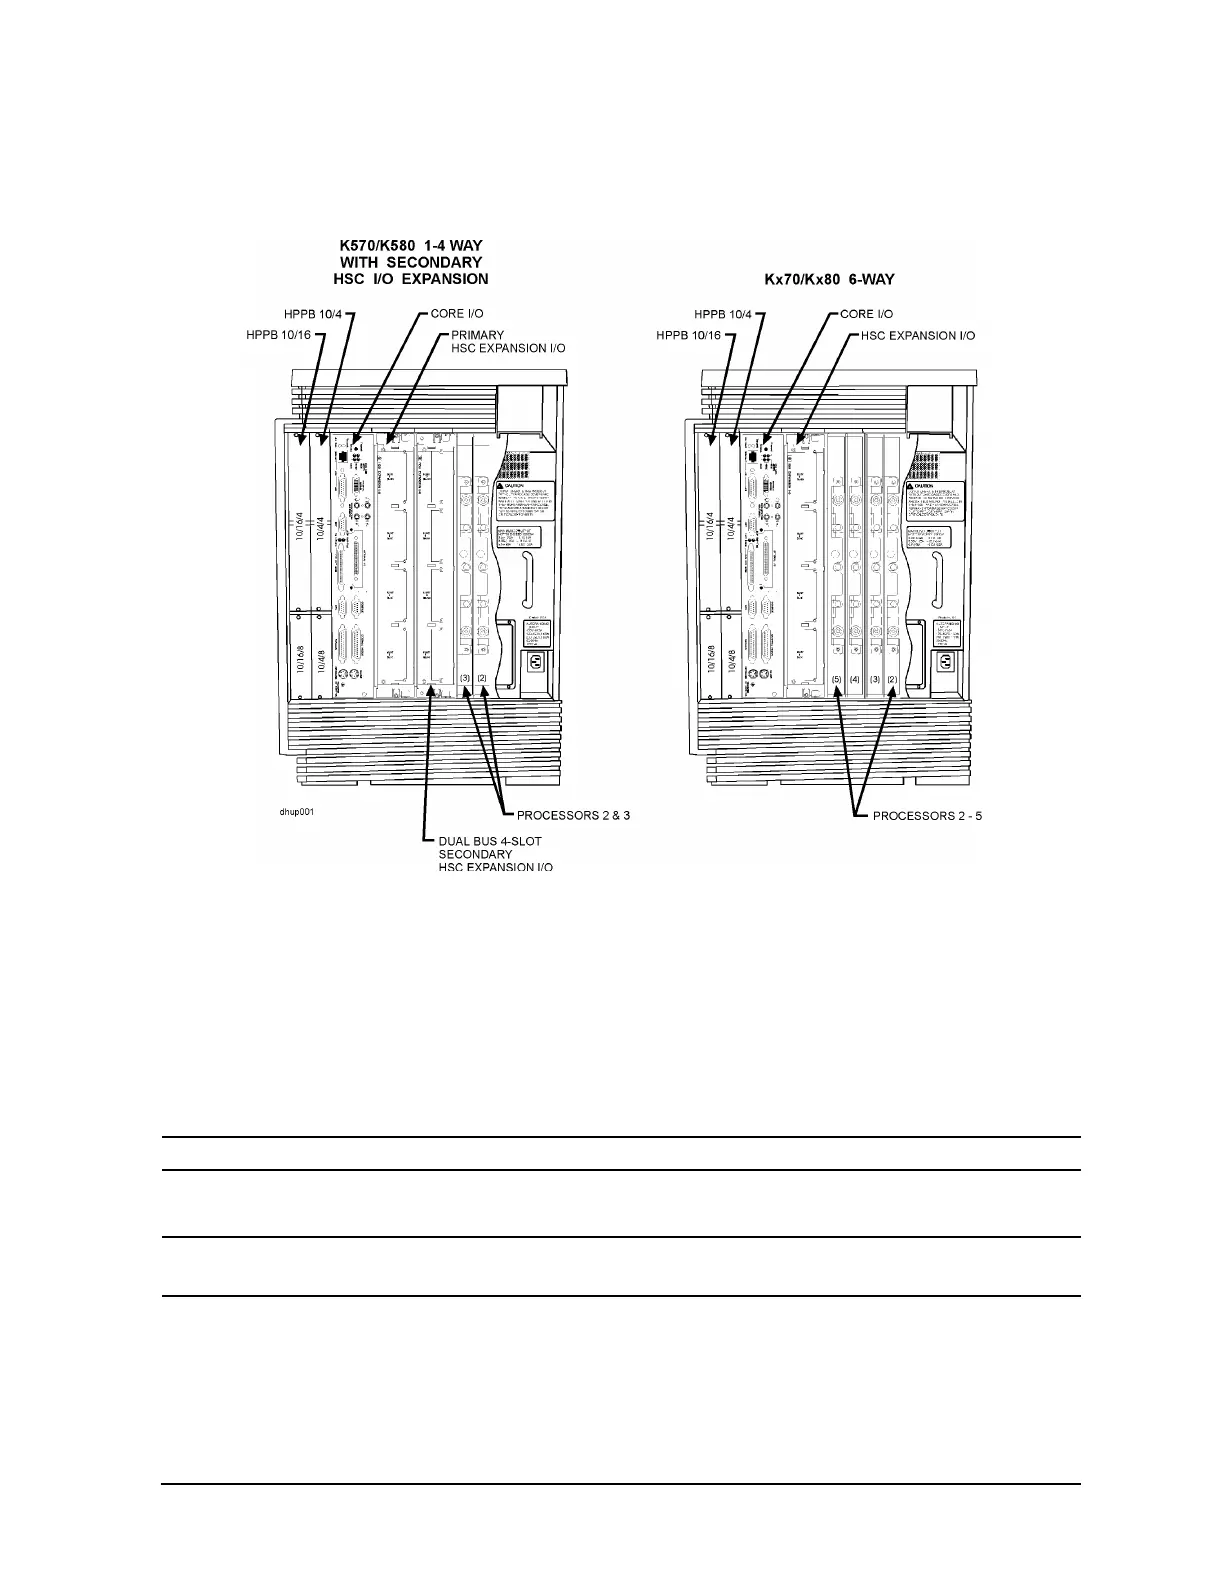
Figure 1-7
HP3000/979KS/989KS and HP9000/K250/K260/K370/K380/K450/K460 and
K570/K580
CPU locations
1. Remove the sheetmetal case.
2. Identify the next available CPU slot in sequence. Carefully reach into the computer cabinet and
remove the CPU connector dust cover by grasping the extended tab and pulling it out. Only remove
the dust cover(s) necessary to install the desired number of CPUs.
3. Remove the protective dust cover from the CPU card and carefully align the CPU card into the
appropriate slot. Be sure the air guide and card components are on the right-hand side of the card
during installation.
NOTE
CPUs 4 and 5 will use snap-in guides that should be installed in your server.
4. Insert the CPU card until it contacts the system board connector, then press firmly to seat the card.
NOTE
If there are more CPUs to add, proceed to the appropriate Adding a CPU Card steps. If
there are no more CPUs to add, proceed to Installation Verification.
5. Replace the back CPU cover plate and tighten all captive mounting screws.
After performing CPU installation steps, replace the power supply according to the instructions in the
preceding
HP3000/979KS/989KS and HP9000/K250/K260/K450/K460/Kx70 and Kx80 Power
Supply Replacement
section.
 Loading...