EasyManua.ls Logo

HP Pavilion Elite E-300 - Desktop PC User Manual

HP Pavilion Elite E-300 - Desktop PC
28 pages
To Next Page IconTo Next Page
Page #1 background imageLoading...
Page #1 background image
584925-001 1
English
1 Match the part you received to the illustration on the next page.
2 Go to the page number indicated (
#) for that part.
3 Complete only the part replacement steps in that section.
Deutsch
1 Suchen Sie das Ersatzteil, das Sie erhalten haben, auf der
Abbildung auf der nächsten Seite.
2 Wechseln Sie zu der Seite für dieses Ersatzteil (
#).
3 Führen Sie nur die Schritte in diesem Abschnitt für Ihr Ersatzteil
durch.
Français
1 Repérez la pièce que vous avez reçue sur l’illustration de la page
suivante.
2 Accédez à la page (
#) de cette pièce.
3 Procédez uniquement à la procédure de remplacement détaillée
dans cette section.
Español
1 Compare la pieza que usted recibió con l’ilustración en la página
siguiente.
2 Vaya al número de la página indicada (
#) para esa pieza.
3 Ejecute solamente los pasos para el reemplazo de la pieza en esa
sección.
Nederlands
1 Zoek het onderdeel dat u heeft ontvangen op in de afbeelding op
de volgende pagina.
2 Ga naar het paginanummer dat staat aangegeven (
#) voor het
betreffende onderdeel.
3 Voer alleen de procedure uit die is beschreven in het gedeelte over
de vervanging van het betreffende onderdeel.
Português de Portugal
1 Compare a peça recebida com a ilustração da próxima página.
2 Vá até o número de página indicado (
#) para a peça.
3 Execute somente os passos para a substituição de peças da secção
indicada.
Italiano
1 Confrontare la parte ricevuta con l’illustrazione nella pagina
successiva.
2 Andare al numero di pagina indicato (
#) per quella parte.
3 Completare solo la procedura di sostituzione parte in tale sezione.
Dansk
1 Sammenlign den del du modtog med illustrationen på næste side.
2 Gå til den side, der er angivet (
#) for den del.
3 Fuldend kun trinnene for udskiftning af del i det afsnit.
Norsk
1 Sammenlign den delen du har mottatt, med illustrasjonen på
neste side.
2 Gå til det angitte sidenummeret (
#) for den delen.
3 Gjennomfør bare deleutskiftingstrinnene i den delen.
Svenska
1 Leta upp den komponent du fick, i bilden på nästa sida.
2 Gå till det sidnummer som anges (
#) för den komponenten.
3 Utför bara stegen för byte av komponent i det avsnittet!
Suomi
1 Vertaa saamaasi osaa seuraavalla sivulla olevaan kuvaan.
2 Siirry kyseistä osaa vastaavalle sivulle, joka on osoitettu
merkillä (
#).
3 Suorita vain kyseisessä kohdassa olevat osien vaihtoon liittyvät
vaiheet.
Polski
1 Dopasuj otrzymaną część do rysunku na następnej stronie.
2 Przejdź do wskazanej strony (
#) dla tej części.
3 Wykonaj procedurę wymiany części zgodnie z opisem tylko w tej
części.
Русский
1 Сопоставьте полученную деталь с иллюстрацией на следующей
странице.
2 Перейдите на страницу с номером, указанным (
#) для этой
детали.
3 Выполните только действия по замене деталей, указанные в
соответствующем разделе.
IMPORTANT: Follow these part replacement instructions:
WICHTIG: Gehen Sie zum Austauschen von Teilen wie folgt vor:
IMPORTANT : Suivez ces instructions relatives au remplacement des
pièces :
IMPORTANTE: Siga estas instrucciones para el reemplazo de piezas:
BELANGRIJK: Volg deze instructies voor het vervangen van
onderdelen:
IMPORTANTE: Siga estas instruções de substituição de peças:
IMPORTANTE: Seguire queste istruzioni per la sostituzione della parte:
VIGTIGT: Følg disse anvisninger om udskiftning af dele:
VIKTIG: Følg disse instruksjonene for utskifting av deler:
VIKTIGT! Följ dessa instruktioner för byte av komponenter:
TÄRKEÄÄ: Toimi näiden osien vaihto-ohjeiden mukaan:
WAŻNE: Wykonaj poniższe instrukcje wymiany części:
ВАЖНО! Ниже приводятся инструкции по замене деталей.
Question and Answer IconNeed help?

Do you have a question about the HP Pavilion Elite E-300 - Desktop PC and is the answer not in the manual?

HP Pavilion Elite E-300 - Desktop PC Specifications

General IconGeneral
BrandHP
ModelPavilion Elite E-300 - Desktop PC
CategoryDesktop
LanguageEnglish

Summary

Part Replacement Instructions

General Installation Guidelines

Follow these instructions for part replacement, matching parts to illustrations.

Component Identification

Front Cover Identification

Identify the front cover part using the provided illustration and page number reference.

Add-in Card Identification

Locate the add-in card using the illustration and page number reference.

Memory Modules Identification

Identify memory modules using the illustration and page number reference.

Safety and Precautions

General Safety Warnings

Important safety guidelines regarding fan operation, power, and sharp edges.

Electrostatic Discharge (ESD) Precautions

Procedures to prevent damage from electrostatic discharge during handling.

Hard Disk Drive Handling

Important notes on handling hard disk drives due to their sensitivity to shock.

Model Feature Variations

Note that computer features may vary by model.

Front Cover Removal

Accessing Internal Components

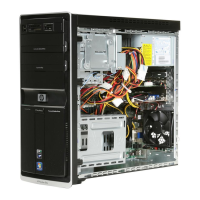
Steps to remove the front cover and side panel to access computer internals.

Detaching the Front Cover Assembly

Procedure for detaching the front cover from the computer chassis.

Front Cover Reinstallation

Securing the Front Cover

Steps to properly reinstall the front cover assembly onto the computer.

CD/DVD Drive Removal

Removing the CD/DVD Drive Unit

Instructions for detaching and removing the CD/DVD drive from the computer.

Disconnecting Drive Cables

Steps to safely disconnect power and data cables from the CD/DVD drive.

CD/DVD Drive Installation

Installing the CD/DVD Drive Unit

Procedure for inserting the CD/DVD drive into its bay.

Reconnecting Drive Cables

Connecting power and data cables to the new CD/DVD drive.

Finalizing CD/DVD Drive Installation

Securing the Drive and Reassembling

Steps to secure the CD/DVD drive and reassemble the computer.

Hard Drive Removal

Removing the Hard Drive Bay

Steps to detach and remove the hard drive bay assembly from the computer.

Detaching the Hard Drive

Procedure to disconnect cables and remove the hard drive from its bay.

Hard Drive Installation

Installing the Hard Drive Unit

Steps to connect cables and install a new hard drive into the bay.

Securing the Hard Drive Assembly

Positioning the Hard Drive

Procedure for properly seating the hard drive assembly.

Computer Case Reassembly

Closing the Computer Case

Steps to close and secure the computer's outer casing.

Add-in Card Removal

Removing the Computer Cover

Instructions to remove the computer's side panel for access.

Accessing Expansion Slots

Identifying the appropriate expansion slot for the add-in card.

Detaching an Existing Add-in Card

Procedure to detach and remove an add-in card from its slot.

Add-in Card Installation

Installing a New Add-in Card

Steps to insert a new add-in card into an expansion slot.

Securing the Add-in Card

Locking the Add-in Card in Place

Procedure to lock the add-in card in place and ensure it is seated correctly.

Computer Case Reassembly

Reattaching the Computer Case

Steps to reattach and secure the computer's outer casing after installation.

Memory Module Removal

Preparing for Memory Installation

Steps to prepare the computer and access the memory module slots.

Detaching Existing Memory Modules

Procedure to unclip and remove existing memory modules from their slots.

Memory Module Installation

Installing New Memory Modules

Steps to insert new memory modules into the slots and secure them.

Computer Cover Reassembly

Securing the Computer Cover

Procedure to close and secure the computer's side panel after memory module installation.

Related product manuals