I
odd
339A
Section
V
SECTION
V
ADJUSTMENTS
5-1.
INTRODUCTION.
5-2.
This section contains complete
adjustment
procedures for the Model 339A Distortion
Measurement
Set. After the instrument has been
adjusted according to
the procedures given in this section,
it should
meet the
accuracy specifications listed in Table
1-1.
5-3.
EQUIPMENT REOUIRED.
Bf
The
test
equipment
required to perform the
adjustments
is listed at the beginning of each adjustment
procedure and in the Recommended
Test Equipment
Table
in Section
I. If
the
recommended equipment
is not
available,
substitute equipment which
meets the critical
specifications
listed in the table
may be used
5-5.
ADJUSTMENT
LOCATIONS.
5-6.
The
Location of
all
adjustments
is shown
in
Figure
5-3 at the back
of
this section
The function
of each
adjustment is listed in Table
5-2.
5-7.
FACTORY
SELECTED
COMPONENTS.
5-8.
Certain
components
in
the
Model 339A are
individually
selected
to
compensate
for varying
circuit
parameters. These components are
noted
on the
schematics and in the material
list by an asterisk (*).
The
value
listed in
ihc
material list and
on the schematic
is the
pical
value
of the selected component.
The
function
of
e factory selected
components and their value
ranges
are listed
in Table
5-1.
5-9.
VOLTMETER
ADJUSTMENTS.
5-10.
Mechanical Meter Zero.
5-11
The mechanical meter-zero should be
checked and
adjusted,
if
necessary, before
proceeding with
the
calibration procedures.
The meter-zero
is checked
when
the
instrument
is
at
its operating temperature
and the
power
is off. The meter
zero
is
correctly
set when the
pointer
rests
directly
over
the zero mark
on the
meter
scale.
To
adjust the meter-zero,
proceed
as
follows:
a. Turn the instrument
on and allow
it to
“warmup”
for at least
20 minutes
d. Continue rotating the screw
clockwise
until
the
pointer
is
exactly over
the zero
calibration
mark.
c.
Rotate the adjustment screw slightly counter-
clockwise to relieve tension on the pointer suspension. If
the
pointer moves off
zero, repeat Steps c through
e. but
make the counter-clockwise rotation less.
5-12.
Gain Adjustments.
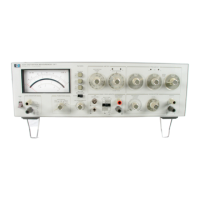
Equipment Required:
AC
Calibrator
(-hp-
Model
745
A).
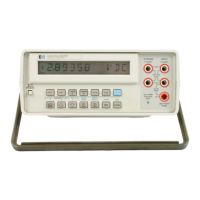
Digital Voltmeter
(-hp-
Model
3*t65A).
a. Set the
339A
controls as follows:
FUNCTION
INPUT
LEVEL
FILTERS OFF (out)
METER RESPONSE
VL
INPUT RANGE
3
V
INPUT, GND SELECT .... DIS.
AN.fi.
(center position)
b.
Set the AC Calibrator
for an output
of
3
V
at
1 kHz,
Connect the
output
of the AC Calibrator to the
339A
DISTORTION ANALYZER input.
c.
Adjust
A2R17 (FULL SCALE ADJUST) for
a
meter indication
of
exactly
3
V.
d.
Reduce the
AC Calibrator output to
I
V
at l kHz.
e. Adjust A2R37
(1,3
SCALE
ADJUST)
for a
meter
indication of
exactly
I
V.
NOTE
The adjustmen:
of
A2R17 and A2R37
interact. Repeat
Steps h through
e
until the
merer indication
is correct
<il both
Julhcaie
fj
V)
and one-third scale
f
1
V).
f.
Set the AC
Calibrator for
an
output of 3.162 V at
1 kHz.
Set the
Digital
Voltmeter
to measure DC
volts
(20
volt
range).
b- Turn
the instrument off and allow
approximately
30 seconds for all capacitors
to discharge.
g
Connect
the DVM's
low
input to
the
A2 assembly
shield
and the high
input
to
A2TP2.
W
c. Rotate the zero
adjustment
screw
clockwise until
the
pointer is left of zero and moving
up-scalc.
h.
Adjust
A2R36
(REFERENCE
ADJUST)
for a
DVM
reading
of
+3.162
V
dc
5-1
 Loading...