Section
V
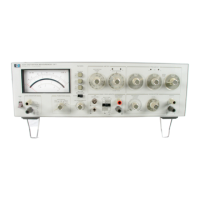
Model
339
A
i.
Reduce the
AC
calibrator output to
0,94 V.
j.
Adjust A2R35
(LOW
LIMIT ADJUST) until
the
INPUT R ANGE
low limit indicator just
lights.
k.
Increase the AC
Calibrator output
to
0.95 V. The
low
limit indicator
should
turn off.
If
not, repeat Steps i
and
j.
l. Increase
the
AC
Calibrator output to 3.10
V.
Note
that both high and low INPUT RANGE indicator
tights
are
OFF
Reconnect the cable
to
A2J2.
Return the LINE switch to
ON.
5-13.
OSCILLATOR
ADJUSTMENTS.
5-14,
Amplitude
Adjustment.
Equipment
Required:
Digital
Voltmeter
(-hp-
Model 3465A)
a.
Set the
339A
controls as
follows:
m.
Increase the
AC
Calibrator output to 3.4 V. The
INPUT RANGE
high limit indicator
should light.
rrmnrvj
JTIONi
UiJUUiJ
Set
the USE
switch OFF before performing
the following
steps to
prevent
damaging
A?
17.
FREQUENCY 10 Hz
(1.0
x
10)
FREQUENCY
VERNIER CAL
OSCILLATOR
LEVEL
3V
(vernier fully CW)
b.
Set the DVM
to measure DC volts
(2
volt range).
Conned the
DVM’s
high
input to
A1TP8 and
the
low
input
to the A1
assembly
shield
n.
Set
the
339A LFNE
switch OFF.
o.
Disconnect the cable from A2J2.
Place the cable in
such a manner that it
will not
short
against the chassts
or
components on
the
PC
assembly,
p.
Install a
jumper
wire
between
A2TPI
and A2TP8.
q.
Set the
DVM
to measure
DC
volLs
(20
volt range).
Connect
the
DVM's
high
input to
A2TP9
and the low
input to the A2
assembly
shield,
c.
Adjust A1R30
(AMPLITUDE
ADJUST)
for
a
DVM reading of
-0.4
V
dc
±0.1
V
dc.
5-15.
Frequency
Adjustment.
Equipment
Required:
Electronic Counter (-hp- Model
5300,A mainframe.
Model 5302A
Universal
Counter Module
1
a.
Set
Lhe 339A controls as
tollows:
r. Set the
AC
Calibrator for
an
output of
3
V at 1 kHz.
s.
Set the 339A LINE switch
ON.
A.
Adjust A2R24
(AUTO
SET-LEVEL
FULL
SCALE
ADJUST)
for a DVM reading of
*3.162 V
dc.
u.
Reduce
the
AC
Calibrator output to
1
V.
v. Adjust A2R22
(ALTO-SET LEVEL
1,
3 SCALE
ADJUST)
for
a DVM reading of
*3.162
V
dc.
NOTE
FREQUENCY
10 kHz <1.0 x 10 K)
FREQUENCY
VERNIER
CAL
OSCILLATOR
LEVEL
3
V
(vernier
fully
CW)
b. Connect the Electronic
Counter
input to the 339A
Oscillator
output.
c.
Adjust A1C7
(10
kHz
adjust) for a counter
indication
of 10 kHz
-
10
Hz.
d.
Set
the
339A
FREQUENCY controls for a
frequency of
100 kHz.
(10.0 x
10 K).
The adjustment
of
A2R22 and A2R24
interact.
Repeat Steps
r through
v
until the
DVM
indication at both full-scale
and
1/3
scale is
*3.
162
V
dc ±0.02
V
dc.
w.
While
observing the
DVM. set the
AC
Calibrator
for output of
1.5,
2.0. 2,5.
and 3
volts.
The
DVM
should
indicate
3.162
V
dc
+0.04
V
dc for each setting.
x. Set
the
339A
LINE
switch to OFF.
Remove the test
jumper and
DVM
leads.
e.
Verify
that
the
counter
reads 100 kHz
±1
kHz. If
not,
readjust
A1C7
until
both
the 10 kHz
and 100 kHz
readings are
within the specified limits.
5-16. ANALYZER
ADJUSTMENTS.
5-17.
Notch
Filter Null Adjust.
Equipment
Required:
Spectrum
Analzyer
(
hp- Model 3044A)
Low
Distortion
Oscillator (-hp-
Model
339
A)
 Loading...