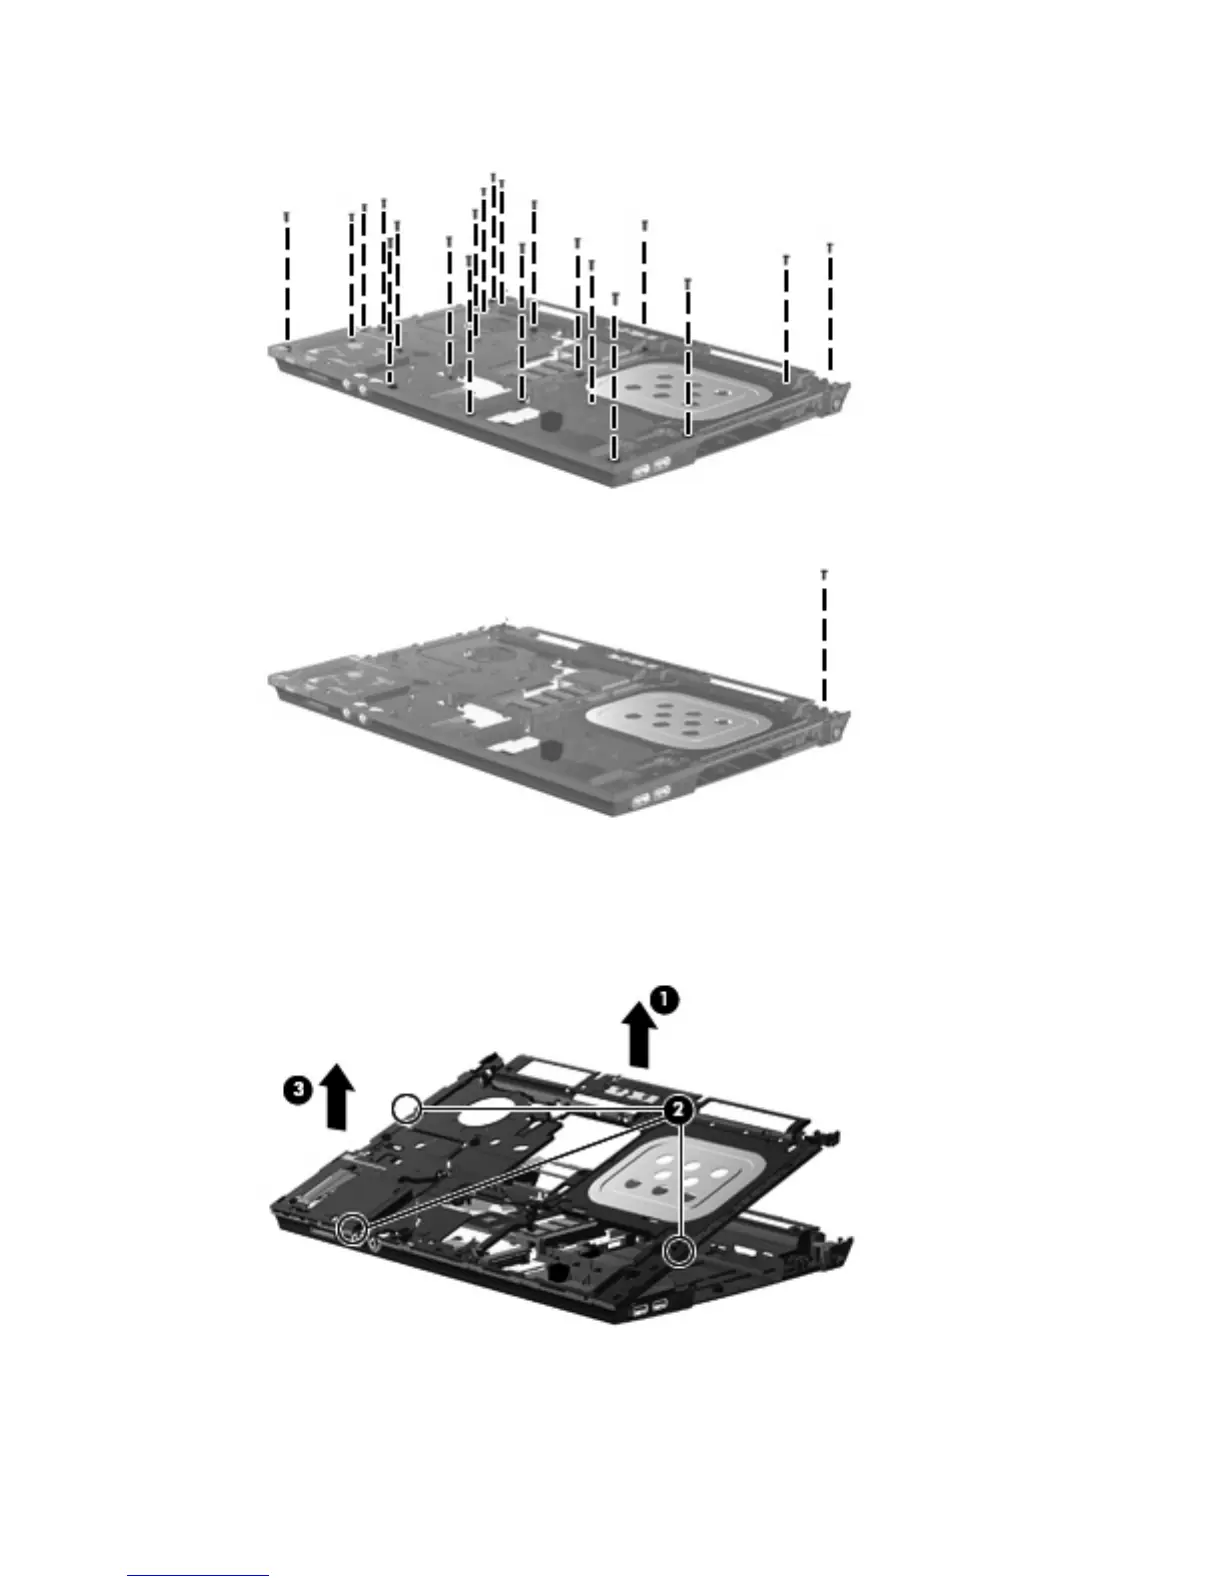
10. Remove the 21 PM2.5×6.0 screws that secure the top cover to the computer.
11. Remove the Phillips PM2.0×4.5 screw that secures the top cover to the computer.
12. Lift the top cover until it disengages from the base enclosure (1). Locations at which the top cover
more securely connects to the base enclosure are indicated by callout (2). If necessary, apply
additional upward pressure at these points to disengage the top cover.
13. Remove the top cover (3).
Reverse this procedure to install the top cover.
Component replacement procedures 93

 Loading...