Hardware Reference Guide www.hp.com 2-33
Hardware Upgrades
The 3.5-inch bay is located underneath the optical drive. To install a
drive into the 3.5-inch bay:
✎
Install guide screws to ensure the drive will line up correctly in the
drive cage and lock in place. HP has provided extra guide screws
(four 6-32 standard screws and four M3 metric screws), installed in
the front of the chassis, under the computer cover. The hard drive uses
6-32 standard screws. All other drives use M3 metric screws. The
HP-supplied M3 metric screws are black and the HP-supplied 6-32
standard screws are silver.
1. Follow the procedure described in the “Removing an Optical
Drive” section to remove the optical drive and access the 3.5-inch
drive bay.
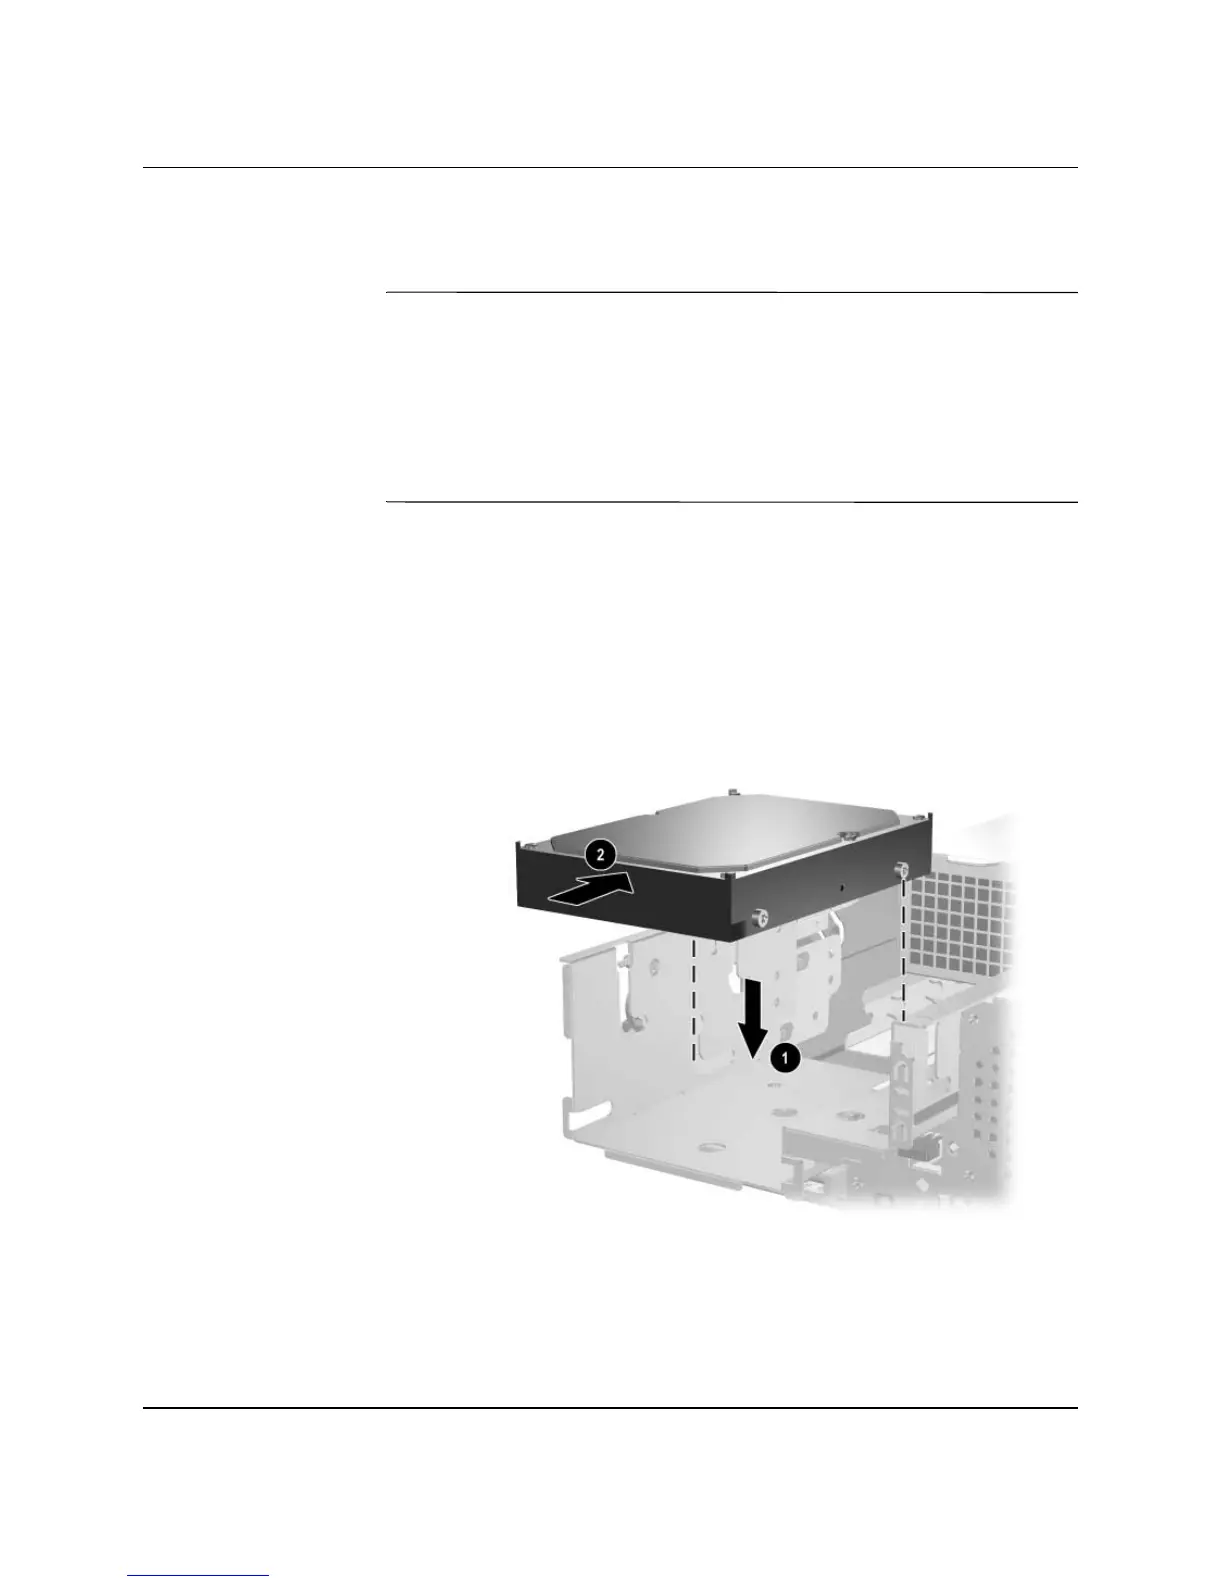
2. Position the guide screws on the drive into the J-slots in the drive
bay 1. Then, slide the drive toward the rear of the computer 2 to
secure the drive in the J slots.
Installing a Drive into the 3.5-inch Drive Bay (Hard Drive shown)
3. Slide the drive cage back into the chassis until it locks into place.
 Loading...