x2
x2
4. Attach the Stand to the printer
5. Assemble the paper Bin
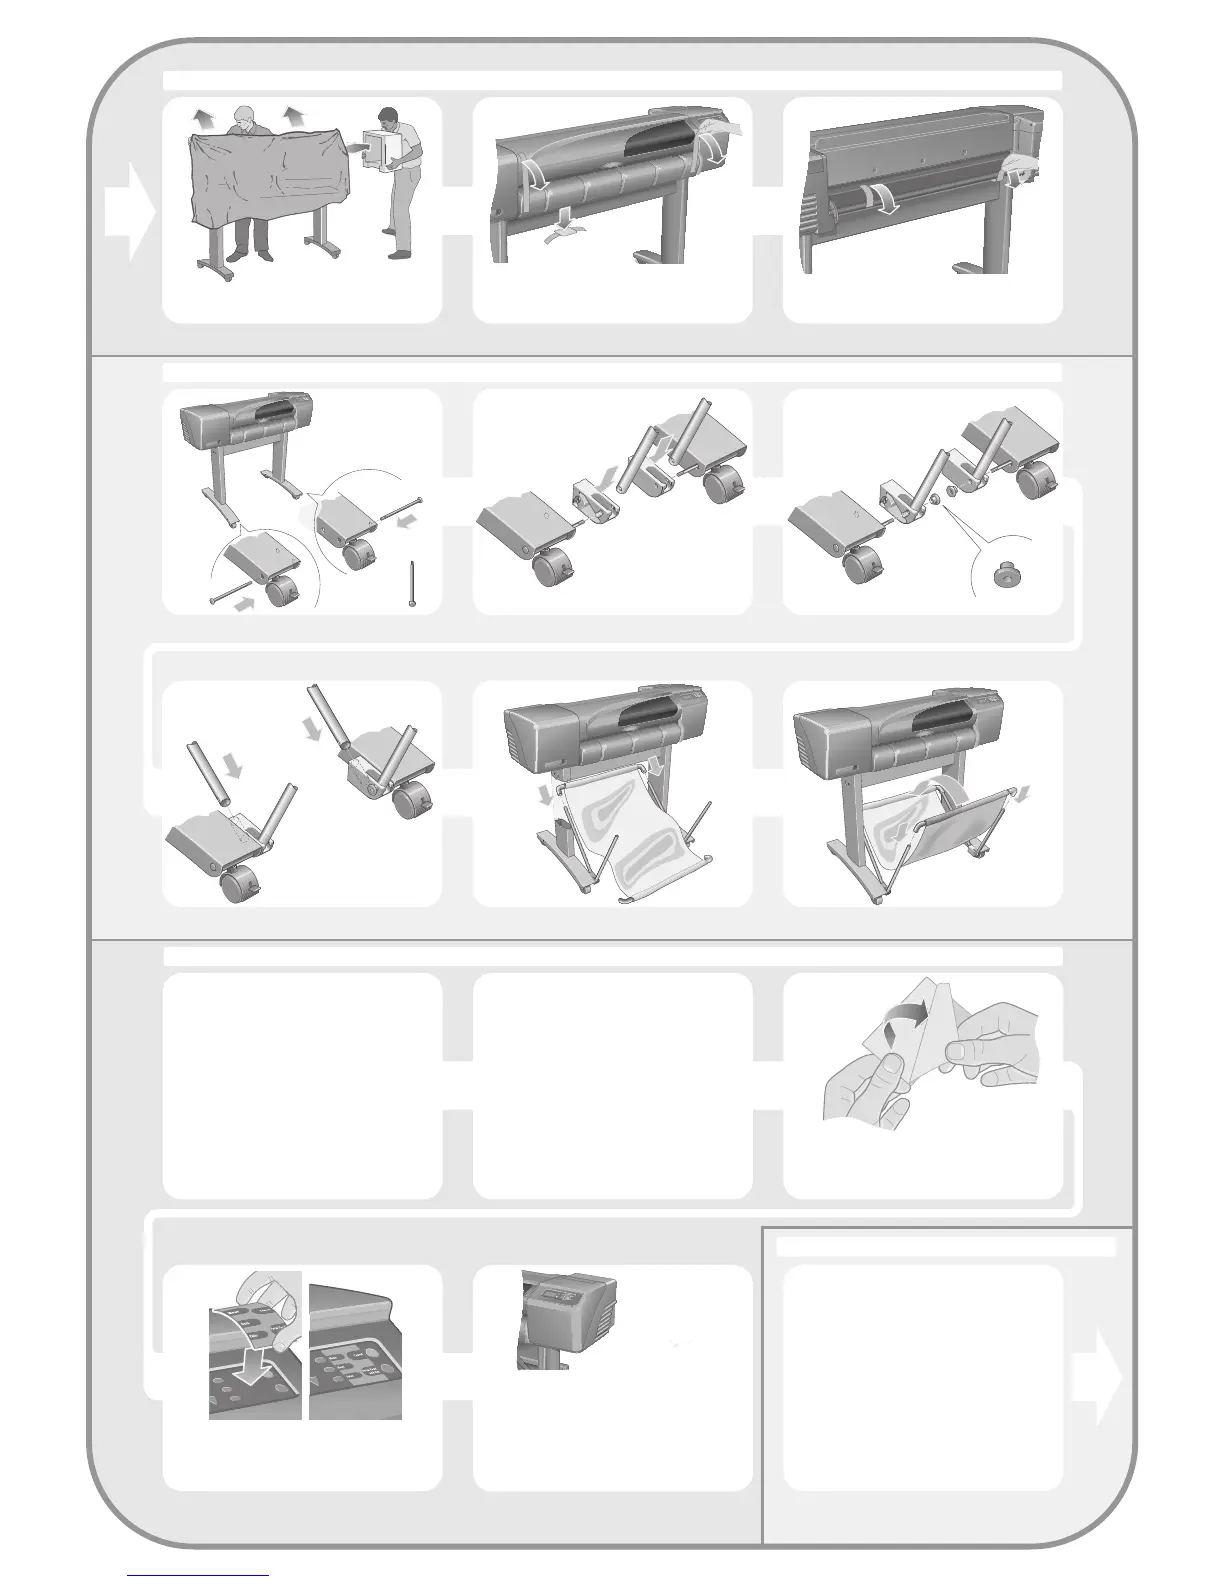
7–Remove the plastic covering and foam
end caps.
For assembly of the accessory stand, use the poster supplied with it
For assembly of the accessory stand, use the poster supplied with it
(continued)
Page 3
8–Remove the tapes from the window and the
spindle. Remove also the small bag of
desiccant material
9–Remove the tapes from the spindle at the
back of the printer.
1
6
5
2
3
4
6. Locate the Front-Panel Overlay and Pocket Guide
(all models)
7. Switch On and Choose a Language
(all models)
NOTE: If your printer is an HP Designjet 510
you will not find the front-panel overlay and
can skip steps 2 and 3.
1–From the red documentation package
(the “installation pack”) remove:
– The Front-Panel overlay, for use in the next
step.
– The Pocket Guide, for use in the next step.
– The ink cartridges, for use in “Insert Ink
Cartridges” on page 4.
– The printheads, for use in “Replace Set-Up
Printheads with Active Printheads” on page 5.
– The cables, for use in “Switch On and
Choose a Language” on page 4 and “Install
and Connect a LAN Card” on page 7.
2–Front-Panel Overlay (1) The overlay for the
Front Panel of the printer is in the “Installation
pack” of documentation and other items. Peel
off the backing.
3–Front-Panel Overlay (2) Carefully stick the
overlay onto the Front Panel, which
is at the
r
ight side of the front of the printer.
4–The Pocket Guide is also In the “Installation
pack” of documentation and other items. It
contains important information for the use of
the printer. We strongly recommend that you
put the Pocket Guide into the horizontal slot on
the right-hand side of the printer, so that users
of the printer can refer to it when necessary.
WARNINGS
• When the printer is powered on, keep
objects such as hair, jewelry and clothing
away from the printer mechanisms.
• Make sure that the power cord supplied
with your printer matches your AC power
outlet connection. Only use a three-wire
(earth-grounded) power cord with this
printer.
HP DesignJet
 Loading...