HP Designjet T Series — Service Manual 6-19
Removal and Installation - Right Front Trim
Right Front Trim
Removal
1. Remove the Front Cover on page 6-16.
2. Remove the
Media Output Assembly on
page 6-17.
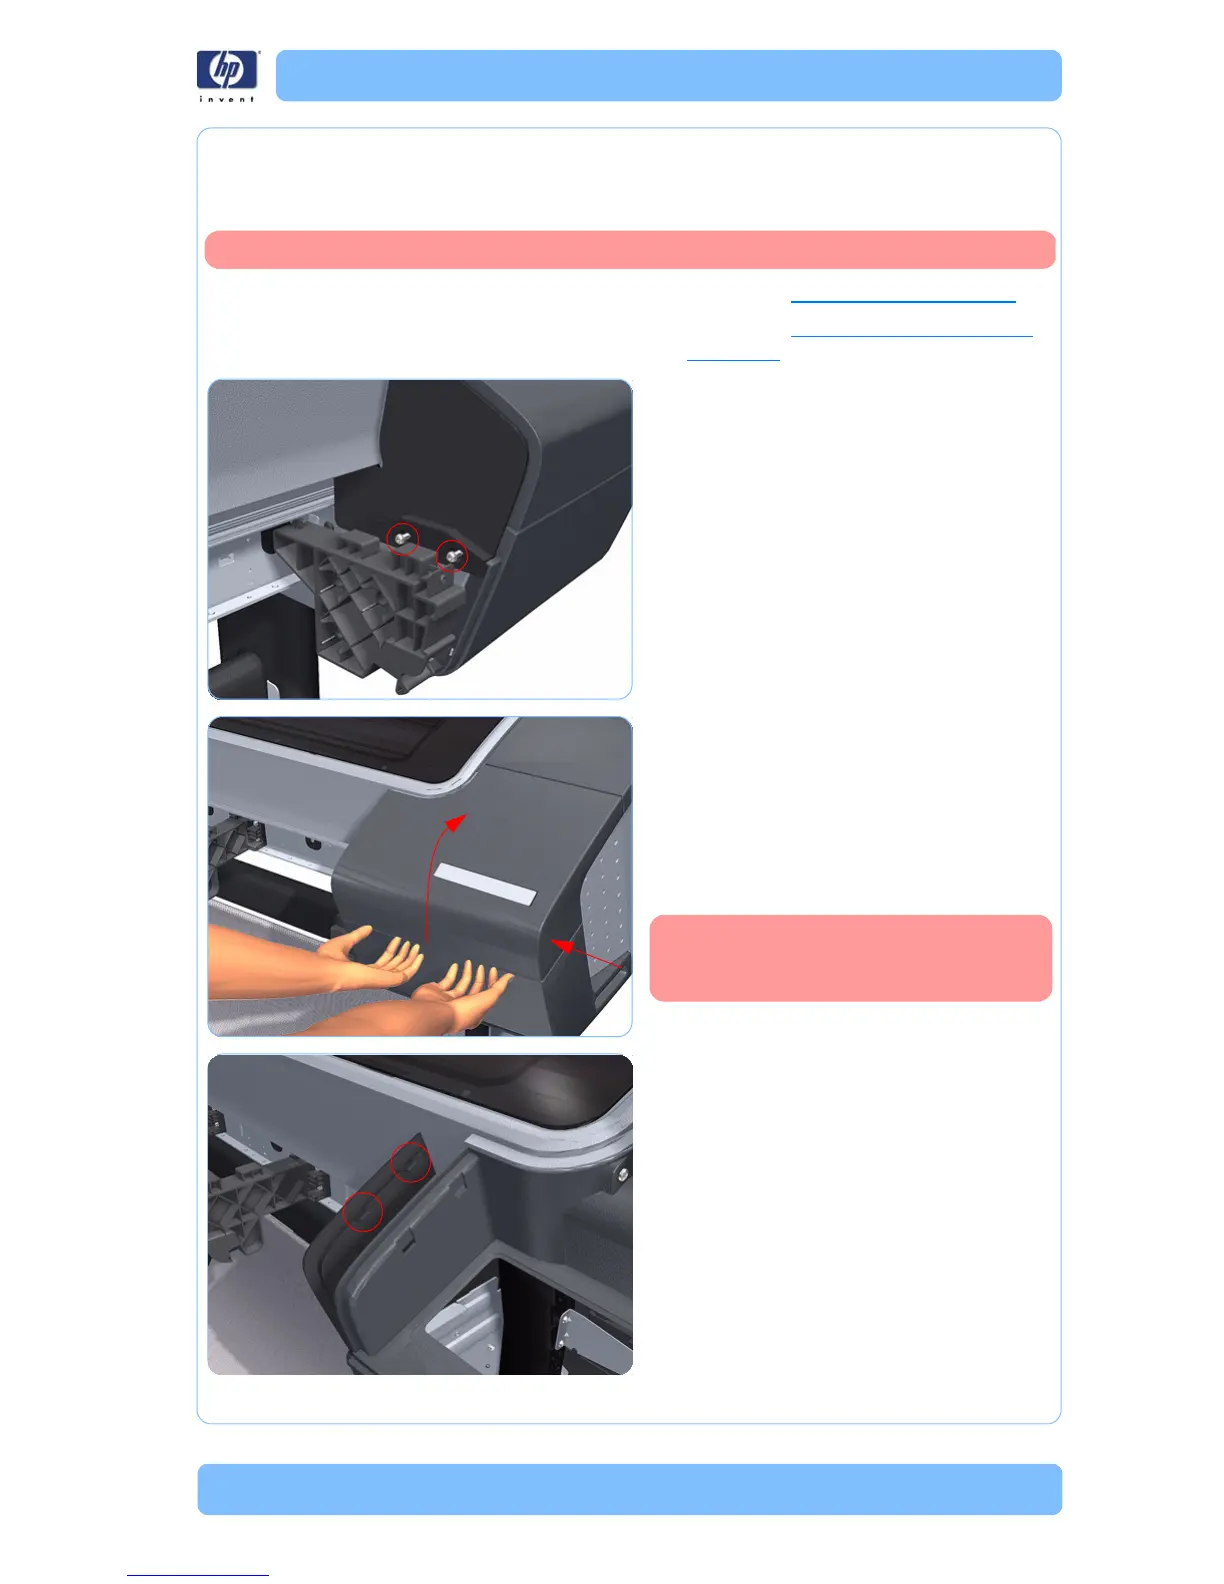
3. Remove two T-15 screws that secure the
Right Front Trim to the printer.
4. Open the Right Ink Cartridge Door by
applying sharp pressure to the right
side of the door and lifting firmly where
the door meets the Right Cover. Use your
hands. When the door is unclipped from
the pressure applied to the right side of the
door, you will hear a sound that
corresponds to the clip.
Do NOT use a screwdriver or other
tool to open the Right Ink Cartridge
Door.
5. Unclip the Right Front Trim.
Switch off the printer and remove the power cable.
 Loading...