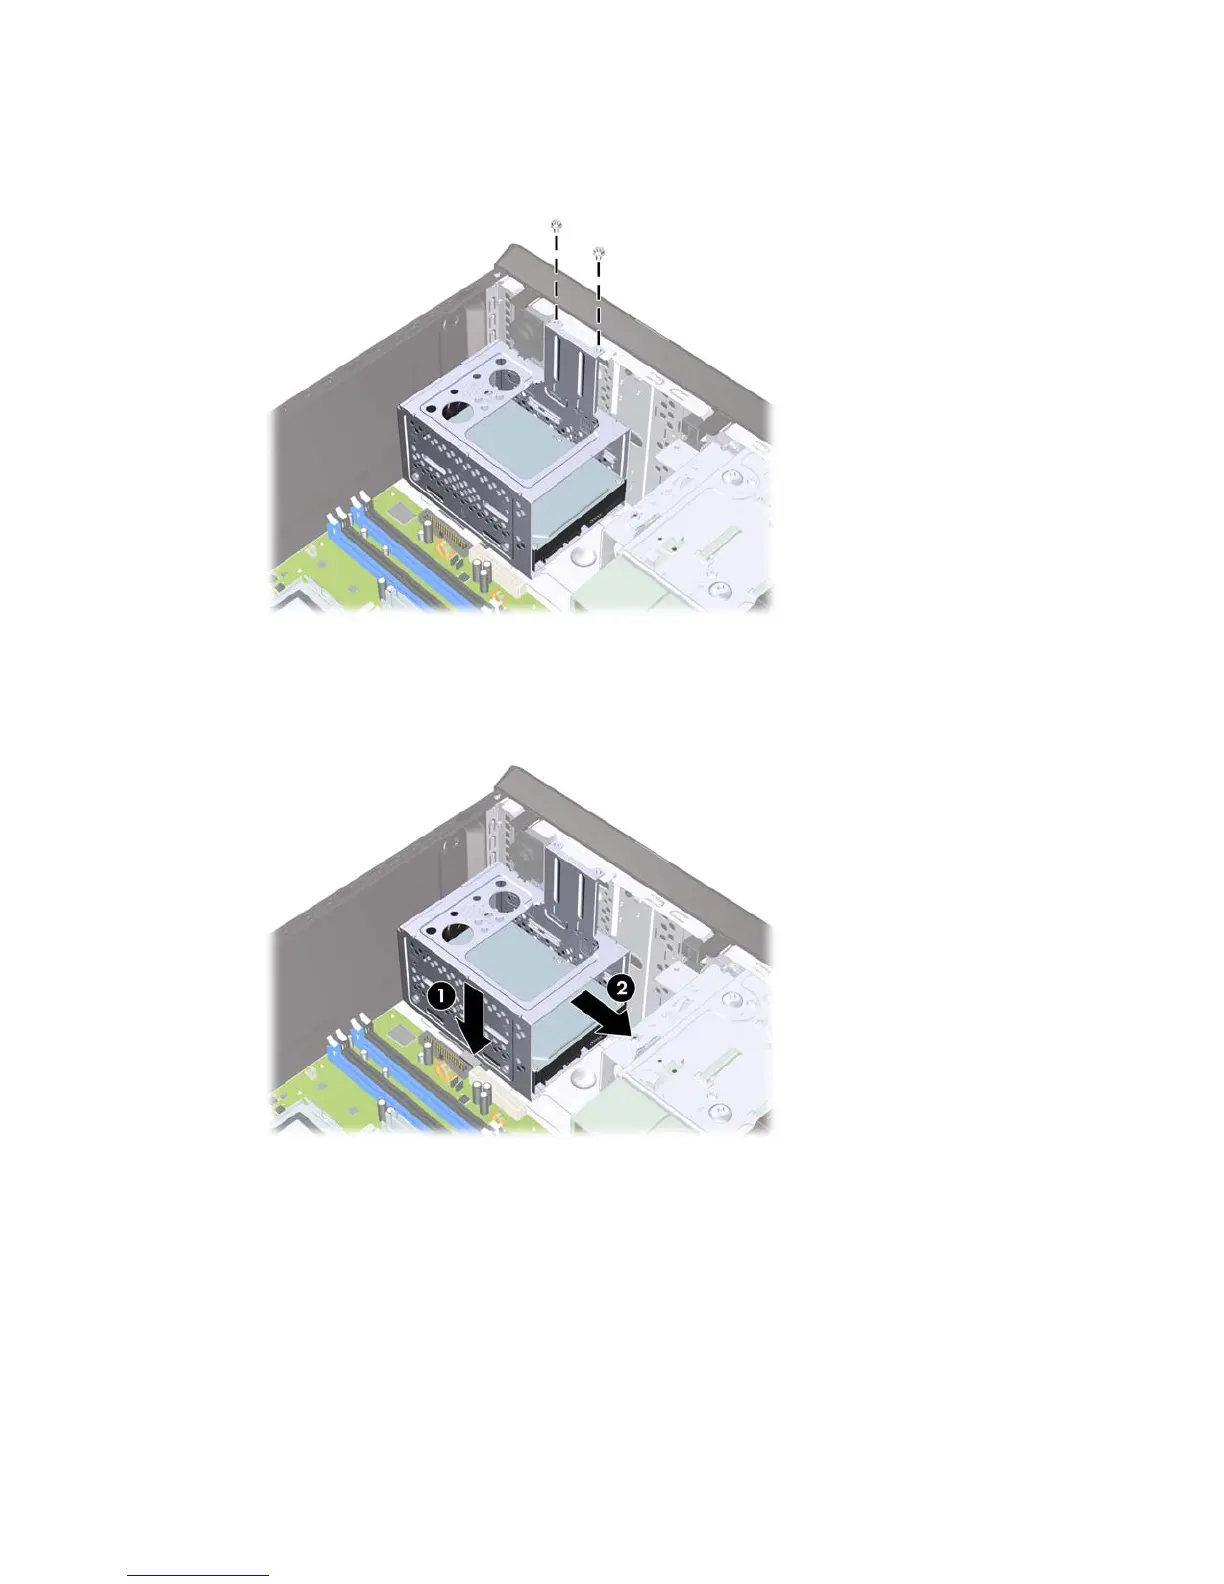
6. Remove the two screws that secure the hard drive cage to the chassis.
Figure 2-26 Removing the Hard Drive Cage Screws
7. Push down the latch on the side of the hard drive cage (1), then slide the hard drive cage away
from the bottom of the chassis (2) as shown below.
Figure 2-27 Releasing the Hard Drive Cage
ENWW Installing Additional Drives 33

 Loading...