EasyManuals Logo

HP dx7500 - Microtower PC Hardware Reference Guide

HP dx7500 - Microtower PC
58 pages
To Next Page IconTo Next Page
To Previous Page IconTo Previous Page
Page #42 background imageLoading...
Page #42 background image
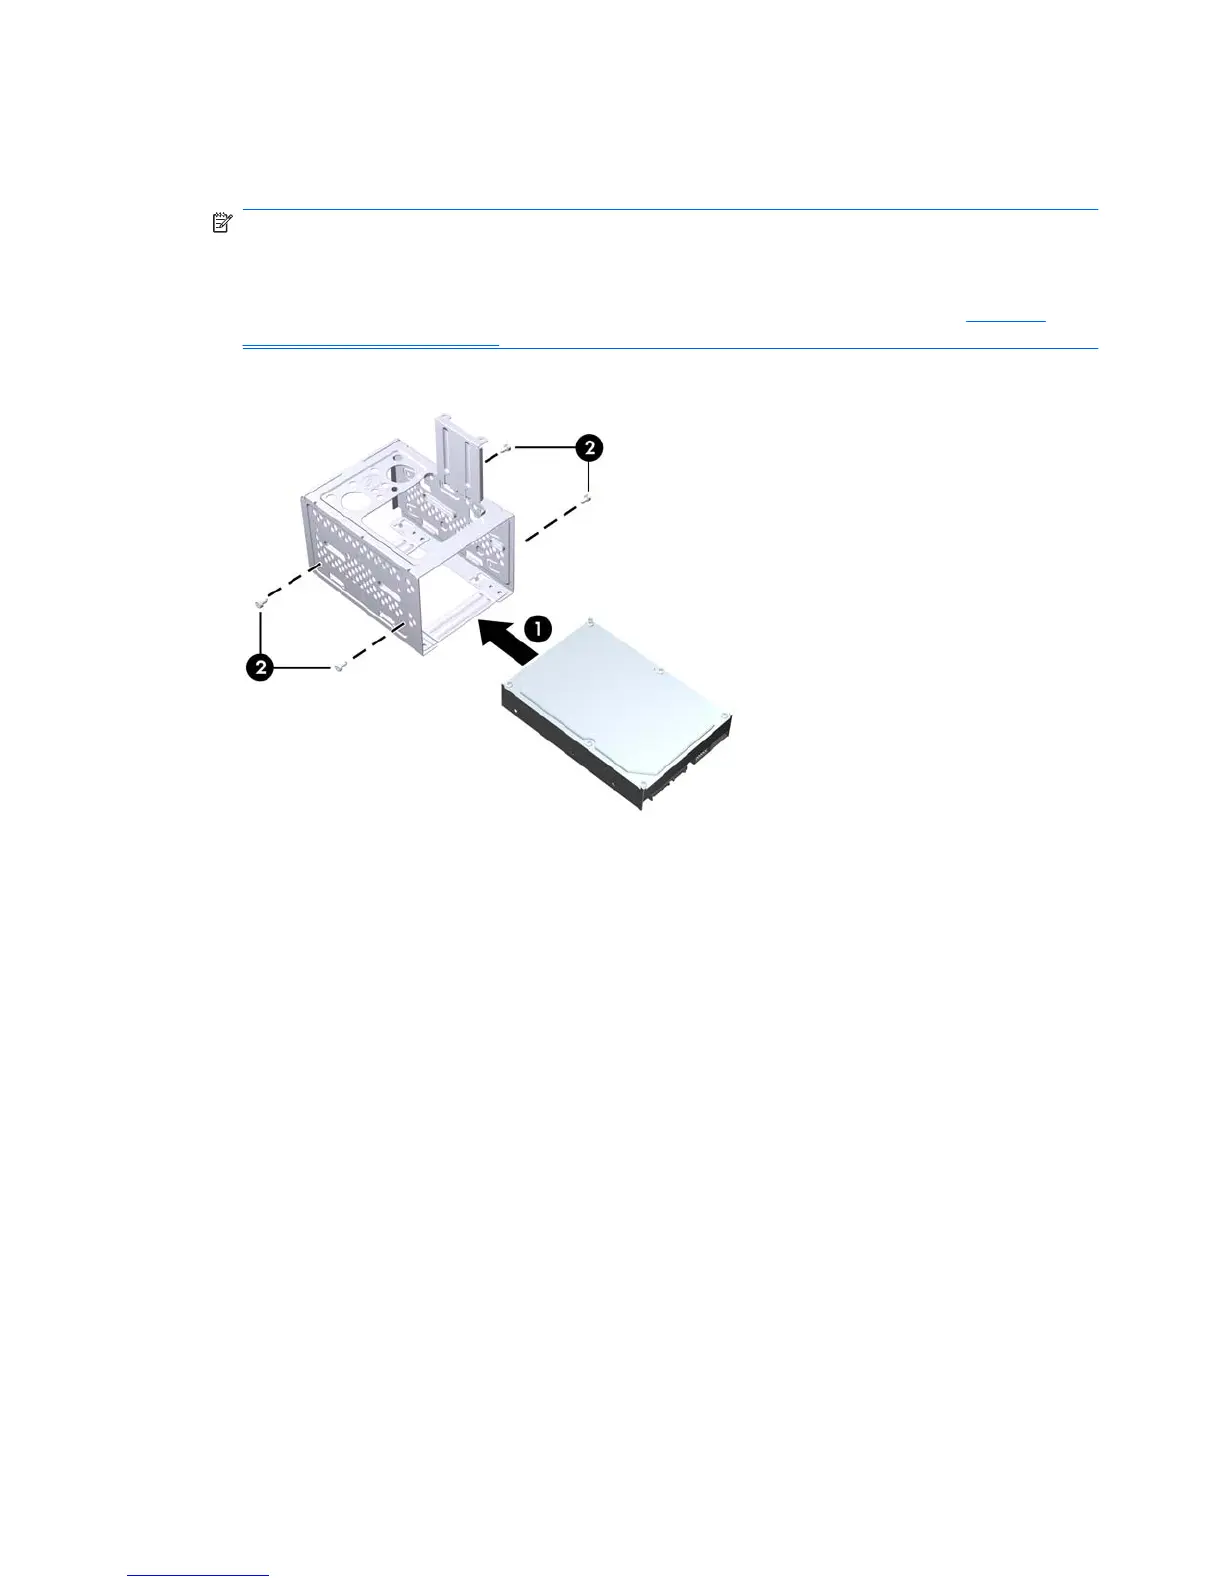
2. Slide the new drive into the hard drive cage (1), aligning the drive with the four screw holes on the
cage. Install the four 6-32 standard screws that secure the hard disk drive to the hard drive cage
(2). Make sure the hard disk drive cables are facing the top of the drive cage.
NOTE: If you are replacing an old drive with a new drive, use the four retainer screws from the
old drive to install the new drive.
NOTE: If you are installing a second hard drive, use four of the extra standard 6-32 screws that
are installed on the interior of the front bezel. The 6-32 screws are silver. Refer to
Installing
Additional Drives on page 24 for an illustration of the retainer screws location.
Figure 2-31 Installing the Hard Drive in the Drive Cage
36 Chapter 2 Hardware Upgrades ENWW

Other manuals for HP dx7500 - Microtower PC

Questions and Answers:

Question and Answer IconNeed help?

Do you have a question about the HP dx7500 - Microtower PC and is the answer not in the manual?

HP dx7500 - Microtower PC Specifications

General IconGeneral
MemoryUp to 8 GB DDR2 SDRAM
Form FactorMicrotower
Power Supply300W
ProcessorIntel Core 2 Duo, Intel Pentium Dual-Core, Intel Celeron
StorageSATA hard drives up to 500 GB
Optical DriveDVD-ROM or DVD+/-RW
GraphicsIntegrated Intel Graphics Media Accelerator 3100, Optional discrete graphics cards
AudioIntegrated High Definition Audio
NetworkIntegrated Gigabit Ethernet
Expansion Slots1 PCI Express x16, 2 PCI Express x1, 1 PCI
PortsUSB 2.0, serial, parallel, VGA, audio in/out
Operating SystemWindows Vista Business, Windows XP Professional, FreeDOS
WeightApprox. 22 lbs (10 kg)

Related product manuals