HP L1940T
49
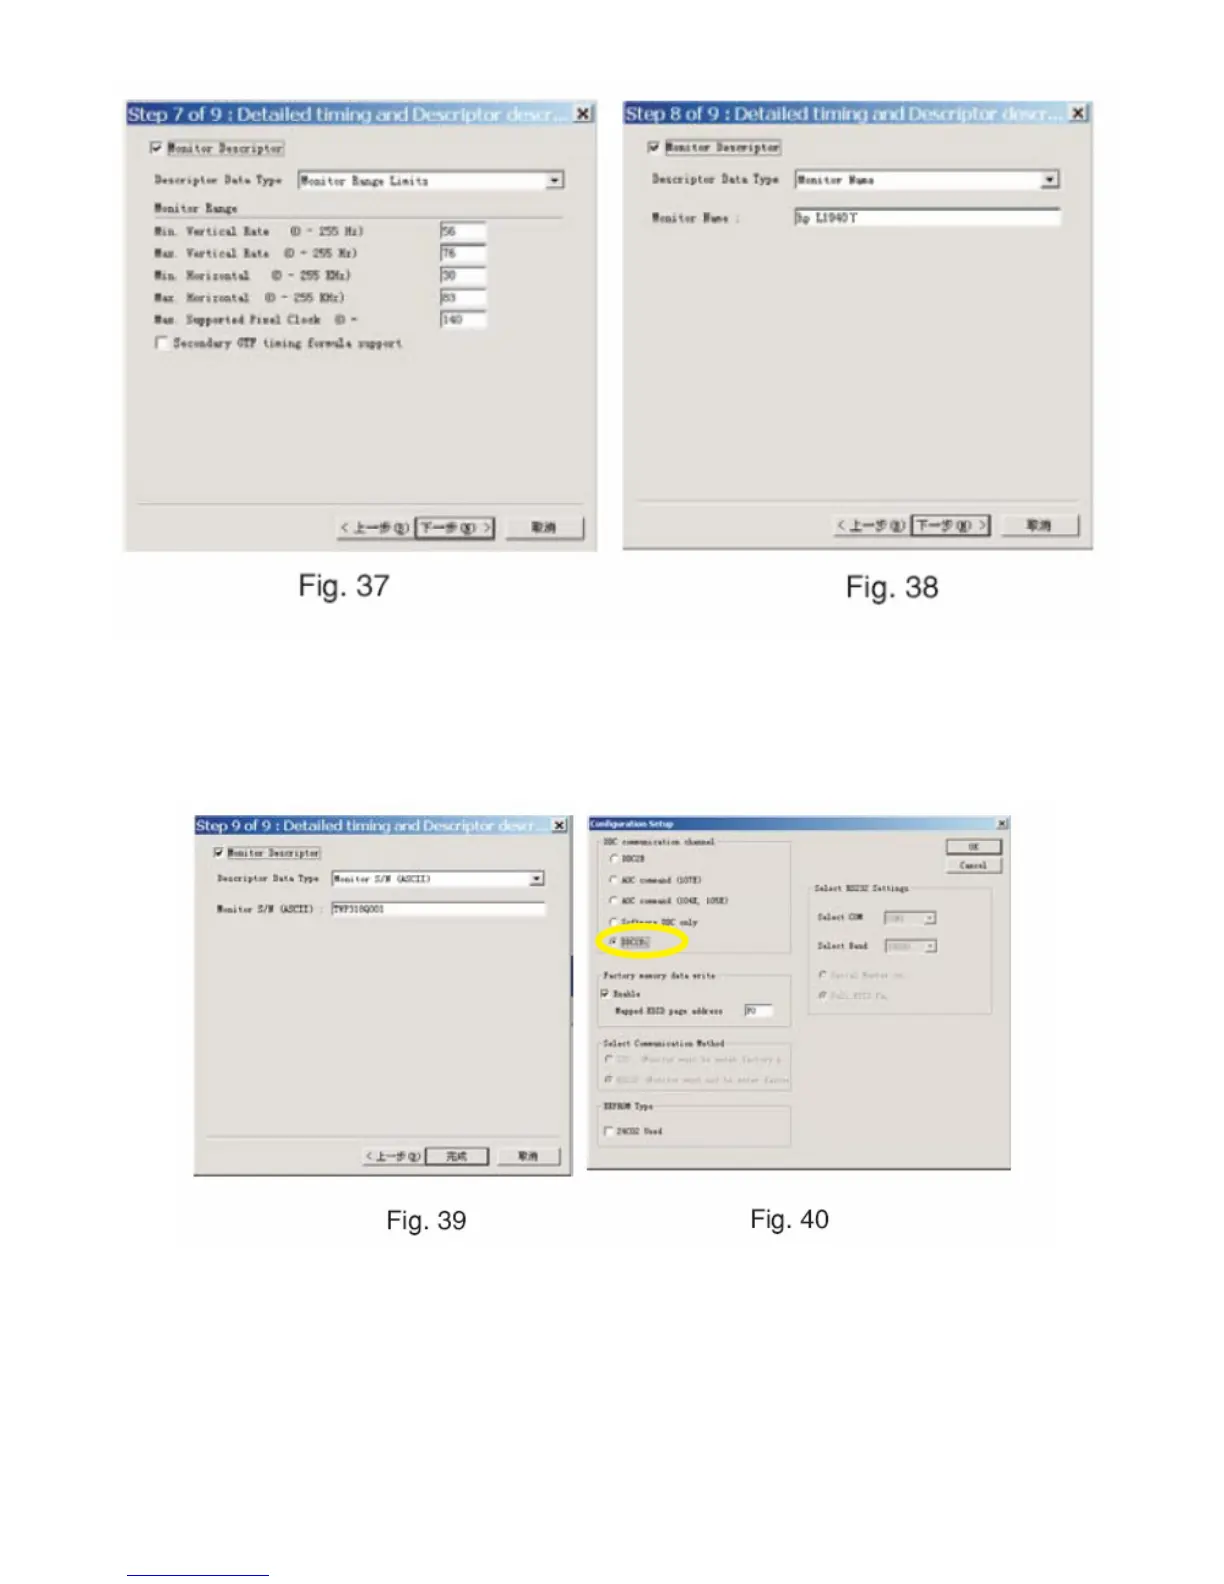
8. Click Next , bring up Fig. 39.
- Click Finish to exit the Step window.
- Serial number can be filled up at this moment (for example, TWP318Q001).
NOTE: You must modify the Serial NO. In step 9, otherwise the Serial NO. In OSD Couldn't be modified correctly.
Step 5: Write DDC data
1. Configuration should be as Fig. 40. And press OK.
2. Access Factory Mode
1). Turn off monitor.
2). [Push "Auto Adjust " and "+(plus) and hold them at the same time ] + [Press power "Power " button untill comes out
"Windows screen"] => then release all button, then press "Menu" button, wait until the OSD menu with Character "F"
(below OSD menu) come on the Screen of the monitor (see Fig. 41).
 Loading...