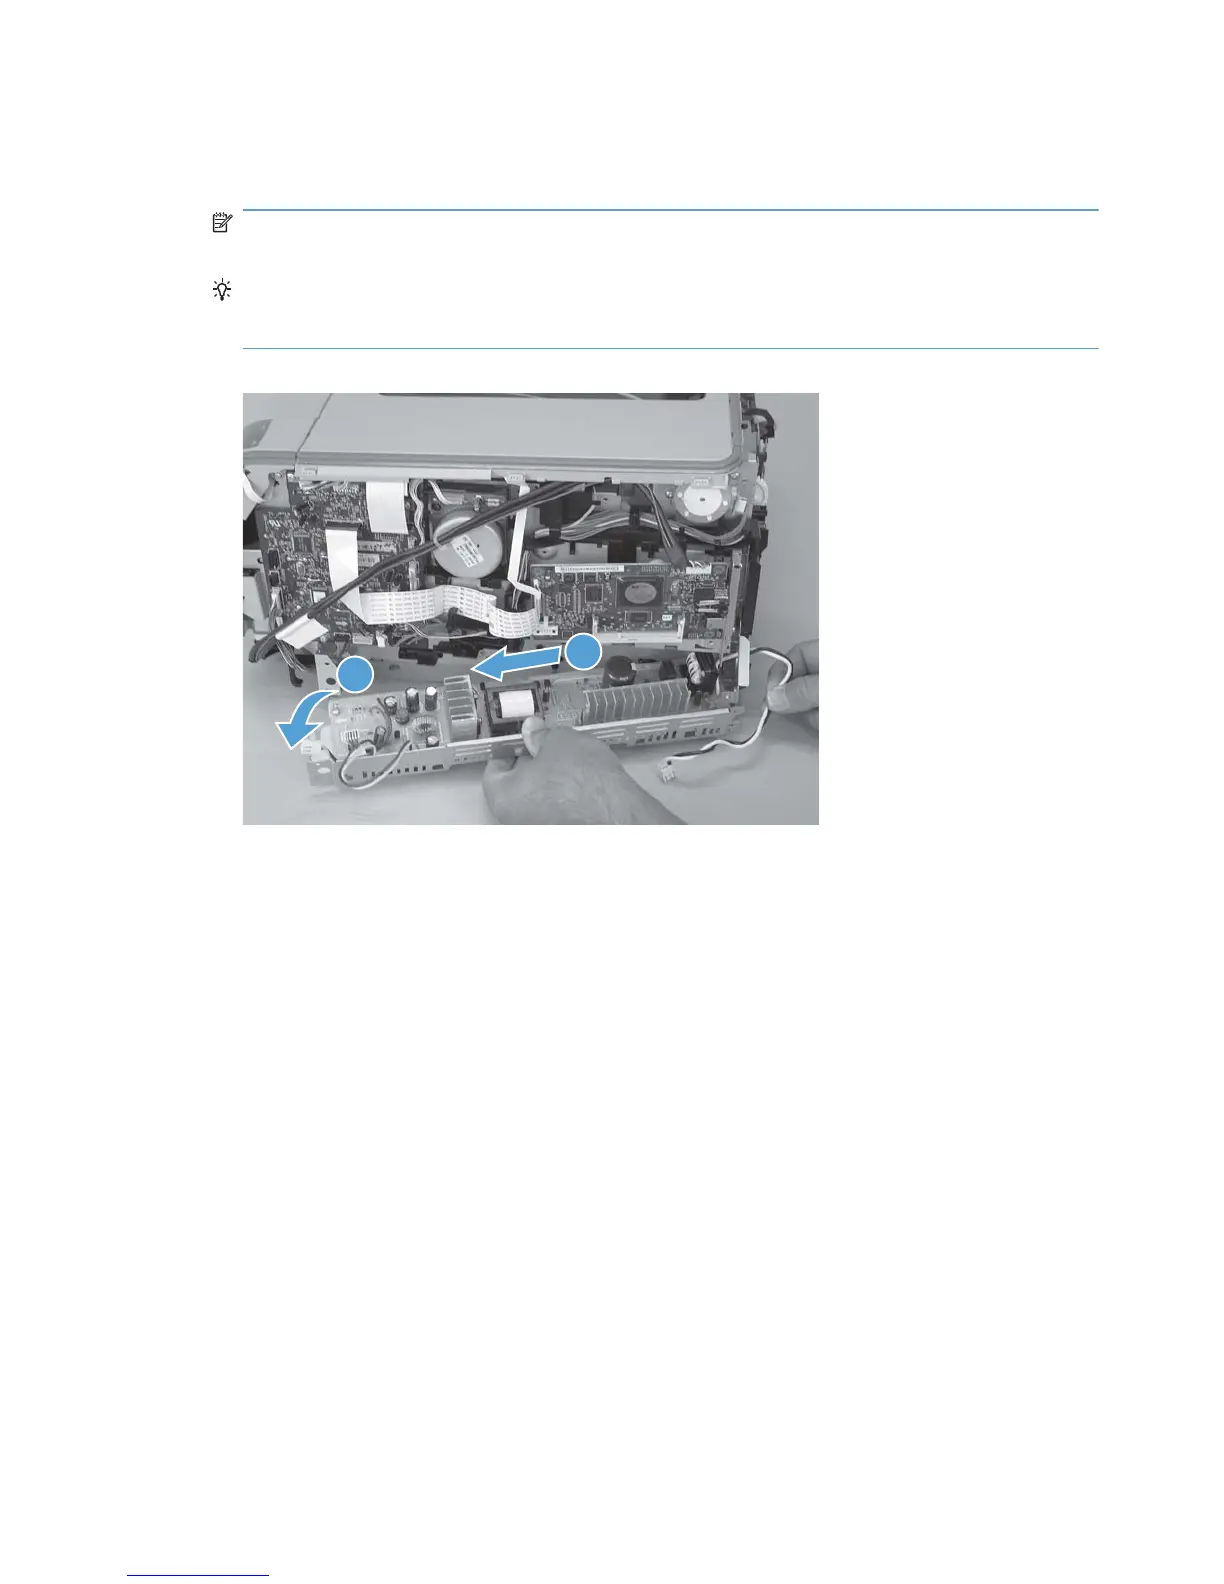
11. Rotate the end of the power supply near the control-panel module out and away from the
product until it clears the chassis, and then slide the power supply toward the control-panel
module to remove it.
NOTE: As you remove the power supply, feed the wire harness at the rear of the product
through the opening in the chassis.
TIP: Make sure that the tab on the right end of the power-supply chassis fits into the slot on the
product chassis, and the left-hand side of the tray rides on top of the ledge of the chassis, when
the power supply is reinstalled.
Figure 1-79 Remove the power supply (low-voltage; 10 of 10)
2
1
52 Chapter 1 Removal and replacement ENWW
 Loading...