10
9
a
b
c
a
b
e
4 • HP Photosmart C7280 All-in-One series
Tekan bagian bawah setiap penahan untuk
melepaskannya, kemudian angkat penahan.
Angkat keenam penahan.
a.
b.
Cocokkan warna dan pola kartrid tinta dengan
warna dan pola di atas penahan.
Dorong kartrid tinta hitam ke dalam slot pertama di
sebelah kiri. Tutup penahan.
Ulangi untuk setiap kartrid tinta warna.
Pastikan setiap penahan terpasang kencang.
Catatan: Gunakan hanya kartrid tinta yang
disertakan dengan printer. Tinta di dalam kartrid
ini diformulasi secara khusus agar bercampur
dengan tinta pada unit kepala cetak pada saat
pemasangan pertama kali.
Tutup pintu akses.
a.
b.
c.
d.
e.
บีบด้านล่างของสลักเพื่อปลดล็อค จากนั้นให้ยกสลักขึ้น
ยกสลักทั้งหกตลับขึ้น
a.
b.
จับคู่สีและรูปแบบของตลับหมึกให้ตรงกับสีและรูปแบบด้
านบนสลัก
ดันตลับหมึกสีดำลงไปในช่องแรกทางด้านซ้าย
ดึงสลักลง
ทำซ้ำขั้นตอนนี้กับตลับหมึกพิมพ์สีอื่นๆ
ตรวจดูว่าปิดสลักแน่นหรือไม่
หมายเหตุ: ใช้ตลับหมึกพิมพ์ที่มาพร้อมเครื่องพิมพ์เท่านั้
น หมึกพิมพ์ในตลับเหล่านี้ถูกสร้างขึ้นเป็นพิเศษเพื่อผสม
กับหมึกในชุดหัวพิมพ์เมื่อทำการติดตั้งครั้งแรก
ปิดฝาครอบตลับบรรจุหมึก
a.
b.
c.
d.
e.
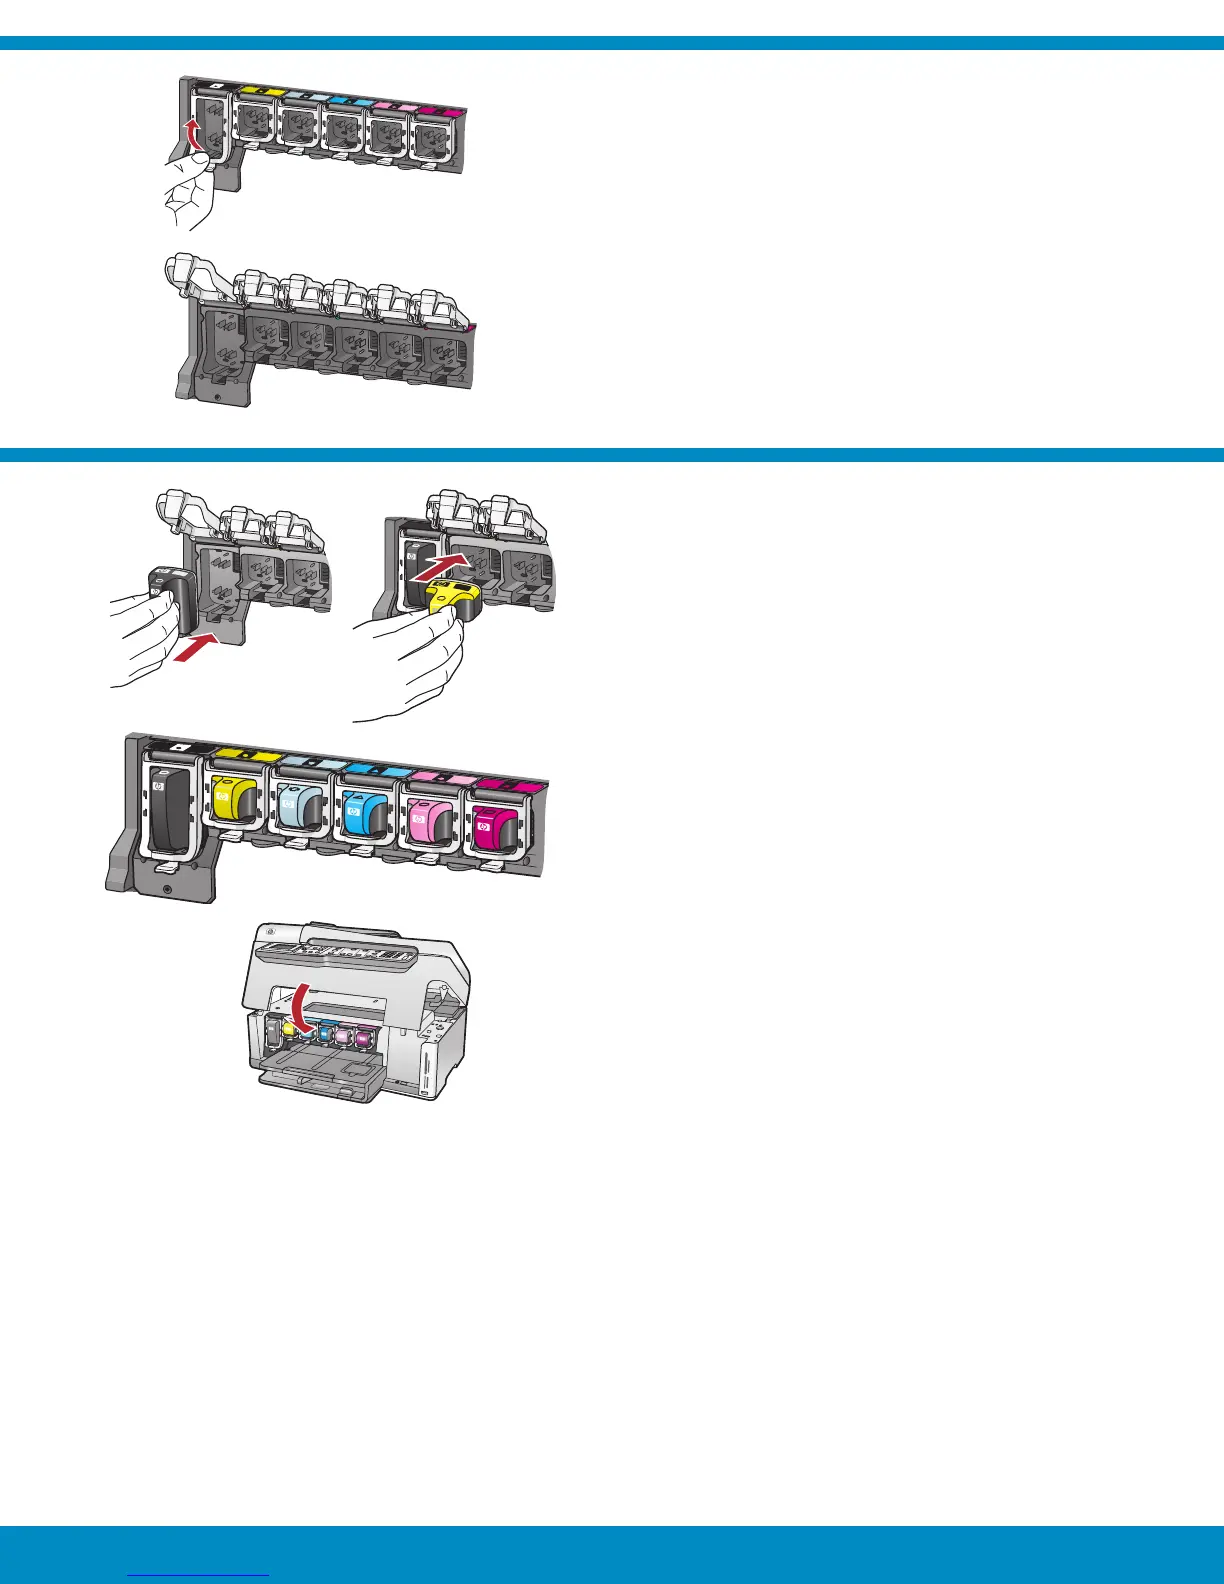
Squeeze the bottom of each latch to release it, and
then lift the latch.
Lift all six latches.
a.
b.
Match the color and pattern of the ink cartridge to
the color and pattern above the latches.
Push the black ink cartridge in to the fi rst slot on the
left. Close the latch.
Repeat with each of the color ink cartridges.
Make sure each latch is secure.
Note: Use only the ink cartridges that came with
the printer. The ink in these cartridges is specially
formulated to mix with the ink in the print head
assembly at fi rst-time setup.
Close the access door.
a.
b.
c.
d.
e.
 Loading...