EasyManua.ls Logo

HP Photosmart M407 - User Manual

HP Photosmart M407
18 pages
To Next Page IconTo Next Page
Loading...
Chapter 1: Getting Started 9
Chapter 1:
Getting Started
Congratulations on your purchase of this HP Photosmart
digital camera! This camera has many features to enhance
your picture-taking experience, including 7 shooting modes,
HP Instant Share, direct printing capability, manual and
automatic controls, on-camera Help, and an optional
camera dock.
With HP Instant Share, you can easily select images in your
camera to be automatically sent to your favorite destinations
(such as e-mail addresses and online albums) the next time you
connect the camera to your computer. Your friends and family
can easily receive and view your pictures in e-mail without
being burdened by large file attachments. And with the direct
printing capability, you can easily select images in your
camera to be automatically printed the next time you connect
the camera to your computer or directly to any HP Photosmart
printer or PictBridge-compatible printer without ever connecting
to your computer.
To further enhance your experience,
you can purchase an HP Photosmart
M-series dock. The camera dock
allows you to easily transfer images to
a computer, send images to a printer
or television, and recharge Nickel Metal Hydride (NiMH)
batteries in your camera. The dock also provides a convenient
home for your camera.

Other manuals for HP Photosmart M407

Question and Answer IconNeed help?

Do you have a question about the HP Photosmart M407 and is the answer not in the manual?

HP Photosmart M407 Specifications

General IconGeneral
Image SensorCCD
Optical Zoom3x
Camera typeCompact
Sensor TypeCCD
Effective Pixels4.1 MP
Screen Size1.5 inches
Storage MediaSD/MMC
Battery Type2x AA batteries
Image sensor size1/2.5"

Summary

Chapter 1: Getting Started

Setup Overview

Initial setup procedures for the camera, including accessory attachment and power installation.

Attaching the Wrist Strap

Instructions for connecting the wrist strap to the camera for secure handling.

Installing the Batteries

Step-by-step guide for inserting batteries into the camera's battery compartment.

Installing a Memory Card

Procedure for inserting an optional memory card to expand storage capacity.

Turning on Camera Power

Instructions on how to power on the camera and identify initial indicators.

Choosing Camera Language

Guide to selecting the preferred language for the camera's user interface.

Setting Date and Time

Procedure for configuring the camera's internal clock for accurate timestamping of images.

Installing Camera Software

Instructions for installing the HP Image Zone software on Windows and Macintosh operating systems.

Accessing User Manual on CD

Information on how to locate and view the camera's user manual from the software CD.

Camera Parts: Back and First Side

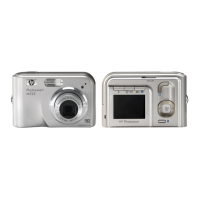
Identification of components and controls on the back and one side of the camera.

Camera Parts: Front, Second Side, and Bottom

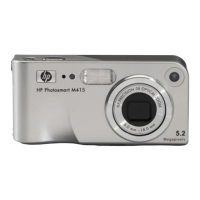
Identification of components and controls on the front, another side, and the bottom of the camera.

Camera Parts: Top View

Identification of controls and features located on the top surface of the camera.

Camera States Explained

Explanation of the camera's two primary operational states: Capture and Playback modes.

Camera Menus Overview

Overview of the different menus accessible on the camera's image display for configuration.

Using the Help Menu

Guide on how to navigate and utilize the camera's built-in help system for assistance.

Camera Status Screen

Description of the information displayed on the camera's status screen during operation.

Restoring Previous Settings

Instructions on how to reset camera settings to their previous non-default state.

Related product manuals