c. Optical drive (see Optical drive on page 72)
d. Fan (see
Fan on page 90)
e. Heat sink (see
Heat sink on page 91)
f. Modem module (see
Modem module on page 89)
g. Keyboard (see
Keyboard on page 96)
h. Bottom cover (see
Bottom cover on page 98)
i. System board (see
System board on page 116)
Remove the ExpressCard assembly:
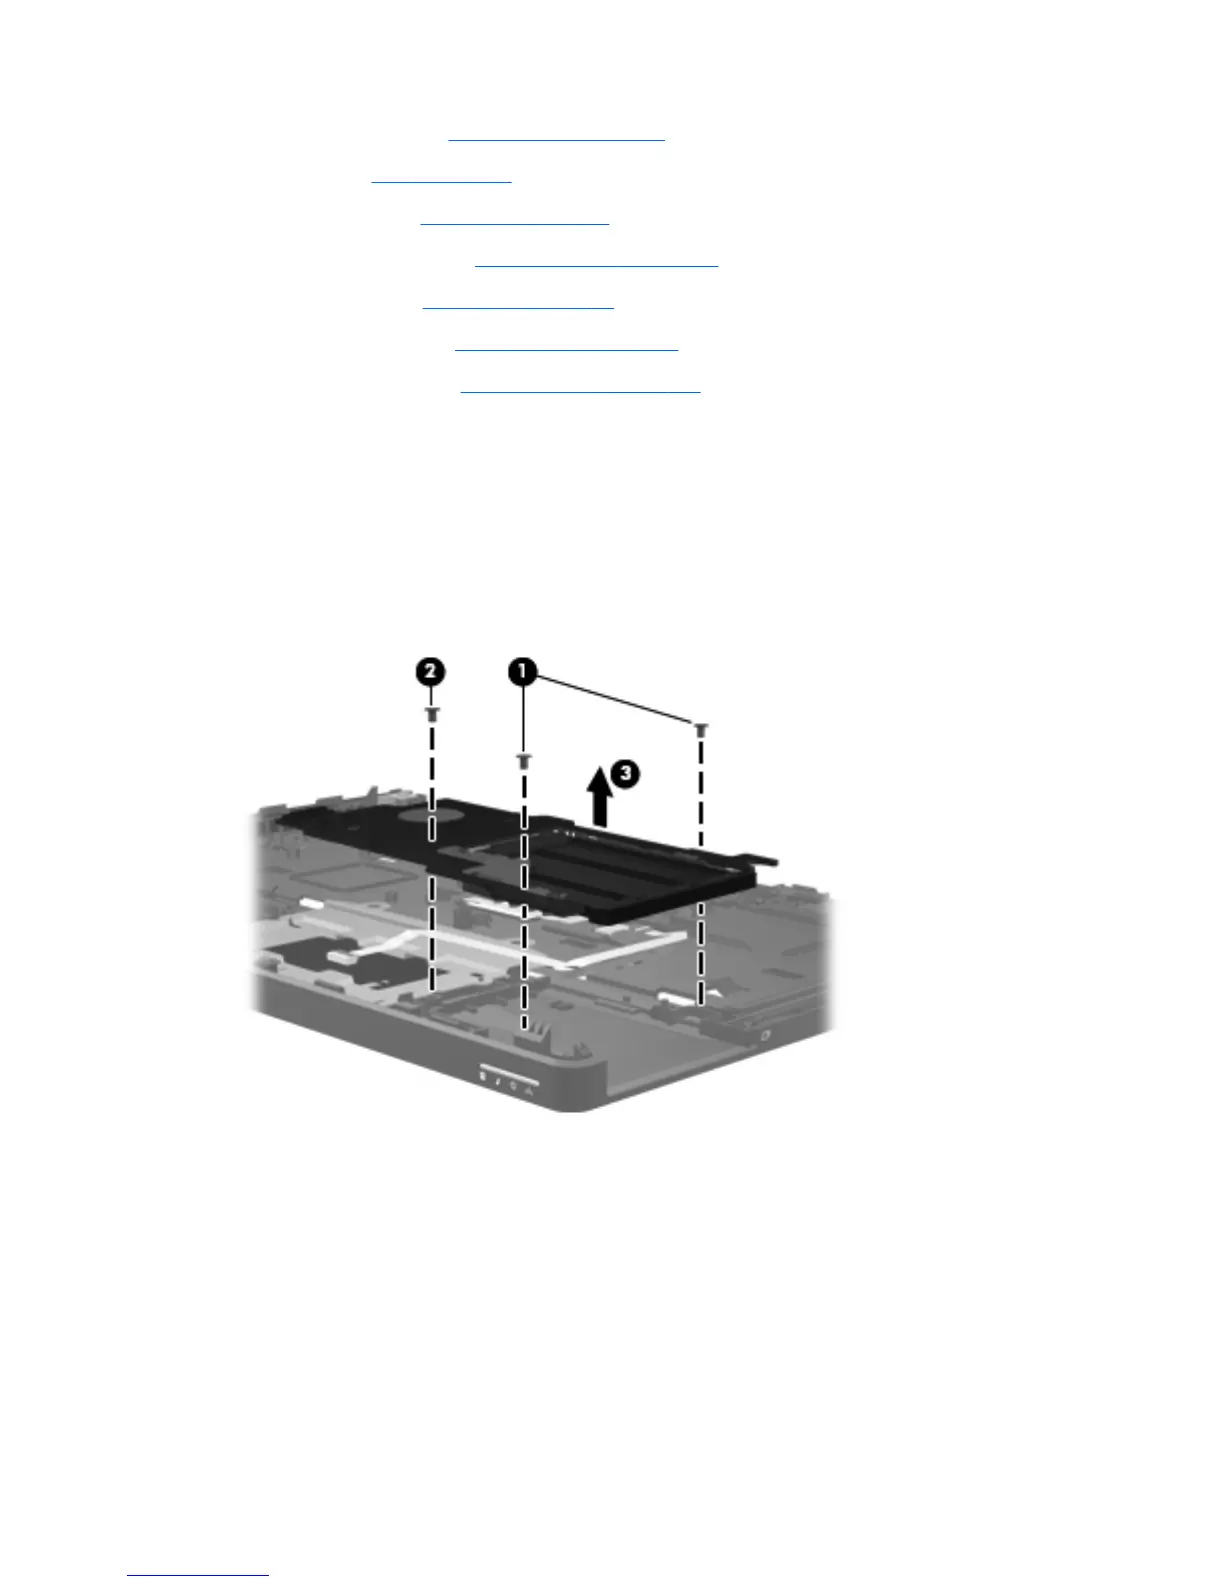
1. Position the computer upside-down with the front toward you.
2. Remove the two Phillips PM2.0×3.0 screws (1) that secure the assembly to the computer.
3. Remove the broadhead Phillips PM2.0×4.0 screw (2) that secures the assembly to the
computer.
4. Lift the assembly straight up and off the computer (3).
Reverse this procedure to install the ExpressCard assembly.
122 Chapter 4 Removal and replacement procedures
 Loading...