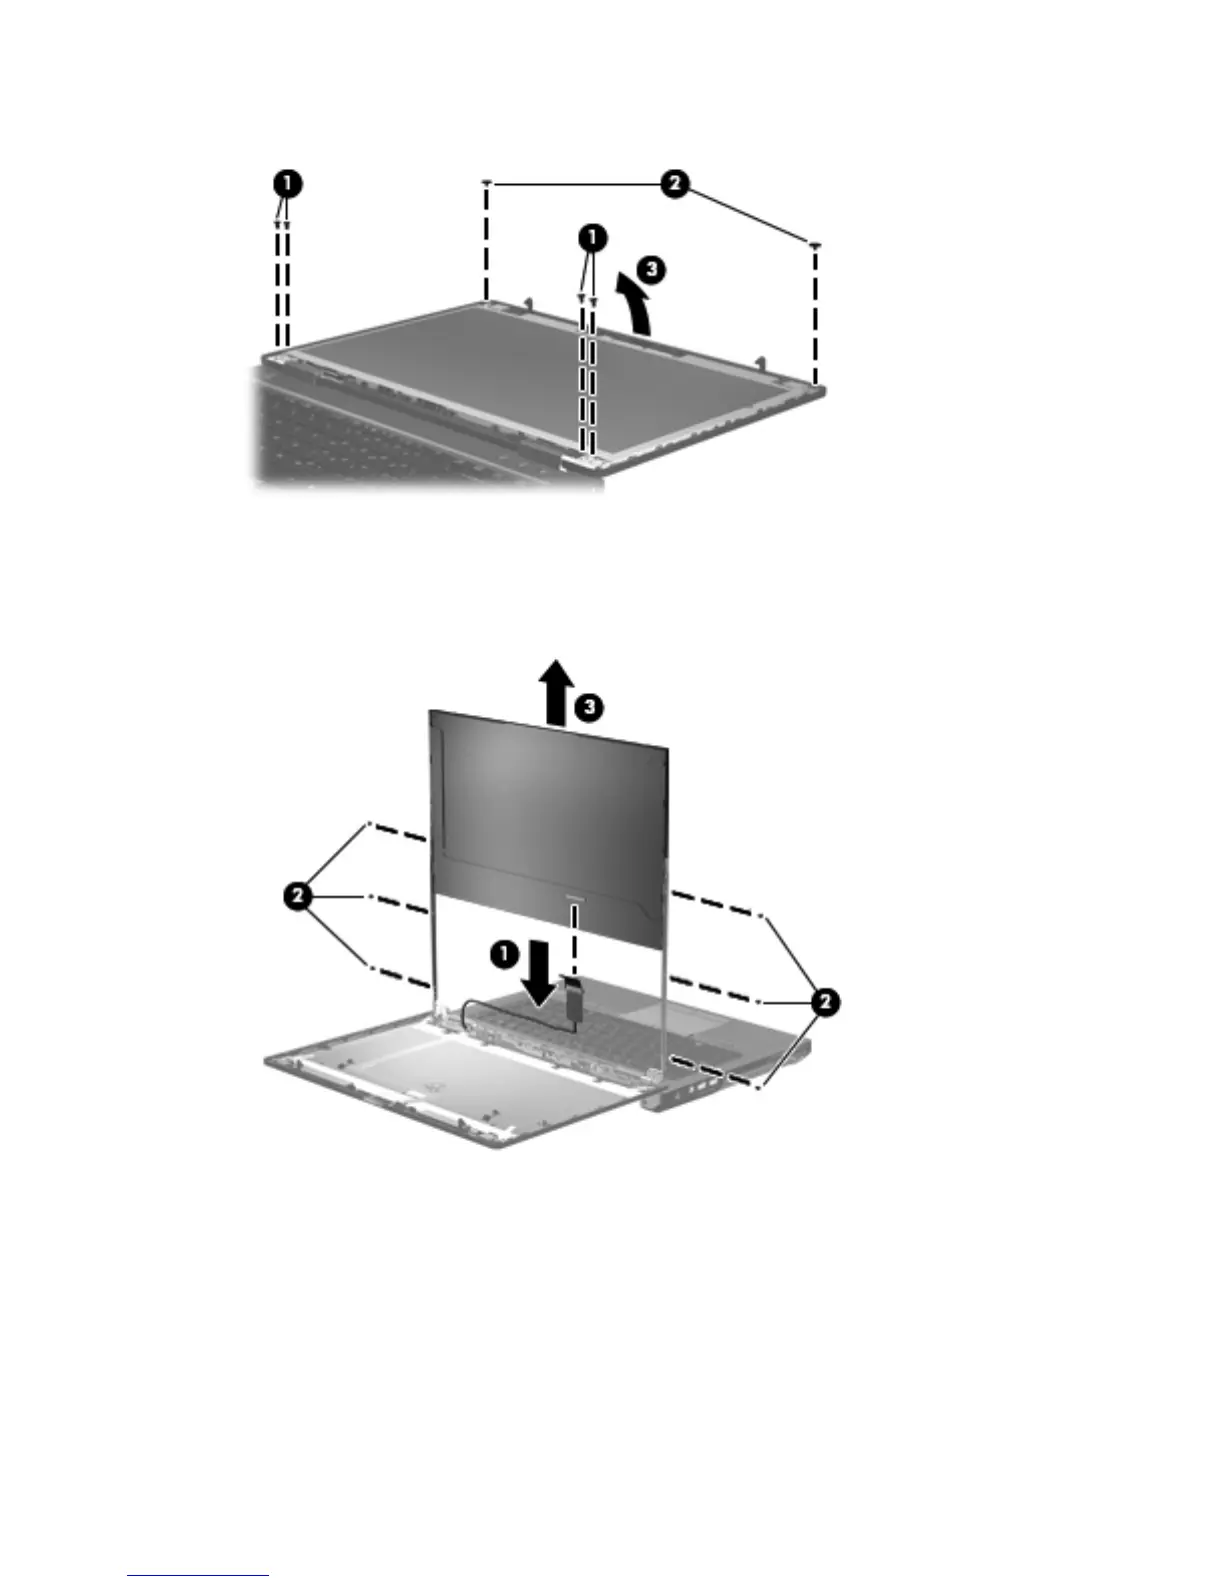
9. Pivot the display panel upward until it sits at a 90 degree angle (3).
10. Disconnect the display panel cable from the back of the display panel (1).
11. Remove the six Phillips PM2.5×5.0 screws (2) that secure the display panel to the brackets.
12. Slide the display panel up and out of the hinges (3).
Reverse this procedure to reassemble and install the display assembly components.
When replacing the display panel, after connecting the display cable, slide the panel into the bracket
(1), replace the screws (2), and then rotate the panel assembly downward so it lies flat in the
enclosure (3). Make sure to insert the display panel brackets into the notches in the corners of the
display enclosure (4).
68 Chapter 4 Removal and replacement procedures
 Loading...