iv
Contents
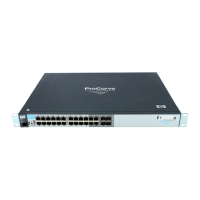
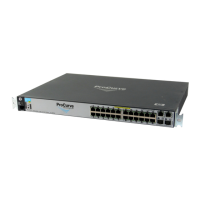
2 Installing the Switch
Included Parts . . . . . . . . . . . . . . . . . . . . . . . . . . . . . . . . . . . . . . . . . . . . . . . . . . 2-1
Installation Procedures . . . . . . . . . . . . . . . . . . . . . . . . . . . . . . . . . . . . . . . . . . 2-3
Summary . . . . . . . . . . . . . . . . . . . . . . . . . . . . . . . . . . . . . . . . . . . . . . . . . . . 2-3
1. Prepare the Installation Site . . . . . . . . . . . . . . . . . . . . . . . . . . . . . . . . 2-5
2. Verify the Switch Passes Self Test . . . . . . . . . . . . . . . . . . . . . . . . . . . 2-5
LED Behavior: . . . . . . . . . . . . . . . . . . . . . . . . . . . . . . . . . . . . . . . . . . 2-7
3. (Optional) Install or Remove a yl Module . . . . . . . . . . . . . . . . . . . . . 2-8
Verifying the Module is Installed Correctly . . . . . . . . . . . . . . . . . . 2-9
4. Mount the Switch . . . . . . . . . . . . . . . . . . . . . . . . . . . . . . . . . . . . . . . . 2-10
Rack or Cabinet Mounting . . . . . . . . . . . . . . . . . . . . . . . . . . . . . . . 2-10
Rack Mounting the 3500, 3500yl and 6200yl Switches . . . . . . . . 2-10
Horizontal Surface Mounting . . . . . . . . . . . . . . . . . . . . . . . . . . . . . 2-11
5. (Optional) Install or Remove a Transceiver . . . . . . . . . . . . . . . . . . 2-12
To remove the transceiver: . . . . . . . . . . . . . . . . . . . . . . . . . . . . . . . 2-12
6. (Optional) Install or Remove mini-GBICs or SFP/SFP+ transceivers .
2-13
7. Connect the Switch to a Power Source . . . . . . . . . . . . . . . . . . . . . . 2-15
8. (Optional) Connect an External Power Supply to the switch . . . 2-15
RPS/EPS Operation . . . . . . . . . . . . . . . . . . . . . . . . . . . . . . . . . . . . . 2-16
Operating Characteristics of the external power supplies . . . . . 2-16
External Power Supply LEDs . . . . . . . . . . . . . . . . . . . . . . . . . . . . . 2-17
External Power Supply Connectivity . . . . . . . . . . . . . . . . . . . . . . 2-19
9. (Optional) Connect a Console to the Switch . . . . . . . . . . . . . . . . . . 2-21
Terminal Configuration . . . . . . . . . . . . . . . . . . . . . . . . . . . . . . . . . . 2-21
Direct Console Access . . . . . . . . . . . . . . . . . . . . . . . . . . . . . . . . . . . 2-22
10. Connect the Network Cables . . . . . . . . . . . . . . . . . . . . . . . . . . . . . . 2-23
Using the RJ-45 Connectors . . . . . . . . . . . . . . . . . . . . . . . . . . . . . . 2-23
Connecting Cables to mini-GBICs . . . . . . . . . . . . . . . . . . . . . . . . . 2-23
Connecting a fiber cable . . . . . . . . . . . . . . . . . . . . . . . . . . . . . . . . . 2-24
Connecting a copper cable . . . . . . . . . . . . . . . . . . . . . . . . . . . . . . . 2-24
Sample Network Topologies . . . . . . . . . . . . . . . . . . . . . . . . . . . . . . . . . . . . . 2-25
Stacking the Switch . . . . . . . . . . . . . . . . . . . . . . . . . . . . . . . . . . . . . . . . . 2-30
Optimizing the 10-GbE Port Configuration . . . . . . . . . . . . . . . . . . . . . 2-32
 Loading...