Removal and Replacement Procedures
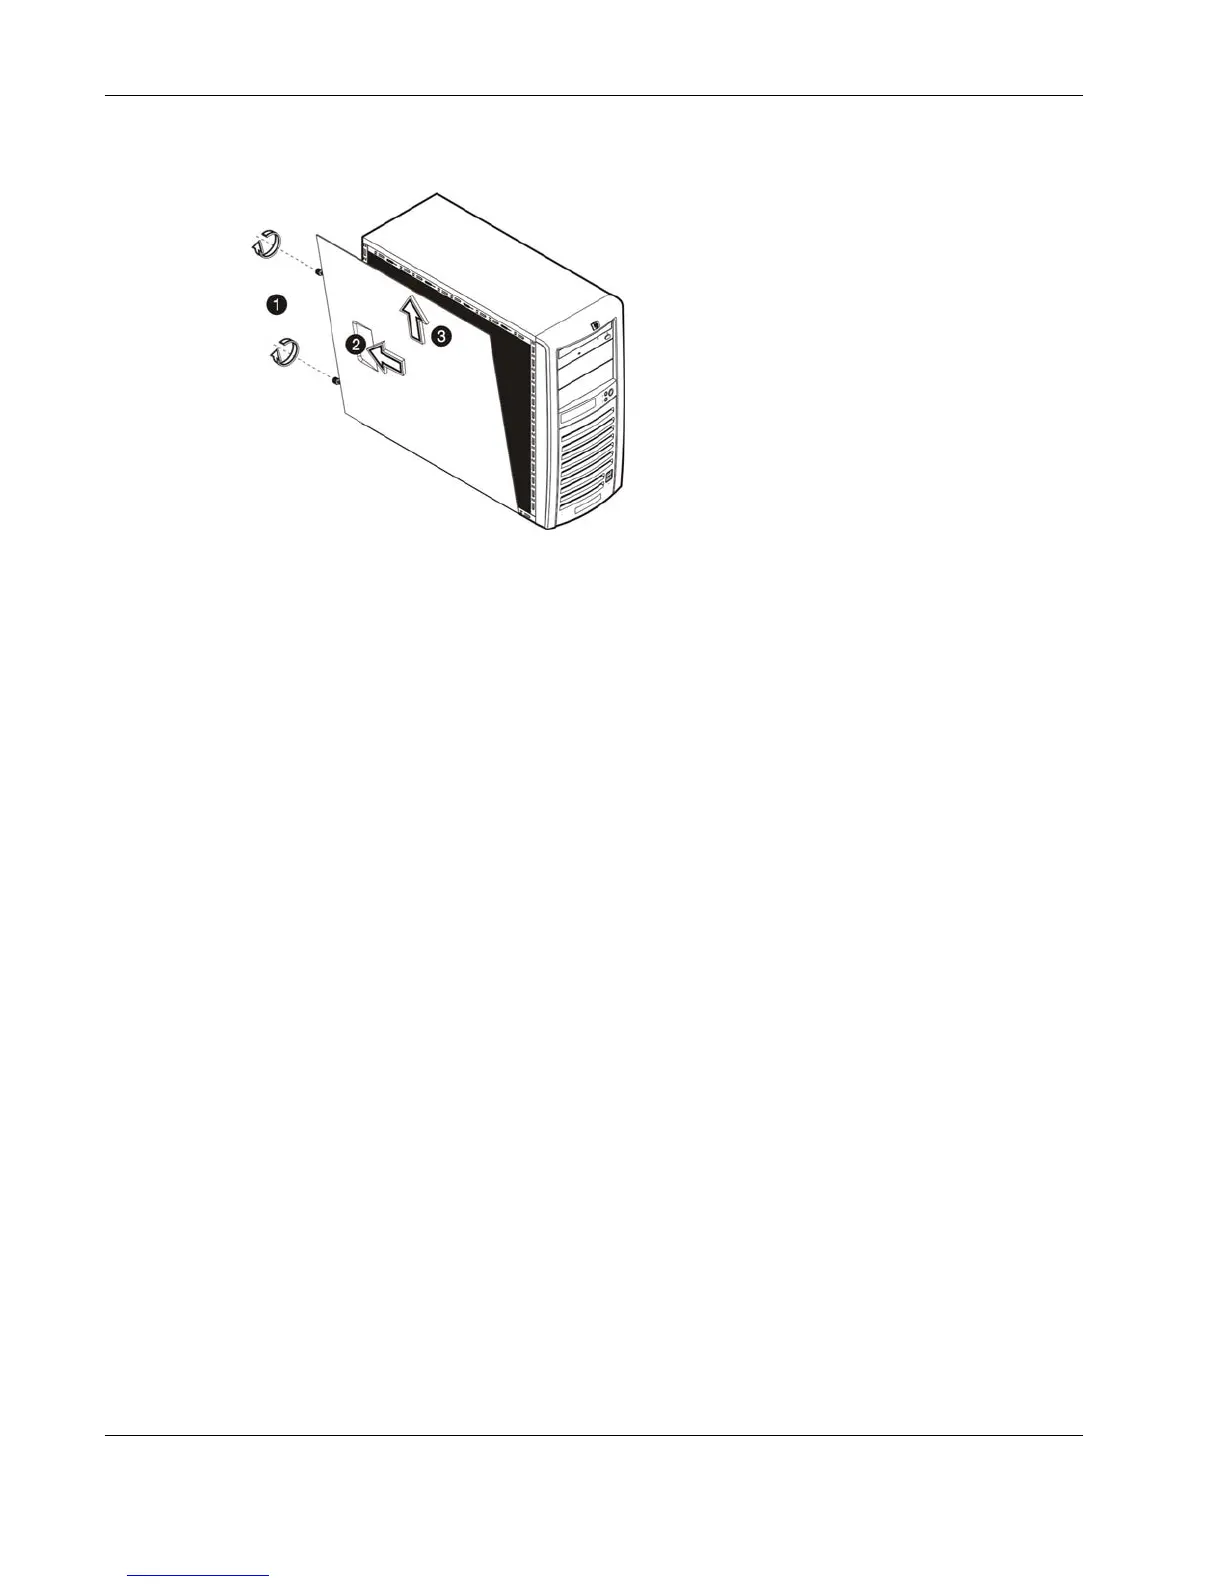
c. Pull the panel upward to remove it from the chassis.
Figure 2-1: Removing the access panel
3. Place the access panel in a safe place for reinstallation later.
After completing any removal or replacement procedure, replace the access panel. Follow the
steps below:
1. If you have been installing accessories or servicing the server, return the server to its
normal upright position.
2. Perform steps 1 through 4 of the post-installation instructions.
3. Reinstall the access panel:
a. Use two hands to place the lower edge of the access panel at an angle to the hinge
tabs along the bottom of the chassis.
NOTE: The hinge tabs are keyed to accept the panel in only one position.
b. With the panel resting on the hinge tabs, tilt it up until it engages the locking
mechanism at the top of the chassis.
c. Slide the panel towards the front panel to position it into place.
d. Once the panel is attached to the chassis, secure it by tightening the two captive
thumbscrews.
2-6 HP ProLiant ML110 Generation 2 Server Maintenance and Service Guide
 Loading...


