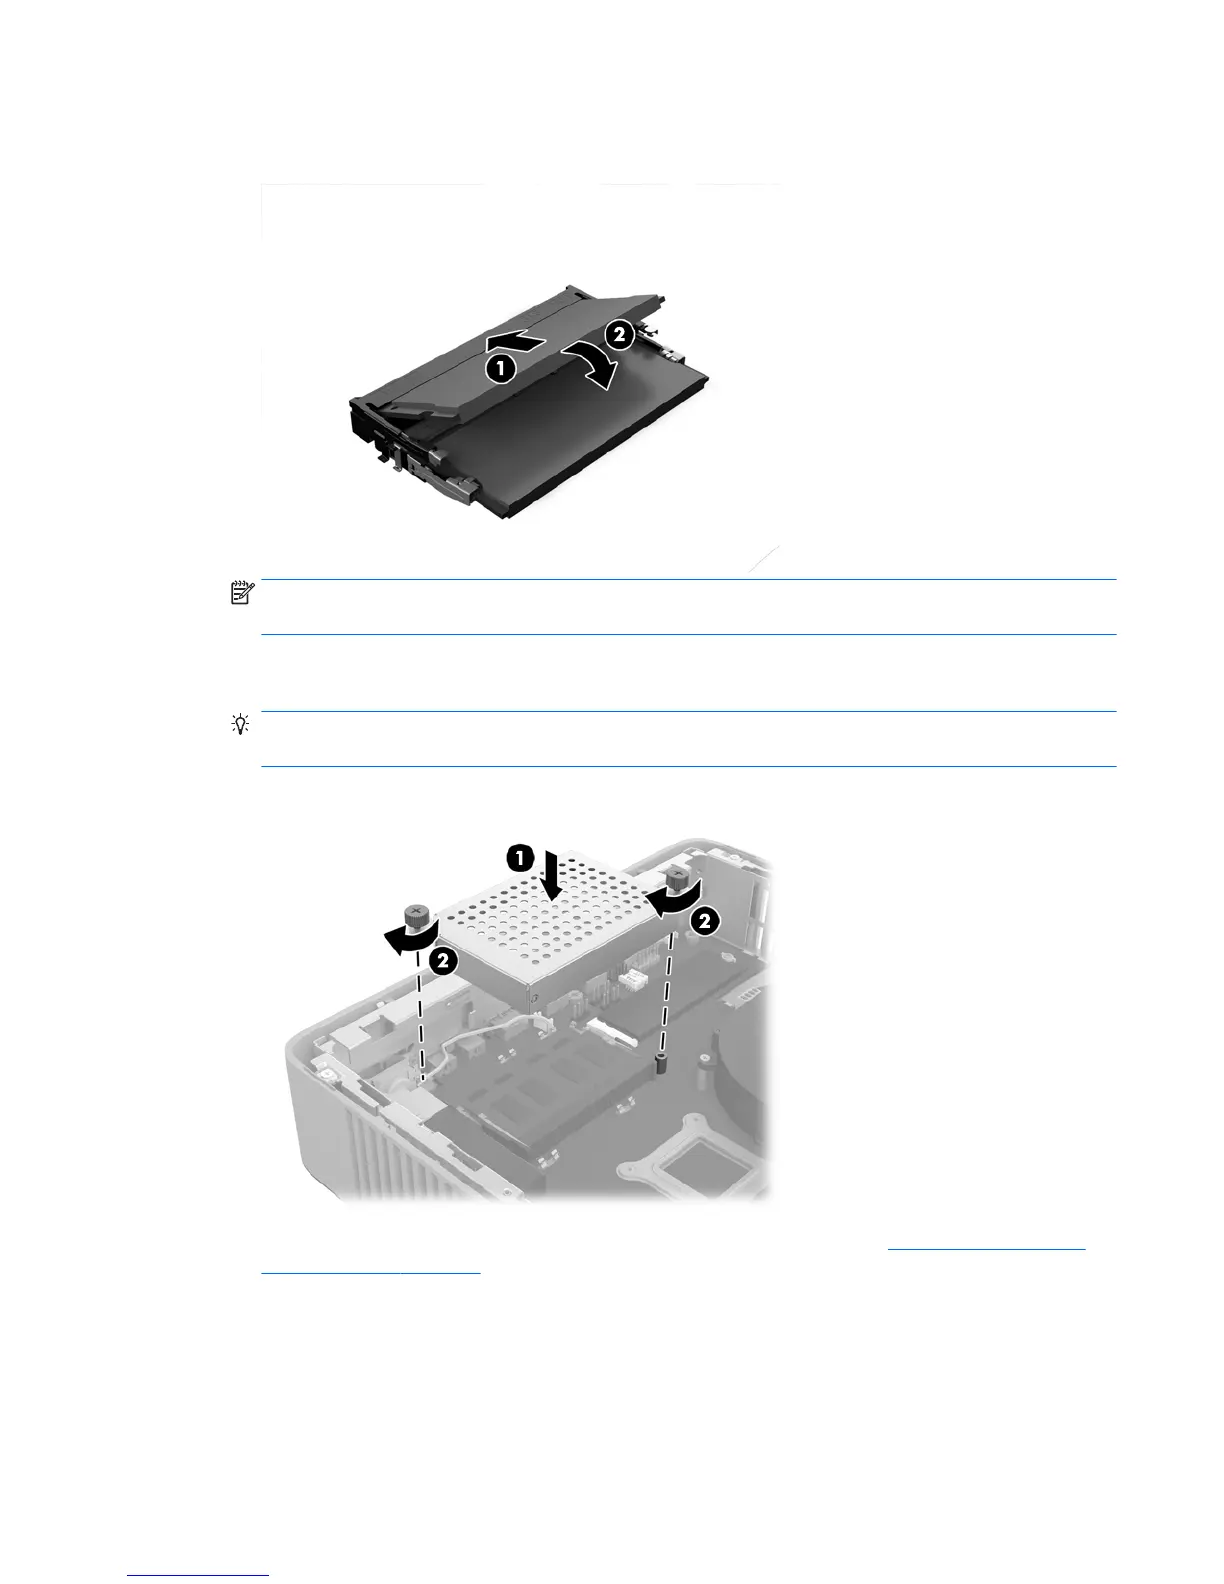
13. Slide the new SODIMM (1) into the socket at approximately a 30° angle, and then press the SODIMM
down (2) so that the latches lock it in place.
NOTE: A memory module can be installed in only one way. Match the notch on the module with the tab
on the memory socket.
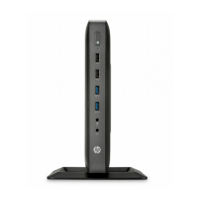
14. Align the memory compartment cover with the two posts and the clips at the base of the compartment,
and then set the memory compartment cover (1) over the SODIMMs.
TIP: The small clips are pairs. When the compartment is properly placed, one of each pair will be inside
the compartment and one will be outside.
15. Tighten the two captive screws (2) to secure the memory compartment cover.
16. Replace and latch the access panel, and then reinstall the rear I/O panel. See Removing and replacing
the access panel on page 4.
17. Replace the thin client stand.
18. Reconnect the AC power cord and turn on the thin client.
19. Lock any security devices that were disengaged when the thin client access panel was removed.
The thin client automatically recognizes the additional memory when you turn on the thin client.
Installing additional SDRAM system memory 17