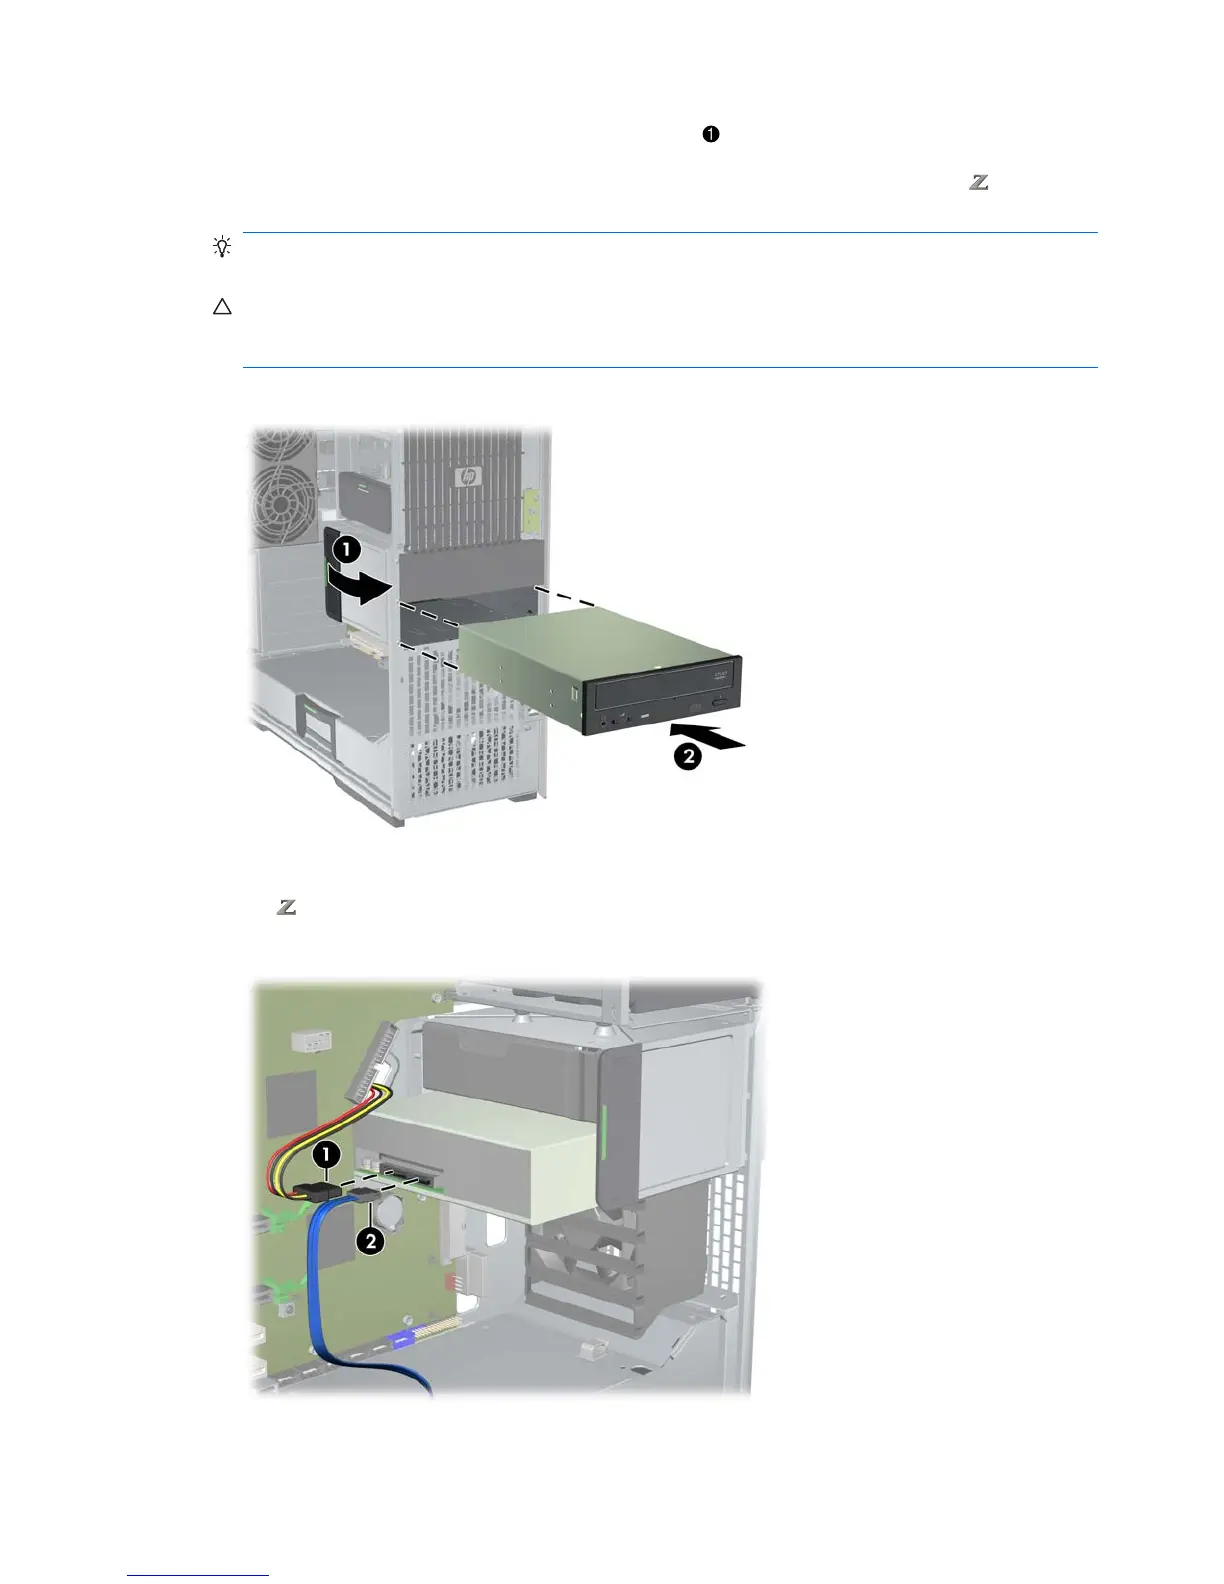
3. Lift and hold the green optical drive bay release latch while sliding the drive into the bay
2
. When
the front of the optical drive is near its final position, let go of the latch, but continue to slide the
drive inward until the latch closes and engages the drive as shown below. (An HP
600
Workstation is shown for example.)
TIP: During installation the adjacent drive or filler may move slightly. It may be necessary to slide
and align both devices to get the release latch to close and engage both devices.
CAUTION: Verify that the optical drive is secure in the workstation chassis by pulling on the drive
to see if it can be easily disengaged. Failure to properly secure the drive can damage the drive
when moving the workstation.
Figure 10-3 Installing the optical drive
4. Connect the power and data cables to the optical disk drive as shown in the following figure. (An
HP
600 Workstation is shown for example.)
Figure 10-4 Connecting ODD power and data cables
56 Chapter 10 Installing optical disk drives ENWW
 Loading...