Do you have a question about the HQT TH-2800 and is the answer not in the manual?
How to transmit using the PTT key and speak into the microphone at a specific distance.
Steps for short-circuiting PCB points, powering on, and setting up modes like manual tuning and wired clone.
Procedure to enable wired clone mode on source and target radios and initiate data transfer.
Steps to enter manual tuning mode by pressing PTT+Moni and observing LED flashes.
Procedure for calibrating the 7.5V voltage supply, involving channel selection and power-on sequences.
Steps to switch the radio on/off in manual tuning mode, involving channel selection and adjustment.
Procedure for initializing the radio within manual tuning mode, involving specific channel and power-on sequences.
Steps to enter and configure the aging program, involving channel selection and observing indicator lights.
Adjusting Tx Frequency, Deviation, CTCSS, and CDCSS deviation using PTT and MONI buttons.
Procedure to adjust VHF power levels (high and low) across different frequency bands.
Procedure to adjust UHF power levels (high and low) across different frequency bands.
Steps to adjust the VHF squelch (SQL) level using channel selection and button presses.
Steps to adjust the UHF squelch (SQL) level using channel selection and button presses.
This document outlines the procedures for setting up and maintaining the TH-2800 device, focusing on both user-level operation and more advanced manual tuning and cloning functionalities.
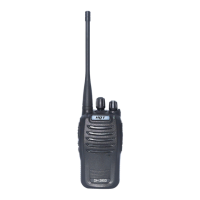
The TH-2800 is a communication device that can be configured either through PC program software or via a manual tuning mode. This manual specifically details the latter, providing a step-by-step guide for its operation and adjustment. The device supports basic user communication, allowing transmission and reception, and offers advanced modes for calibration, programming, and cloning. It is designed to allow for precise adjustments of various parameters, including frequency deviation, power output, sensitivity, and noise elimination, ensuring optimal performance. The device also incorporates features for system initialization and an aging program, which are crucial for its long-term reliability and proper functioning.
To transmit, the user simply presses the PTT (Push-To-Talk) key and speaks into the microphone. It is recommended to maintain a distance of 2.5 to 5 centimeters between the mouth and the microphone for clear communication. Releasing the PTT key switches the device back to receiving mode. This straightforward operation makes the TH-2800 accessible for general communication tasks.
Before advanced operations, the device needs to be put into a specific mode. This involves short-circuiting two points labeled "SELF" on the PCB and then turning on the radio. During this process, the LED indicator will flash red and green alternately, signaling entry into the mode. The user then selects the appropriate channel based on the device's model. Once in this mode, manual tuning and wired clone functions are automatically enabled. Pressing the PTT key at this stage sets the currently chosen channel and initiates a system initialization. It's important to note that re-initializing the radio will erase pre-stored tuning data and channel information (frequency, CTCSS/CDCSS) and may alter some functions. Therefore, this operation should generally be avoided unless replacing the E2PROM or performing other necessary settings.
The TH-2800 supports a wired clone mode, allowing the transfer of settings from a "source" radio to a "target" radio. To activate this mode on the source radio, the SK2 key is pressed while turning on the device. The LED will flash red twice within 2 seconds, indicating that the source radio has entered wired clone mode. For the target radio to receive the clone, it must also be enabled for clone mode by pressing its PTT key while the source radio is still in clone mode. To disable the clone function on the target radio, the PTT key is pressed again, and the indicator will flash red twice. By default, the clone function on the target radio is disabled. During the cloning process, pressing the SK2 key on the source radio will cause the red light to flash, signifying that cloning is in progress. Once completed, the red light will turn off. If the cloning process fails, the indicator will flash green instead of red. This wired clone mode can also be disabled using programming software.
The manual tuning mode is designed for adjusting critical parameters such as frequency deviation, power output, sensitivity, and noise elimination. To enter this mode, the user must press the [PTT+Moni] keys simultaneously while turning on the power. These keys should be held for 2 seconds until the LED flashes green twice, after which they can be released, and the device will enter manual tuning mode.
Before entering manual tuning mode, it is crucial to read the radio settings into a computer using the programming software. This data should then be used to program the manual and modulation modes, selecting manual tuning mode. After closing the current window, the modulated settings from the computer should be written back to the radio. This preparatory step is essential to enable entry into the manual tuning mode and ensure that existing configurations are preserved or correctly updated.
As mentioned, performing a system initialization will erase all pre-stored tuning data and channel information (frequency, CTCSS/CDCSS) and may alter some device functions. Therefore, this operation should be undertaken with caution and only when absolutely necessary, such as when replacing the E2PROM or performing other critical settings that require a fresh start. This highlights the importance of understanding the implications of such actions to avoid unintended data loss or configuration changes.
While the wired clone mode offers convenience for transferring settings, it can also be disabled if not required or for security reasons. The manual specifies that the wired clone mode can be disabled through the use of programming software, providing a flexible option for managing this feature.
The TH-2800 is designed with both ease of use for basic communication and comprehensive adjustment capabilities for advanced users and technicians, ensuring its adaptability and performance across various operational requirements.
| Frequency Range | 400-470MHz |
|---|---|
| Number of Channels | 16 |
| Output Power | 5W |
| Operating Voltage | 7.4V |
| Battery | 1500mAh (Li-ion) |