EasyManua.ls Logo

Huawei C2120-EI - User Manual

Huawei C2120-EI
8 pages
Print Icon
To Next Page IconTo Next Page
Loading...
Issue: 04
版权所有 © 华为技术有限公司 2019。保留一切权利。
Copyright © Huawei Technologies Co., Ltd. 2019.
All rights reserved.
Quick Start Guide
快速入门
版本:04
Packing List and Qualification Card
装箱清单和合格证
电子电气产品有毒有害物质声明
Additional Guides Available
资料获取路径
部件名称
有毒有害物质或元素
Pb 铅 Hg 汞 Cd 镉 Cr6+ 六价铬 PBB 多溴联苯 PBDE 多溴二苯醚
结构件
×
单板/电路模块
×
线缆和线缆组件
×
纸质配件
表示该有害物质在该部件所有均质材料中的含量在GB/T 26572规定的限量要求以下。
×
表示该有害物质至少在该部件的某一均质材料中的含量超出GB/T 26572规定的限量要求。
This product has an environment friendly use period (EFUP) of 20 years. Some replaceable
parts have their own EFUP labels. The EFUP is suitable only for products that work in conditions
specified in the product manual.
本产品的环保使用期限为20 年。某些可更换的零部件会有一个不同的环保使用期贴在其产品上。此环保使
用期限只适用于产品是在产品手册中所规定的条件下工作。
本表格依据SJ/T 11364的规定编制。
1
Component 物品 PCS
Camera
网络摄像机
1
1/4 UNC-20 screw
1/4 UNC-20 螺钉
2
Quick Start Guide
快速入门
1
Default Login IP
Adresse IP
IP accesso predefinito
默认 IP 地址
User Name
nom d'utilisateur
nome utente
用户名
192.168.0.120 admin
針對中國臺灣,限制物質含有情況標示聲明書,請登錄 http://support.huawei.com/enterprise網站,輸入對應的攝像機型號
進行搜索,在對應的產品文檔下選擇“
安裝指南 > 附錄 > 限制物質含有情況標示聲明書
”查看。
HiKnow
Technical
Support
APP
华为企业服务 APP
To obtain the latest documents, including the Product Documentation and FOSS License
Information, visit http://support.huawei.com/enterprise and enter the camera model to
search for related documents. You can also log in to
http://support.huawei.com/enterprise
or scan the QR code using your mobile phone to download the Technical Support app. Then
start this app and choose
Products> Video Surveillance
to obtain the latest documents of
the required camera model.
请登录
http://support.huawei.com/enterprise
网站,输入摄像机型号进行搜索,获取最新资料,
包括《产品文档》和《开源软件使用声明》等。
您也可以用手机登录
http://support.huawei.com/enterprise
网站或者扫描右侧二维码,下载“华
为企业服务 APP”,选择“
产品 > 视频监控
”,根据摄像机型号获取最新资料。
C2120-EI(3.6mm)
C2120-EI(6mm)
C2120-EI-P(3.6mm)
C2120-EI-P(6mm)
Question and Answer IconNeed help?

Do you have a question about the Huawei C2120-EI and is the answer not in the manual?

Overview

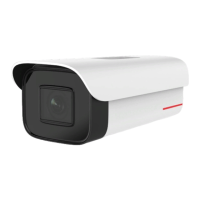
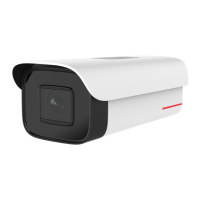
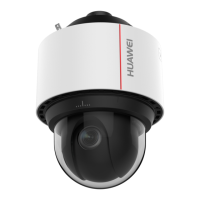
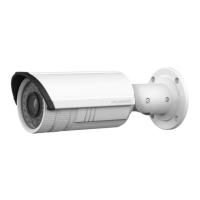
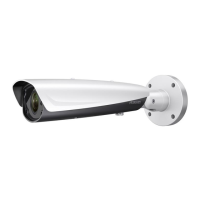
This document describes the Huawei C2120-EI(3.6mm), C2120-EI(6mm), C2120-EI-P(3.6mm), and C2120-EI-P(6mm) camera models.

Function Description

These cameras are designed for surveillance applications, providing high-quality video monitoring. They support various network protocols and can be integrated into existing surveillance systems. The "P" models likely indicate Power over Ethernet (PoE) capability, simplifying installation by delivering both power and data over a single Ethernet cable.

Important Technical Specifications

Camera Models:

  • C2120-EI(3.6mm)
  • C2120-EI(6mm)
  • C2120-EI-P(3.6mm)
  • C2120-EI-P(6mm)

Power Supply:

  • PoE/LAN: Network interface, supports PoE.
  • POWER: Power input interface, DC 12V ±25%.

IP Address:

  • Default Login IP: 192.168.0.120
  • User Name: admin
  • Password: admin

Power Consumption:

  • P Models:
    • DC 12V input (Typical): 4.8 W (Maximum)
    • DC 12V input (Minimum): 7 W (Maximum)
    • PoE input (Typical): 4.7 W (Maximum)
    • PoE input (Minimum): 7 W (Maximum)
  • Non-P Models:
    • DC 12V input (Typical): 4.8 W (Maximum)
    • DC 12V input (Minimum): 7 W (Maximum)

Operating Temperature:

  • -30°C to +55°C.

Corrosion Resistance:

  • Applicable to areas 1500 meters away from the seaside (far away from chemical industry or heavily polluted areas).

Usage Features

Installation: The cameras support both wall-mounted and pendant-mounted installations.

  • Wall-Mounted Installation:
    1. Place the mount in the desired installation position. Use a marker to mark the screw locations. Use an 8 mm drill bit to drill the holes to a depth of about 55 mm. Use a hammer to carefully drive the white plastic expansion tubes into the holes.
    2. Use screws to fix the wall mount to the wall.
    3. Unfasten the screw marked with 'a' on the universal joint to rotate freely. Fasten screws marked with 'b' and 'c' to fix the camera to the universal joint. Adjust the vertical monitoring angle, and fasten all screws on the universal joint.
  • Pendant-Mounted Installation:
    1. Place the mount in the desired installation position. Use a marker to mark the screw locations. Use an 8 mm drill bit to drill the holes to a depth of about 55 mm. Use a hammer to carefully drive the white plastic expansion tubes into the holes.
    2. Install the pendant mount.
    3. Remove the screws from the sunshield above the camera and fix the camera to the pendant mount.
  • Beam-Mounted Installation:
    1. Loosen the hose clamps and remove them. Install the universal joint in the #2 holes on the pole mount (for the #2 hole identifier, see the silk screen on the physical device).
    2. Unfasten the screw marked with 'a' on the universal joint for the universal joint to rotate freely. Fasten screws marked with 'b' and 'c' to fix the camera to the universal joint. Adjust the vertical monitoring angle, and fasten all screws on the universal joint.
    3. Thread the hose clamps through the installation holes on the pole mount. Place the hose clamps around the beam and tighten them up.
  • Cable Connection:
    1. Connect the power cable (DC 12V IN).
    2. Connect the network cable. Loosen the components 1, 2, and 3 of the waterproof connector kit on the network cable port in sequence. Thread the network cable through the kit. If the network cable cannot be threaded through the kit, cut off the RJ45 connector, and install the components in the sequence marked in the following figure. The waterproof connector or the network cable must be secured tightly, or they may come loose later, resulting in poor contact or even damage.
    3. O-ring for the waterproof connector (rubber ring).

Waterproofing and Insulation:

  • Before waterproofing and insulation, check the cabling and ensure that the camera runs normally to avoid re-workings.
  • Waterproof and insulate all cables including power cables, network cables, and unused pigtails.
  • The waterproof tape must cover the cable bundle from the insulation sheath all the way to the cable conduit (for example, a PVC tube). The tape must be wrapped tightly and there must be no gaps in the coverage or water will leak in.
  • Steps:
    1. Wrap one layer of insulation tape around each cable joint.
    2. Stretch the waterproofing tape evenly to twice its original length. Then apply it for three layers from bottom to top, from top to bottom, and from bottom to top again.
    3. Apply three layers of insulation tape. Then, use cable ties to secure the both ends.
    4. Cover the rest of the cabling in a conduit or with protective waterproof rubber tape. Make a drip loop as shown below to create an artificial lowest point of the cable.

Web Client Login:

  1. Open Internet Explorer, enter the camera IP address in the address box and press Enter. The Internet Explorer displays "There is a problem with this website's security certificate". Click "Continue to this website (not recommended)" to continue browsing this website. Then install the root certificate or upload your own certificate.
  2. Enter the user name (admin) and password. For the first login, set the password as prompted.
  3. Click Log In.

Maintenance Features

Installation Verification/Security Check:

  • After the device installation, check the following items to ensure that the device is installed properly.
  • Check items/Result:
    • All screws are fully tightened: Yes/No/Not applicable
    • The camera is securely installed to the mount or wall: Yes/No/Not applicable
    • Necessary protective measures have been taken for the camera: Yes/No/Not applicable
    • The ambient temperature meets the device specifications: Yes/No/Not applicable
    • Insulation and waterproofing measures have been taken to protect cables installed in humid environments, and the drip loops are in correct positions: Yes/No/Not applicable
    • The camera can power on normally: Yes/No/Not applicable
    • You can access the camera web portal using the IP address you configured: Yes/No/Not applicable
    • On the camera web portal, you can view live video from the camera: Yes/No/Not applicable
    • You can view the surveillance scene on camera web pages and the image is clear, as shown in the following figure: Yes/No/Not applicable
    • In night vision mode, the surveillance area can be viewed clearly: Yes/No/Not applicable

Warranty Card:

  • Warranty Period: Unless otherwise stated specifically by Huawei, the following periods apply:
    • You are entitled to a free warranty service of at least 12 months for the camera you purchased from Huawei. The specific warranty duration is subject to the sales contract.
    • The start date of the warranty is the 90th day after the date of the product shipment from Huawei, or the date of receiving service request, whichever is earlier.
  • Notes:
    1. If there is any conflict with contract terms and conditions, the contract terms and conditions shall prevail.
    2. When you purchase a product from Huawei, please confirm the date when the product will be shipped from Huawei, and check other warranty-related information.
    3. For expansion and replacement parts, you are entitled to either of the following warranties (whichever is longer):
      • (1) 90-day warranty starting from the date the replacement parts are shipped.
      • (2) The remainder of the original product warranty.
    4. Warranty service is provided for the lithium battery modules for the S series switches, but the term related to hardware warranty service response time in the Enterprise Warranty Policy do not apply to the lithium battery modules.
  • Service Guidelines:
    • This warranty card entitles you to free warranty service within the warranty period. For a complete listing of applicable warranties, please visit http://e.huawei.com, choose Support > Service Solutions > Warranty.
    • Technical Support: Visit http://e.huawei.com, click Contact Us at the upper right corner of the page, and select your country to obtain contact information of Huawei local office.
    • TAC Support: Visit http://e.huawei.com and choose Contact Us - Global Service Hotline to find the service hotline available in your country.

Safety Precautions:

  • Carefully read and strictly comply with the following instructions. Pay special attention to the alarm details in the manual.
  • When the camera is unpacked, please install and power it on within 24 hours. Do not install the camera in rainy or windy and dusty days to prevent water or sand from getting into the camera.
  • The power cable must be used by the device to meet the input voltage and current requirements described on the device label.
  • In areas prone to lightning strikes, a lightning arrester must be installed and grounded.
  • If the battery is replaced by an incorrect type, the battery may explode. Dispose of used batteries according to the instructions.
  • This is a class A product. In a domestic environment this product may cause radio interference. Users may be required to take compensatory measures.
  • Use a soft dry cloth when cleaning the camera body. Do not use strong or abrasive alkaline cleaners or volatile solvents such as alcohol, benzene, or chemical thinners.
  • Do not use the device in water or any other liquids. Take proper waterproofing measures.
  • Keep the device away from heat sources, and fire sources (such as heating apparatus or candles), and strong magnetic fields (for example, high-power power distribution cabinets).
  • Avoid any unauthorized modifications of the design of the structure, security, or performance.
  • Installation and maintenance must be performed by professional technical engineers or system installation engineers.
  • If the installation environment ever exceeds 50°C, install the product in an area accessible only to professional personnel.
  • Use product-attached auxiliaries and recommended fittings.
  • Carry a device by the device body. Do not pull the pigtails.
  • Comply with related laws and regulations, and respect legal rights of others when using this device. If a camera is installed in a public place, post a clearly visible notice stating, "You have entered an electronic surveillance area."
  • For devices with embedded batteries, dispose of the batteries according to local laws and regulations.

Huawei C2120-EI Specifications

General IconGeneral
BrandHuawei
ModelC2120-EI
CategorySecurity Camera
LanguageEnglish

Related product manuals