5.4 Installing the Chassis in a Cabinet (CE8860, CE8861, CE8868 and CE8850-64CQ-EI Switches)
5
CE8860, CE8861, CE8868 and CE8850-64CQ-EI switches requires 3U of vertical space in a cabinet/rack.
Before You Start
Step 1
Step 2
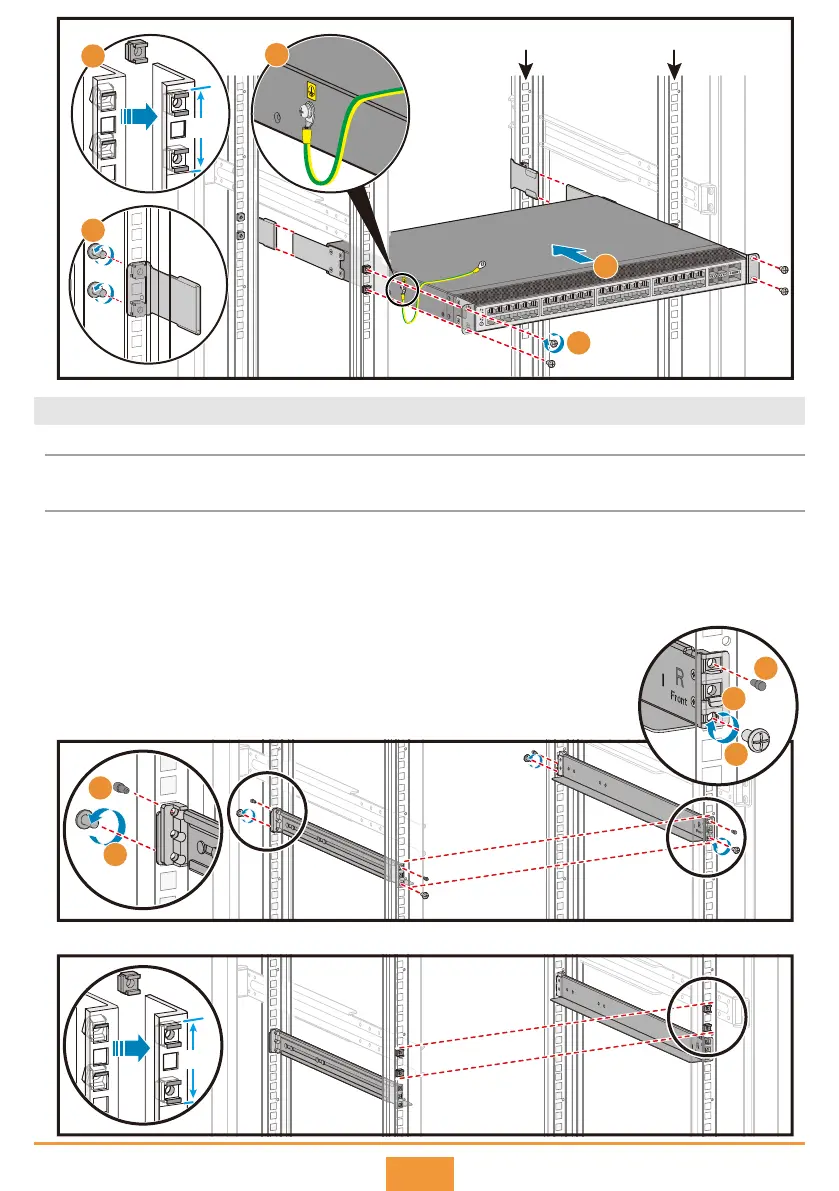
Installation Procedure
Front mounting rail Rear mounting rail
1U
X8
3
4
5
6
7
b
a
d
b
c
Mount the expandable guide rails on the mounting rails.
a. Hold a guide rail with its front side facing the front of the cabinet and move it to the planned position.
Expand the guide rail and hook both sides on the mounting rails. Ensure that the three holes on the guide
rails are in the same 1U space.
b. Insert plugs on the top holes on both sides of the guide rail to secure the guide rail.
c. Install an M6 screw in the lowest hole on the rear side of the guide rail.
d. (Optional) Install an M6 screw in the lowest hole on the front side of the
guide rail to enhance shock resistance of the switch.
Install two floating nuts in the 1U space above the guide rail on each front mounting rail.
1U
X8