Instructions for 12V Vehicle Power Outlet Inator/Deator
©2019 Manufactured by H. D. Hudson
Manufacturing Company
Customer service is here to help! If you have any questions or concerns, do not return to the store.
Call 1-800-9-SPRAYER or email ladybug@hdhudson.com
1-800-9-SPRAYER
ladybug@hdhudson.com
23001-23002
Instructions
Connect with us!
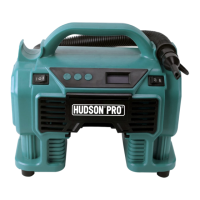
Model: 23001 or 23002
Maximum pressure 160 PSI/ 11Bar/ 1100kPa
Power source 12V Cigar-Lighter
Automatic shut off Yes
Low pressure hose length 14 inches
High pressure tire inator hose length 32 inches
Cigar-lighter cord length 125 inches
Accessories • Tire adapter x1 • Ball adapter x1 • Raft/Mattress adapter x1
PRODUCT SPECIFICATIONS
TIRE INFLATION
WARNING: TO PREVENT SERIOUS INJURY FROM ACCIDENTAL OPERATION:
Make sure that the Power Switch is in the o position before performing any procedure.
DANGER: TO PREVENT SERIOUS INJURY OR DEATH: Do not operate Inator/Deator while car engine is running in an enclosed area.
CAUTION: TO PREVENT OVERHEATING WHILE INFLATING, keep the air intake and vents clear of obstructions. Always
wear appropriate eye protection during use.
WARNING: TO PREVENT SERIOUS INJURY FROM EXPLOSIONS: Before inating, check item manufacturer’s
recommended max air pressure. DO NOT exceed that pressure. Over ination may result in an explosion.
Note: The inator/deator has a sleep mode feature that powers o the unit after approximately 5 minutes of non-use.
Press the power button to turn the unit back on.
Notice: The inator/deator can become hot during use. Allow the unit to cool for ten minutes after each use.
Inator/deator needs to cool 30 minutes before storing away.
OPERATION
1. Remove the high-pressure hose from its
storage area.
2. Remove tire’s valve
cap. Move tire inator’s
lever to the up position,
insert tire adapter if
needed, then move the
lever down to lock in
place.
3. Plug unit into the
vehicle power outlet.
4. Turn unit on by turning
the power switch on high
(||)
5. Once desired pressure
is reached, simply move
the tire inator lever up
to unlock and remove.
6. Turn the unit o by moving the switch
to the center (O)
Note: Please refer to your vehicle or bicycle
manual for appropriate pressure.
BALL INFLATION RAFT/MATTRESS INFLATION
1. Remove the high-pressure hose
from its storage area
2. Plug unit in with preferred power
source.
3. Turn unit on by turning the power
switch on high (||)
4. Once desired pressure is reached,
simply move the tire inator lever up to
unlock and remove.
5. Turn the unit o by moving the
switch to the center (O)
1. Remove the high-pressure hose
from its storage area.
2. For smaller inatables: Move tire
inator’s lever to the up position,
insert raft/mattress adapter, then
move the lever down to lock in
place.
3. For larger inatables: Remove
high-volume hose from storage,
connect it to the back of the unit
by aligning the slots in the hose
to the pins and turn the hose
counterclockwise to lock in place.
4. Insert the other end of the hose
into the inatable.
5. Plug unit into the vehicle power
outlet.
6. Turn unit on by turning the
power switch on low (|).
7. Once desired air input is
reached, simply remove the hose
from the inatable.
8. Turn the unit o by moving the
switch to the center (O).
230020 Instructions