6
P/N 211644 11/03
1
3
2
9
4
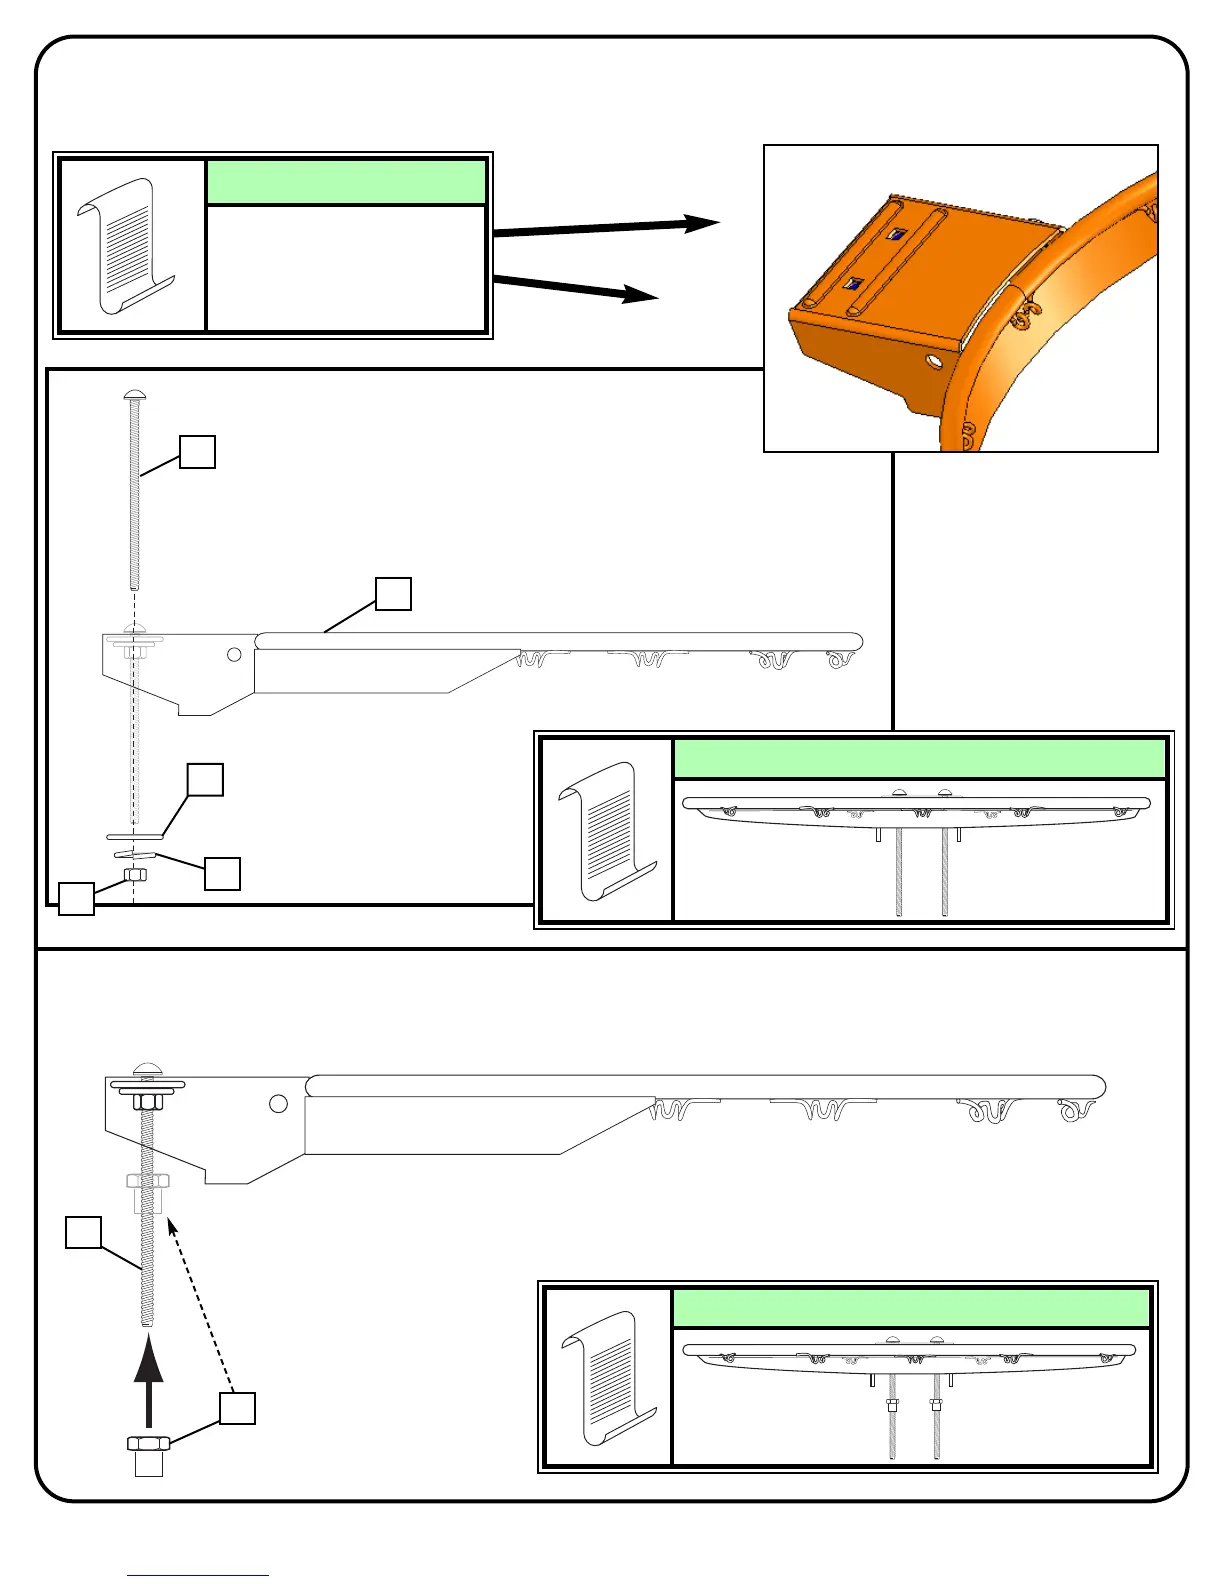
Install two carriage bolts (2) through rim (1), washers (3), and lock washers (9) as shown.
Tighten nuts (4) completely.
1.
Place a special locking nut (20) approximately half-way up on each carriage bolt (2) as
shown. Keep the two special locking nuts (20) at the same level.
2.
Perform this step twice
as it is applied to both
holes of rim bracket
shown
NOTE:
NOTE: COMPLETED ASSEMBLY:
2
NOTE: COMPLETED ASSEMBLY:
20
 Loading...