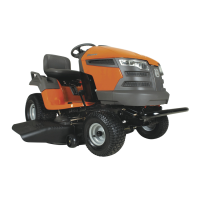
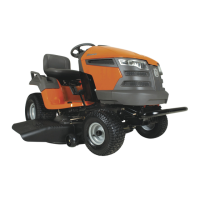
EasyManua.ls Logo

Husqvarna YTH1542XPT User Manual

Husqvarna YTH1542XPT
44 pages
To Next Page IconTo Next Page
Page #1 background imageLoading...
Page #1 background image
03002
YTH1542XPT
Owner's Manual

Questions and Answers:

Husqvarna YTH1542XPT Specifications

General IconGeneral
Cutting Width42 inches
TransmissionHydrostatic
Deck MaterialSteel
Cutting Height1.5 - 4 inches
EngineBriggs & Stratton
Fuel Capacity2.5 gallons
Warranty3 years

Summary

SAFETY RULES

I. GENERAL OPERATION

Read, understand, and follow all instructions on the machine and in the manual before starting.

II. SLOPE OPERATION

Slopes are a major factor related to loss of control and tip-over accidents.

III. CHILDREN

Tragic accidents can occur if the operator is not alert to the presence of children.

IV. TOWING

Tow only with a machine that has a hitch designed for towing.

V. SERVICE

To avoid personal injury or property damage, use extreme care in handling gasoline.

GENERAL SERVICE

Never operate machine in a closed area.

PRODUCT SPECIFICATIONS

GASOLINE CAPACITY AND TYPE

Specifies the fuel tank capacity and type.

OIL TYPE

Specifies the recommended oil type for the engine.

OIL CAPACITY

Specifies the engine oil capacity with and without filter.

SPARK PLUG

Specifies the recommended spark plug type and gap.

GROUND SPEED

Lists the forward and reverse ground speeds.

CHARGING SYSTEM

Details the charging system specifications.

BATTERY

Provides battery specifications like AMP/HR, CCA, and Case Size.

BLADE BOLT TORQUE

Specifies the torque for the blade bolt.

CUSTOMER RESPONSIBILITIES

ASSEMBLY

TO REMOVE TRACTOR FROM CARTON

Unpack carton, check battery, adjust seat.

UNPACK CARTON

Remove all accessible loose parts and parts cartons from carton.

CHECK BATTERY

Lift hood to raised position.

ADJUST SEAT

Sit in seat, lift adjustment lever, slide seat.

TO ROLL TRACTOR OFF SKID

Raise attachment lift lever to its highest position.

TO ROLL TRACTOR OFF SKID (CONTINUED)

Release parking brake, place freewheel control in disengaged position.

TO DRIVE TRACTOR OFF SKID

Check engine oil, fill fuel tank, place freewheel control in engaged position.

CHECK TIRE PRESSURE

Reduce tire pressure to PSI shown on tires.

CHECK DECK LEVELNESS

For best cutting results, mower housing should be properly leveled.

CHECK FOR PROPER POSITION OF ALL BELTS

Verify that the belts are routed correctly.

CHECK BRAKE SYSTEM

Check to see that the brake is operating properly.

CHECKLIST

OPERATION

SYMBOLS

Learn and understand the meaning of tractor symbols.

HAZARD SYMBOLS AND DEFINITIONS

DANGER, WARNING, CAUTION, HOT SURFACES, FIRE symbols and their meanings.

KNOW YOUR TRACTOR

Read manual, familiarize with controls and adjustments.

CONTROL DESCRIPTIONS

Detailed list and function of each control (A-Q).

HOW TO USE YOUR TRACTOR

Follow instructions for setting parking brake and stopping.

TO SET PARKING BRAKE

Depress brake pedal, pull parking brake lever.

STOPPING

Stop mower blades, ground drive, and engine.

TO USE THROTTLE CONTROL

Always operate engine at full speed (fast).

TO USE CHOKE CONTROL

Use choke control when starting a cold engine.

TO MOVE FORWARD AND BACKWARD

Direction and speed controlled by drive pedals.

TO USE CRUISE CONTROL

Feature for forward travel only.

SYSTEM CHARACTERISTICS (CRUISE CONTROL)

Use cruise control on smooth, straight surfaces.

TO ADJUST MOWER CUTTING HEIGHT

Position of attachment lift lever determines cutting height.

TO ADJUST GAUGE WHEELS

Adjust gauge wheels to be slightly off ground at desired height.

TO OPERATE MOWER

Select height of cut, engage attachment clutch.

REVERSE OPERATION SYSTEM (ROS)

Allows operation of mower or powered attachment while in reverse.

WARNING: BACKING UP WITH ATTACHMENT CLUTCH ENGAGED

Discouraged; use ROS only when necessary and safe.

USING THE REVERSE OPERATION SYSTEM

Use only if clear of children/bystanders.

TO OPERATE ON HILLS

Do not drive on slopes >15 degrees; drive up/down, not across.

TO TRANSPORT

Disengage transmission, secure hood.

SERVICE REMINDER/HOUR METER

Indicates when service is required.

TOWING CARTS AND OTHER ATTACHMENTS

Use recommended attachments; exercise common sense.

BEFORE STARTING THE ENGINE

Check engine oil level.

ADD GASOLINE

Fill tank to bottom of filler neck, use fresh unleaded gasoline.

TO START ENGINE

Procedures for starting engine in warm and cold weather.

PURGE TRANSMISSION

Recommended before first operation and after service.

MOWING TIPS

Tips for proper leveling, trimming, discharge, and grass conditions.

MAINTENANCE

MAINTENANCE SCHEDULE

Checklist for checking components before use, every 8, 25, 50, 100 hours, season, and storage.

GENERAL RECOMMENDATIONS

Warranty covers defects, not abuse or negligence.

BEFORE EACH USE

Check oil, brake, tire pressure, operator presence, ROS, fasteners.

LUBRICATION CHART

Points for lubrication with general purpose grease.

TRACTOR

Observe safety rules when performing maintenance.

BRAKE OPERATION

Check braking performance if stopping distance is excessive.

TIRES

Maintain proper air pressure; keep tires free of chemicals.

BLADE CARE

Blades must be sharp; replace worn or damaged blades.

BLADE REMOVAL

Raise mower, remove blade bolt, install new blade.

BATTERY

Tractor has a charging system; periodic charging extends life.

TO CLEAN BATTERY AND TERMINALS

Clean terminals to prevent power leakage.

V-BELTS

Check V-belts for deterioration and wear.

TRANSAXLE COOLING

Keep transmission fan and cooling fins clean.

TRANSAXLE PUMP FLUID

Fluid maintenance not required for life of transaxle.

ENGINE LUBRICATION

Use high quality detergent oil rated API SG-SL.

TO CHANGE ENGINE OIL

Procedures for draining and refilling engine oil.

CLEAN AIR SCREEN

Keep air screen free of dirt and chaff.

AIR FILTER

Engine will not run properly with dirty air filter.

ENGINE OIL FILTER

Replace engine oil filter every season or every other oil change.

MUFFLER

Inspect and replace corroded muffler and spark arrester.

SPARK PLUGS

Replace spark plugs at beginning of mowing season or every 100 hours.

IN-LINE FUEL FILTER

Replace fuel filter once each season.

CLEANING

Clean engine, battery, seat, finish, etc. of foreign matter.

SERVICE AND ADJUSTMENTS

TRACTOR

Perform service with brake pedal fully depressed and parking brake set.

TO REMOVE MOWER

Disconnect lift lever, links, and belt from mower.

TO INSTALL MOWER

Slide mower under tractor and attach suspension arms and links.

ATTACH REAR LIFT LINKS

Position slot over pin on rear mower bracket.

ATTACH FRONT LINK

Insert rod end through front hole and into mower bracket.

TO LEVEL MOWER

Ensure tires are properly inflated for accurate leveling.

VISUAL SIDE-TO-SIDE ADJUSTMENT

Adjust lift link nut to lower or raise mower side.

PRECISION SIDE-TO-SIDE ADJUSTMENT

Measure distance from blade bottom edge to ground on both sides.

FRONT-TO-BACK ADJUSTMENT

Adjust mower so front tip is lower than rear tip.

TO REPLACE MOWER DRIVE BELT

Remove old belt and install new belt onto pulleys.

TO REPLACE MOTION DRIVE BELT

Remove and install motion drive belt, observing belt guides.

TO CHECK BRAKE

Check braking performance by manually pushing tractor.

FRONT WHEEL TOE-IN/CAMBER

Front wheel toe-in and camber are set at factory and not adjustable.

TO REMOVE WHEEL FOR REPAIRS

Block axle, remove cover, retaining ring, and washers.

TO START ENGINE WITH A WEAK BATTERY

Use jumper cables following specific connection order.

REPLACING BATTERY

Disconnect cables, remove old battery, install new battery.

TO REPLACE HEADLIGHT BULB

Raise hood, pull bulb holder, replace bulb.

INTERLOCKS AND RELAYS

Check wiring for poor operation, stopping, or starting issues.

TO REPLACE FUSE

Replace with 20 amp automotive-type plug-in fuse.

TO REMOVE HOOD AND GRILL ASSEMBLY

Raise hood, unsnap headlight wire connector, lift off.

TO ADJUST THROTTLE CONTROL CABLE

Cable is preset at factory, adjustment should not be necessary.

TO ADJUST CHOKE CONTROL

Control is preset at factory, adjustment should not be necessary.

TO ADJUST CARBURETOR

Carburetor is not adjustable; contact service center for problems.

STORAGE

TRACTOR

Remove mower, clean, inspect, lubricate, fasten parts.

BATTERY

Fully charge battery for storage, disconnect cables.

ENGINE

Prevent gum deposits in fuel system parts.

FUEL SYSTEM

Empty fuel tank or use stabilizer.

ENGINE OIL

Drain oil and replace with clean engine oil.

CYLINDER(S)

Pour oil through spark plug hole into cylinder(s).

OTHER

Do not store gasoline; store indoors and cover tractor.

TROUBLESHOOTING POINTS

WILL NOT START

Check fuel, choke, spark plug, battery, air filter, fuel filter, wiring.

HARD TO START

Check air filter, spark plug, battery, fuel filter, fuel, wiring, carburetor.

ENGINE WILL NOT TURN OVER

Check brake pedal, attachment clutch, battery, fuse, wiring, switch, solenoid.

ENGINE CLICKS BUT WILL NOT START

Check battery, wiring, solenoid or starter.

LOSS OF POWER

Check grass cutting, throttle, buildup, air filter, oil, spark plug, fuel, wiring, carburetor.

EXCESSIVE VIBRATION

Check blade, blade mandrel, loose/damaged parts.

ENGINE DIES WHEN TRACTOR IS SHIFTED INTO REVERSE

Ensure ROS is "ON" while attachment is engaged.

POOR CUT - UNEVEN

Check blade, deck level, buildup, mandrel, vent holes.

MOWER BLADES WILL NOT ROTATE

Check clutch, drive belt, idler pulley, blade mandrel.

POOR GRASS DISCHARGE

Check engine speed, travel speed, wet grass, deck level, tire pressure, blade, buildup, belt, blades, vent holes.

HEADLIGHT(S) NOT WORKING (IF SO EQUIPPED)

Check light switch, bulbs, switch, wiring, fuse.

BATTERY WILL NOT CHARGE

Check battery cells, connections, regulator, alternator.

LOSS OF DRIVE

Check freewheel control, drive belt, transmission air.

ENGINE "BACKFIRES" WHEN TURNING ENGINE "OFF"

Set throttle control between half and full speed before stopping.

SCHEMATIC

IGNITION SWITCH

Shows switch positions and circuits.

WIRING INSULATED CLIPS

Note on replacing removed wiring insulated clips.

NON-REMOVABLE CONNECTIONS

Indicates connections that are permanent.

REMOVABLE CONNECTIONS

Indicates connections that can be detached.

DECALS

WHEELS AND TIRES

SUGGESTED GUIDE FOR SIGHTING SLOPES FOR SAFE OPERATION

WARRANTY STATEMENT

SECTION 1: LIMITED WARRANTY

Husqvarna warrants product to original purchaser against defects.

SECTION 2: HUSQVARNA'S OBLIGATIONS UNDER THE WARRANTY

Husqvarna will repair or replace defective components without charge.

SECTION 3: ITEMS NOT COVERED BY THIS WARRANTY

Excludes normal maintenance items, discoloration, engine/drive systems.

SECTION 4: EXCEPTIONS AND LIMITATIONS

Inapplicable to defects from accident, misuse, neglect, or improper maintenance.

SECTION 5: CUSTOMER RESPONSIBILITIES

Product must exhibit reasonable care, maintenance, operation, storage.

SECTION 6: PROCEDURE TO OBTAIN WARRANTY CONSIDERATION

Owner's and Dealer's responsibility for registration and proof of purchase.

Related product manuals